JSON is the short form for JavaScript Object Notation. It is used for transferring text-based data all around the web. And yes you can transfer it to the Excel format. If you wish to transfer a JSON file to Excel, follow this guide.
Steps to Transfer JSON File to Excel Format

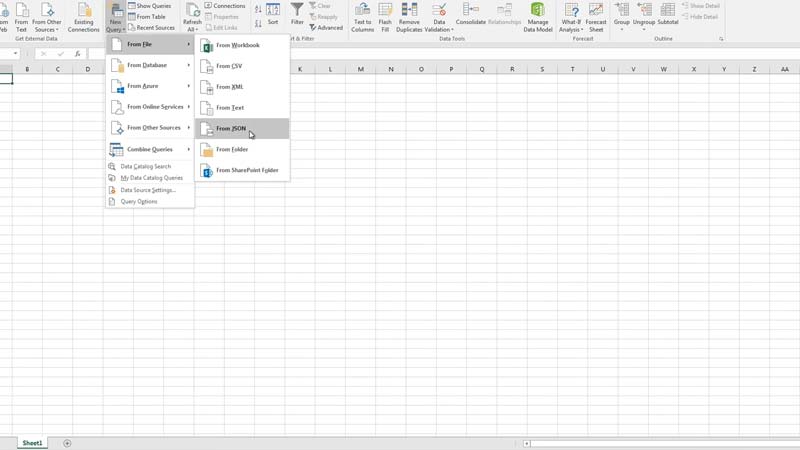
The first step you have to perform is to connect the Excel to your JSON data. If you have downloaded the file then you can choose to insert the data from the “New Query” tab. If not then select the option of “From Web” from the same tab. After clicking on “New Query”, choose the “From File” option and then choose the JSON file. This will open up the folder to import your JSON data into Excel.
Query Editor

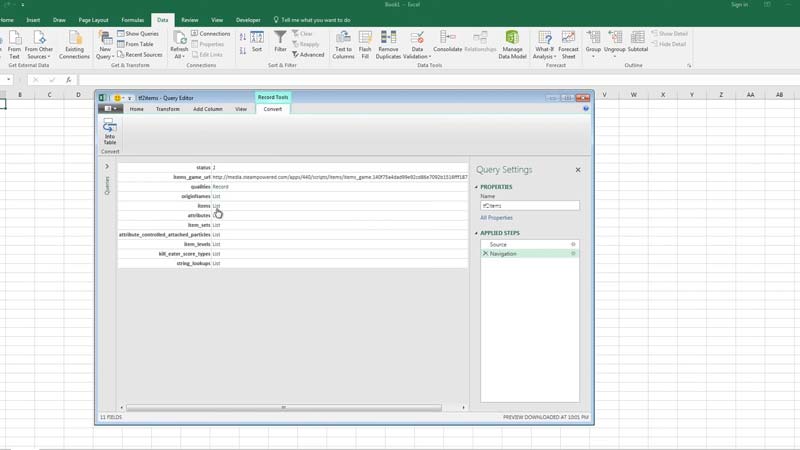
Once you import the folder, you will find the Query Editor file opening where you need to select the option of items- list. It will open your file and then you have to convert the data into a table. For this, select the “To Table” option in the top left corner of the Query Editor tab.
If you want to edit the data and just need only a small part of it, just click the button next to the heading of your data. You will find the list of data and then you can untick the data you don’t want to see in the Excel file. Once you finish this step click on the ‘Ok’ tab and you will find your data in a table format.
The last step is to click on the ‘Close & Load’ option in the top left corner of the Query Editor tab. Once you click on it, your data will open in the Excel sheet in a table format.
It is an easy process to transfer JSON files to Excel since it involves hardly a few steps. Your JSON file would be successfully transferred to the Excel sheet and you can start editing the data as per your needs in Excel.
That is everything you need to know about how to transfer JSON to Excel. If you are interested in getting more Microsoft Excel Tips and Tricks, then check out our other guides on How to Import Data from PDF to Excel, and How to fix Arrow Keys Not Working in Excel.
