One of the new features in iOS 17 is StandBy, which allows you to save battery life by putting your iPhone in low-power mode when you are not using it. StandBy automatically activates when your iPhone is locked and idle for a certain period of time, and it pauses background activities such as app updates, notifications, and location services. When you unlock your iPhone, StandBy deactivates and resumes normal operation. So, to learn how to use and customize StandBy on your iPhone with iOS 17, this guide will help you.
How to Use StandBy on iOS 17?
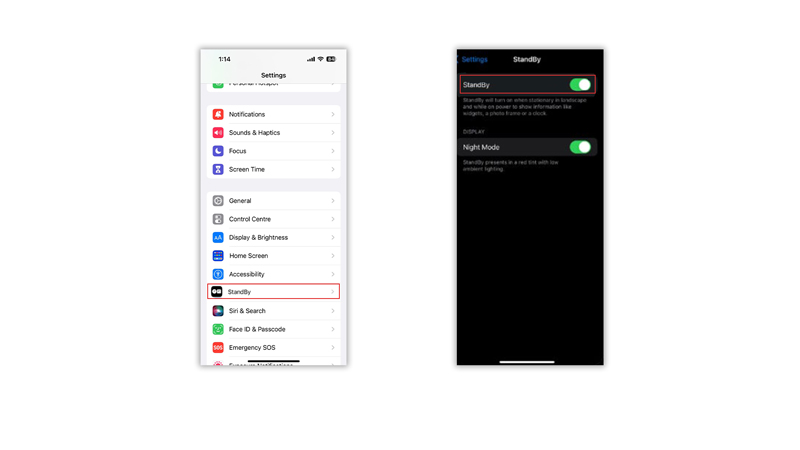
StandBy is enabled by default in iOS 17, but if it is not turned on, you can enable it by going to Settings > StandBy and turning on the ‘StandBy’ toggle by tapping on it. Now to use StandBy mode, you need a charger that can hold your iPhone in landscape orientation. You can use a wireless charger, a MagSafe charger, or a wired charger with a stand. StandBy mode works best with iPhone 14 Pro and 14 Pro Max, which have an always-on display that can show StandBy mode continuously. For other iPhones, you need to tap the screen to activate StandBy mode.
How to Customize StandBy on iOS 17?
You can Customize StandBy on your iPhone with iOS 17 in the following ways:
1. Change StandBy Time Interval
To change the time interval for activating StandBy, go to Settings > Battery > StandBy. You can choose from 5 minutes, 15 minutes, 30 minutes, or 1 hour. The shorter the interval, the more battery you can save, but the longer it will take for your iPhone to resume normal operation when you unlock it.
2. Enable Night Mode
Go to Settings > StandBy and turn on the Night Mode toggle. Night Mode will dim the screen and use a red tint after sunset to reduce eye strain. Also, it works when you are in a dark room or in a place where the light is dim.
3. Switch to a Different StandBy View

There are three different StandBy views in the StandBy. The default view shows an analog clock and a calendar widget. The second view shows your photos from your library or albums. The third view shows different clock styles with different colors. You can switch between these views by swiping left or right on your iPhone screen.
4. Change Widgets in the Default View

To change the widgets on the default view, swipe up or down on the clock or the calendar to see more options. You can choose from widgets like weather, stocks, reminders, events, home, and more. To add or remove widgets on the default view, press and hold on the clock or the calendar and tap the ‘+’ or ‘-‘ icons in the top left corner. You can add up to two widgets on each side of the screen. Since iOS 17 is in beta testing for developers, you can only use the default Apple widgets. However, when the full version of iOS 17 will be released you can also use the third-party widgets.
5. Change Photos in Gallery View
To change the photos on the gallery view, press and hold on to any photo and tap ‘Choose Album’. You can select any album from your library or create a new one.
6. Change the Clock Style in the Third View
You can change the clock styles and colors on the third view by pressing and holding on any clock and swiping left or right to see more options. Also, you can tap on any color to change it.
StandBy mode is a great way to make use of your iPhone when it is charging and not in use. You can customize it according to your preferences and enjoy a smart display experience on your iPhone with iOS 17. To make your iPhone more personalized, you can try out other new features of iOS 17 like creating the contact poster or using stickers on contact photo and our guides on them will help you get started.