Users always seek privacy when it comes to their computers and smartphones. It is important to keep one’s files safe from unwanted intrusion. If your Windows 10 computer is at risk of unauthorized access, it is better to put a password on the system. But, if you share a Windows PC with other users, then locking the entire computer may not be convenient. So, you can easily protect your files and folders by putting a password on them in Windows 10. Protecting specific folders with passwords on Windows 10 PCs is easy yet not many users are aware of it. In this guide, we will explain how to password protect a folder on Windows 10.
How to Put Password on a Folder on Windows 10?
You can put a password on any folder in Windows 10 using the FolderLocker utility. It is a lengthy process but, quite an easy one. We have divided the entire process into two parts so that you can check out the steps easily. Here is how you can password protect a folder on Windows 10:
Part 1: Create FolderLocker on Windows 10
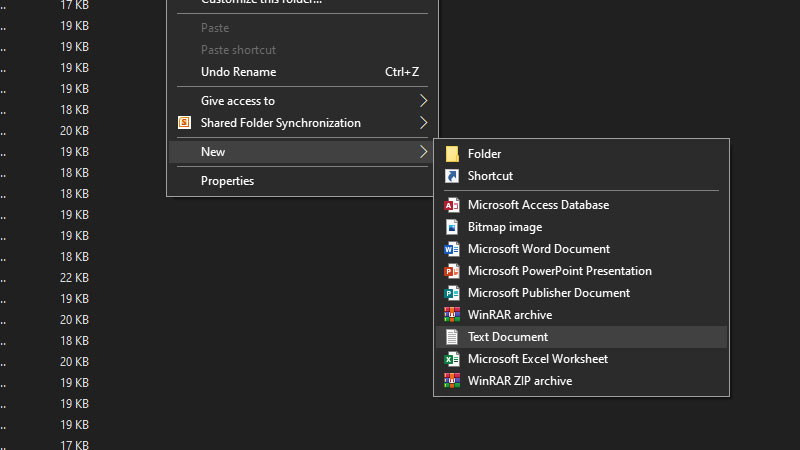
- Open the folder which you need to password protect.
- Right-click the empty space inside the folder.
- Select New > Text Document.
![create-text-document]()
- Once a new document is created, save it with any name and open it.
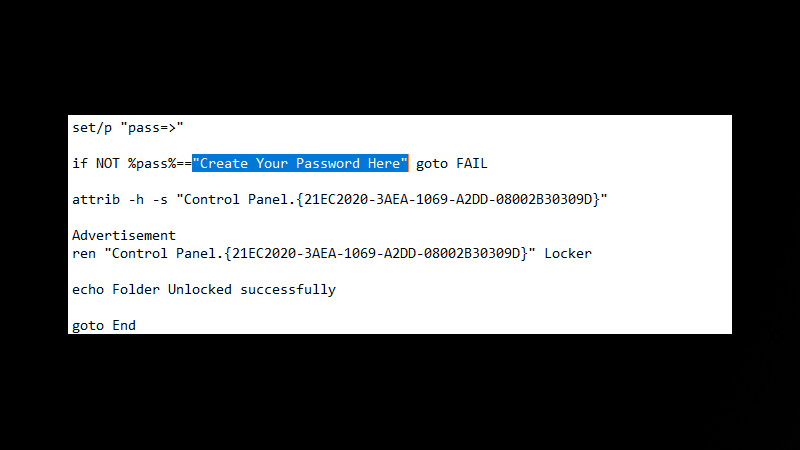
Copy/paste the following text into the document – - cls@ECHO OFF
title Folder Locker
if EXIST “Control Panel.21EC2020-3AEA-1069-A2DD-08002B30309D” goto UNLOCK
if NOT EXIST Locker goto MDLOCKER
:CONFIRM
echo Are you sure u wish to Lock the folder(Y/N)
set/p “cho=>”
if %cho%==Y goto LOCK
if %cho%==y goto LOCK
if %cho%==n goto END
if %cho%==N goto END
echo Invalid choice.
goto CONFIRM
:LOCK
ren Locker “Control Panel.21EC2020-3AEA-1069-A2DD-08002B30309D”
attrib +h +s “Control Panel.21EC2020-3AEA-1069-A2DD-08002B30309D”
echo Folder locked
goto End
:UNLOCK
echo Enter password to Unlock folder
set/p “pass=>”
otherwise %pass%==Your-Password-Here goto FAIL
attrib -h -s “Control Panel.21EC2020-3AEA-1069-A2DD-08002B30309D”
ren “Control Panel.21EC2020-3AEA-1069-A2DD-08002B30309D” Locker
echo Folder Unlocked successfully
goto End
:FAIL
echo Invalid password
goto end
:MDLOCKER
md Locker
echo Locker created successfully
goto End
:End
- Next, find “Create Your Password Here” in the text.
![create-password]()
- Replace it with a password you need to set for your folder. (Without the punctuation marks)
- From the top menu bar, select File > Save As…
- Open the ‘Save as type’ drop-down menu under ‘File name’.
- Click ‘All Files’.
- Now, click the ‘File name’ box and replace the existing name with ‘FolderLocker.bat’.
- Hit the ‘Save’ button.
Part 2: Create a Locker Folder to Safeguard Files on Windows 10
- Close the text document and go back to the folder that you need to protect with a password.
- Double-click ‘FolderLocker’.
- This will generate a folder named ‘Locker’.
- Cut/paste or move all the files to this folder which should be saved with a password.
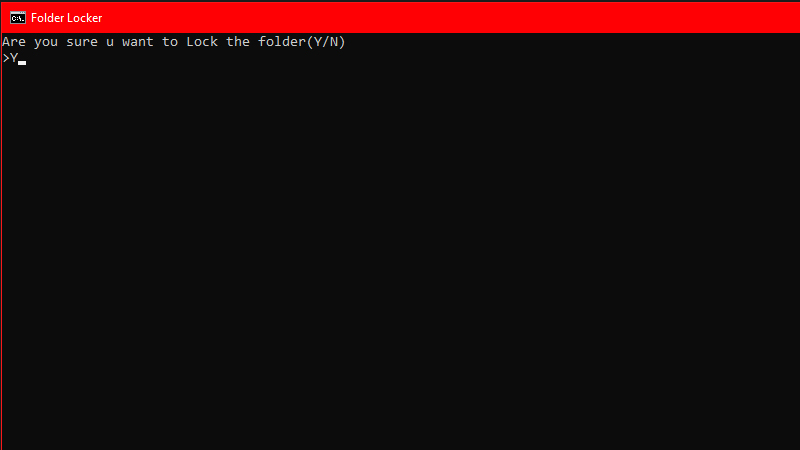
- Again, double-click ‘FolderLocker’.
- Type ‘Y’ and hit the ‘Enter’ key.
![unlock-locker-folder]()
- The ‘Locker’ folder will disappear along with the files that you stored in it.
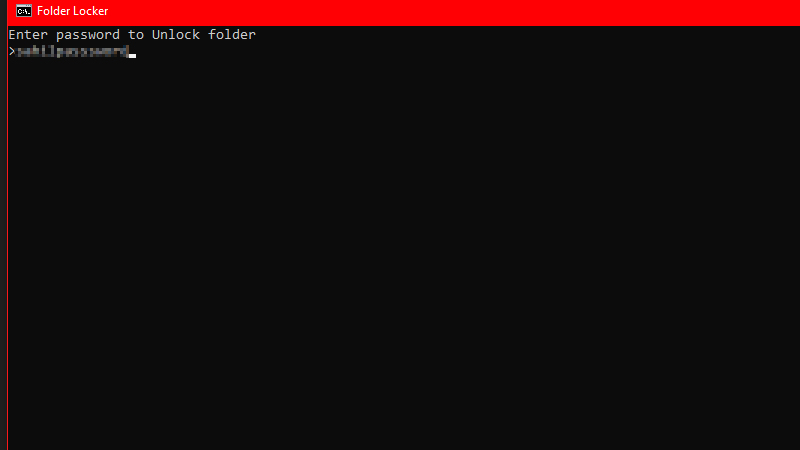
- To open the password-protected folder, double-click ‘FolderLocker’.
- Type in the password that you created earlier and hit the ‘Enter’ key.
![enter-password]()
- The ‘Locker’ folder will be available to access again.
Also, if you need to hide the ‘Locker’ folder, follow steps (5) and (6).
This is how you can password protect a folder on Windows 10 without using any third-party apps. Locking your files and folder with a password can come in handy to secure them and keep your valuable data safe. Check out some other guides on Windows 10: How to Show Hidden Files in Windows 11 and Check If Someone was Peeping into Your Windows PC.