Are you looking to install a web server on your Windows 11 PC? Web Server in Windows 11 offers you a secure platform to easily host websites, services, and applications. To test any dynamic content, the best method is to install and use a local webserver. In this guide, I will show you how to install a web server on a computer running Windows 11.
How to Install a Web Server on a computer running Windows 11
You can easily create a web server in Windows 11 and I will show you everything you need to know to get started. Follow the method given below to easily click and view your HTML files in the Google Chrome browser on your Windows 11 PC.
- On your Windows 11 PC, click on Start and then click on Settings.
- On the left side, click on Apps and then click on Optional Features.
- Scroll down below and then click on More Windows features.
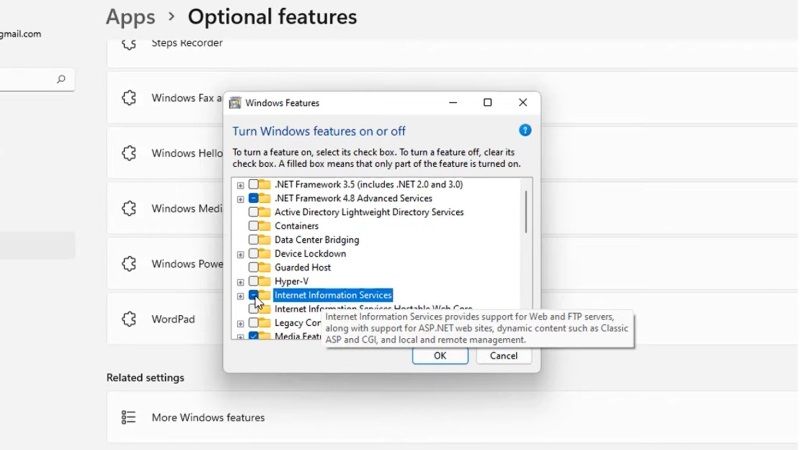
- In the Turn Windows features on or off dialog box, check Internet Information Services and click OK.
- Windows will install the optional features now. Once the process is completed, simply click on Close.
- After that open Notepad with admin rights and enter the HTML code mentioned below for a basic webpage:
<html>
<body>
<h1> Hello World</h1>
</body>
</html>
- Now, you need to save the HTML code in the wwwroot location, which is located at C:\intepub\wwwroot. Just rename it to index.html and change the Save as type: to All files.
- This way, you have just created and published your first website on Windows 11.
- Now, open CMD and type ipconfig. Search for the IPv4 Address and save it in a text document.
- Open Google Chrome browser and type the same IPv4 Address in this way – http://(your IPv4 address) and press Enter key.
- Finally, you will see your newly created website on Windows 11.
That is everything you need to know about Windows 11 webserver. For more tips and tricks of Windows 11, check how to build a file server on Windows 11, or download Windows 11 Build 22478 with redesigned emoji now.