HEIC stands for High-Efficiency Image Container which is a new image format found on mac operating system versions from High Sierra to Ventura. The file size of HEIC can be half of the JPGs in comparison. However, since opening the same image format is not compatible with many other platforms like Windows or Android phones, you can check out many ways to convert HEIC to JPG on your Mac. In this guide, you will find out how to change HEIC to JPG on Mac Ventura operating system.
Mac Ventura: How to Convert or Change HEIC to JPG
To convert or change HEIC file to JPG format you don’t need third-party products on Mac Ventura, the operating system takes care of it directly with the assistance of some inbuilt applications like Automator, Preview app, etc; follow the different methods given below to find out how it is done.
Convert HEIC to JPG on Mac with Automator
- To start Automator, you can find it in the Applications folder, or if you prefer you can open it from Spotlight. Once this is done you will simply have to create a new workflow.
- Select Quick Action.
- Search and drag the action “Copy Finder items” to the right (simultaneously choosing the folder in which the JPG images will be saved).
- Find and drag the action “Change type of images” to the right (choosing the format you prefer, here you need to opt for JPG).
- Save the workflow by giving it a name for the command that you will find in the right-click of Quick Actions. In this case, you can choose “Convert to JPEG”.
- The simple operation is done and you now have Quick Action at the click of a right mouse button. Just right-click on the HEIC file (or files if more than one) and choose your saved workflow from Quick Actions, then convert them to JPG.
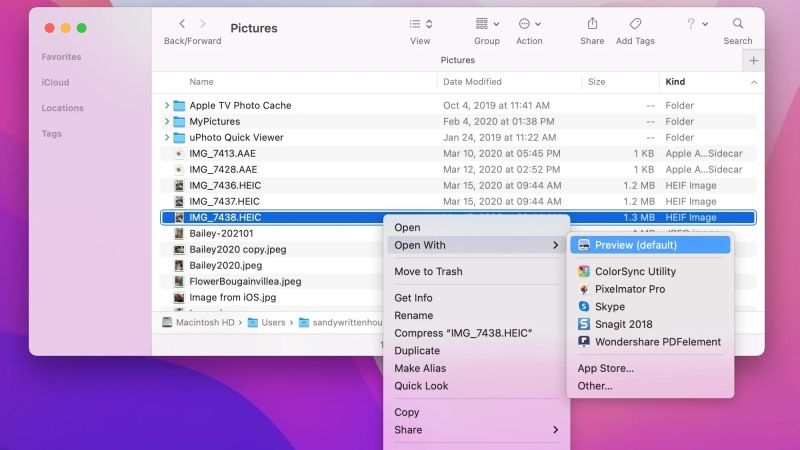
Convert HEIC to JPG with the Preview app
- Open the HEIC file in the Preview app which is an inbuilt tool in your macOS Ventura.
- On the top menu, click on File.
- Then click on Export.
- In the dropdown menu, you need to select the JPG file format. Adjust any other settings if you want here, which will increase or decrease the file size.
- Finally, click on Save and set a file location where you want to save the JPG file on your Mac. This way the HEIC file will be converted to a JPG file.
That’s everything you need to know about how to change or convert HEIC to JPG file format on Mac Ventura. If you are looking for similar types of macOS Ventura Guides, check out our other articles only on our website TechNClub.com: How to Fix Wifi Not Working after macOS Ventura Update, How to Fix High Power Consumption of Safari after macOS Ventura Update.