If you are unable to access a shared resource on your Microsoft Windows 2000 or Microsoft Windows 2003 server network, such as a device, a drive, or another computer, a “system error 53 has occurred” error message appears on your screen. This error message indicates that your system failed to find the network path. This prevents you from establishing a connection. There are many reasons this error can happen, such as an incorrect command, misconfigured network settings, or third-party software blocking the connection. Hence, to fix the system error code 53 issue, this guide will help you.
Fix: “System error 53 has occurred” on Windows (2023)
You can fix the “System error 53 has occurred” on your Windows desktop by following these steps:
1. Turn ON File and Printer Sharing for Microsoft Networks
The “File and Printer Sharing for Microsoft Networks” settings allow your system to share resources on the network. If it is disabled, you may get the error code 53. Hence, to enable it, follow these steps:
- Firstly, press the ‘Windows’ + ‘R’ keys on your keyboard to open the Run dialog box and type ‘Control Panel’ without quotes.
- Then click the ‘OK’ button on the Run dialog box to open the Control Panel.
- Now go to Network and Internet > Network and Sharing Center and click the ‘Changed advanced sharing settings’ hyperlink from the left panel.
- Click the ‘Turn on network discovery’, and ‘Turn on automatic setup of network connected devices’ checkboxes under the ‘Network discovery’ section.
- Then under the ‘File and printer Sharing’ section, click the ‘Turn on file and printer sharing’ checkbox.
- Now, close the window and check if you can access a shared network resource without the error code 53.
2. Turn on NetBIOS Protocol
NetBIOS Protocol helps your system communicate with other devices using their names rather than IP addresses. If it is turned off by your router or firewall, you may get an error code 53. Hence, to enable NetBIOS Protocol, follow these steps:
- First, open the Run dialog box and type ‘ncpa.cpl’ without quotes.
- Then hit the ‘Enter’ key on your keyboard to open the ‘Network connections’ window.
- Right-click on your active network adapter and select the ‘Properties’ option from the menu.
- Then double-click the ‘Internet Protocol Version 4 (TCP/IPv4)’ option under the ‘Networking’ tab.
- Now click the ‘Advanced’ button under the ‘General’ tab.
- Here click the ‘WINS’ tab, and under the ‘NetBIOS setting’ section, select the ‘Enable NetBIOS over TCP/IP’ option.
- Now click the ‘OK’ button to enable NetBIOS Protocol.
- Now check if the error code 53 is fixed.
3. Run Ping Test to fix the error code 53
Pinging the server helps you identify if the network servers are working properly, and you can do it by following these steps:
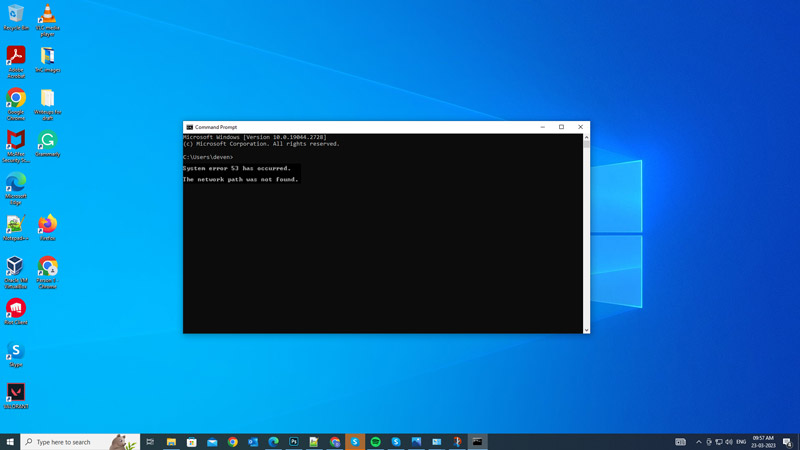
- Open the Command Prompt from the Start menu and type the following Ping command:
ping (server IP address)
- Make sure to replace ‘(server IP address)’ with the exact IP address of the server network.
- Finally, press the ‘Enter’ key on your keyboard to execute the Ping command.
- If your network is set up properly you will get a reply. Otherwise, your connection is not set up correctly, and you must troubleshoot the problem based on the result of the test.
That’s everything covered on how to fix the “system error code 53 has occurred” on Windows. Also, check out our other guides, such as How to fix the “remote connection was not made” error or How to fix the ‘couldn’t create a new partition’ error on Windows.