Apple has announced the latest macOS 13 Ventura at the Apple Event WWDC 2022. Many users are now willing to try this new macOS version out of curiosity to get to know about the new features that it packs. Though it is not fully developed yet, you can try the beta version to get your hands on the newest stuff it has for you. In this guide, we will show you how to download and install macOS 13 Ventura beta on your Mac.
Requirements to Install macOS 13 Ventura Developer Beta
Before installing the latest macOS on your Mac, you first have to ensure these few things that are mentioned below:
A macOS 13 Ventura Compatible Mac
Your Mac must be compatible with the macOS 13 Ventura to install the Developer Beta. Check the list of Mac compatible with macOS 13 Ventura given below:
- MacBook Pro 2017 and later
- Mac mini 2018 and later
- Mac Pro 2019 and later
- Mac Studio 2022iMac 2017 and later
- iMac Pro 2017 and later
- MacBook 2017 and later
- MacBook Air 2018 and later
An Apple Developer Account
Get an Apple Developer Account ($99/year) to get the macOS 13 Ventura Developer Beta.
MacBook Backup
Use iCloud, Time Machine, or whatever suits you to create a backup of our Mac. If the bugs in macOS 13 Ventura create any problems for you, the backup will help keep your data safe.
That’s it! You just need to ensure these things to install the macOS 13 Ventura Developer Beta on your Mac.
How to Download macOS 13 Ventura Developer Beta on Mac
Follow these steps to download the macOS 13 Ventura Developer Beta on your Mac:
- Log in to your Apple Developer Account.
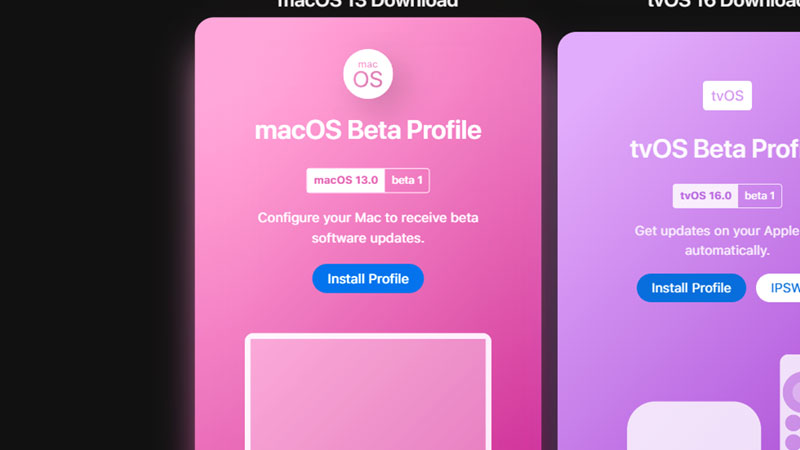
- Go to the macOS 13 section and click ‘Install Profile’.
- Go back to the desktop. Select Finder > Downloads.
- Click ‘macOS 12 Developer Beta Access Utility’.
- Once the installation process completes, select ‘Update’.
This will download the macOS 13 Ventura Developer Beta on your Mac.
How to Install macOS 13 Ventura Developer Beta on Mac
After you download the developer beta profile, the installation process will start automatically. Follow these steps to install the macOS 13 Ventura Developer Beta on your Mac:
- Select Continue > Continue > Install.
- Enter your passcode.
- Select Install Software > Upgrade Now.
Lastly, wait till the installation process completes. Your Mac will then restart and you’re done. The macOS 13 Ventura Developer Beta version is now installed on your MacBook.
Download macOS 13 Ventura Developer Beta Without Apple Developer Account
There are a few third-party sites where you can easily get the macOS 13 Venture Developer Beta profile. Search for them using any web browser and you will be able to install the macOS 13 Ventura Developer Beta on your Mac without an Apple Developer Account.
Use any of the methods mentioned above to download and install the macOS 13 Ventura Developer Beta on your MacBook. Explore this new OS thoroughly and be aware of the bugs too. Also, check out our other guides on similar topics: How to Download and Install macOS Monterey 12.5 Developer Beta and How to Clean Install macOS Monterey on your New MacBook Pro.