
Your Mac can be a lifesaver since it helps you with your important work, right? But, have you ever given a thought to the safety of your data on your Mac? No matter how cruel it may sound, if your Mac ever gets damaged, corrupted, or faces an error, its data may get erased. That is why Apple has provided all Mac with Time Machine. In this guide, we will show you how to backup your Mac with Time Machine.
What is the Time Machine Software in Mac?
The Time Machine app enables you to create a backup of your Mac which can be restored when required. A Time Machine backup includes not only your files but also your complete system settings and preferences as you have set at the time of backup. Think of it as an actual time machine that lets you get back in time to an actual state. This feature comes in handy if you ever encounter an error on your Mac or if it gets damaged by any chance. So, do you know how to use Time Machine for backup?
How to Use Time Machine on Mac (2023)
Here are the steps to create a backup for your Mac using Time Machine:
- Connect your Mac to an external storage device that will hold the backup for your Mac. It can be a USB or hard drive.
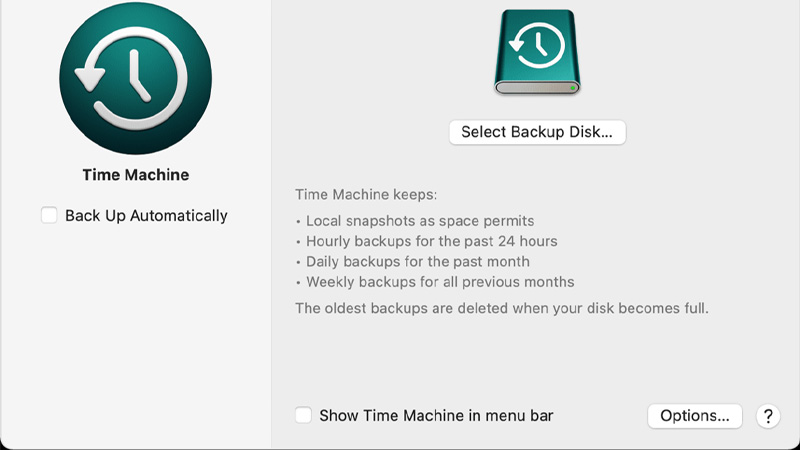
- From the desktop of your Mac, click the ‘Time Machine’ icon at the top and select ‘Open Time Machine Preferences’.
Or, click the ‘Apple’ icon > System Preferences > Time Machine. - Next, click ‘Select Backup Disk’.
- Select the external storage device for the backup.
- Click ‘Use Disk’.
Your Time Machine will now automatically start backing up your Mac from time to time. You don’t even have to worry about the backup now. Next, you must learn how to restore the backup, right?
How to Restore Time Machine Backup on Mac
Follow these steps to restore a Time Machine backup on your Mac:
- Connect the external storage device to your Mac that has the backup.
- Boot your Mac and before it boots completely, press and hold the ‘Command + R’ keys.
- You will see the Apple logo or a globe.
- The Utilities window will now appear. Select ‘Restore from Time Machine Backup’ > Continue.
- Select the backup that you created earlier to restore it on your Mac.
These are all the steps to restore the backup on your Mac. Once the backup gets restored on your Mac, it will reset to the state it was in, when the backup was created.
So, we have explained how easily you can backup and restore data using the Time Machine software on your Mac. Use it to keep your Mac safe from any unwanted trouble. You cannot avoid all the errors that your Mac may run into, but you can save it from any loss by using Time Machine. Do not forget to check out our other guides on similar topics: How to Reset the Launchpad on Your Mac and How to Fix USB Port Not Working on Mac.