")
If you are a Mac user who has installed Adobe Creative Cloud applications, you may have noticed a process called CCXProcess.exe running in the background. This process is part of the Adobe Core Sync service, which is responsible for syncing your files, fonts, settings, and other assets across your devices and applications. However, some users may find this process annoying or unnecessary, especially if they do not use the sync features or experience performance issues or high CPU usage due to CCXProcess.exe. Fortunately, there are a few ways you can follow to get rid of CCXProcess.exe on Mac without uninstalling the entire Adobe Creative Cloud suite, and this guide will help you with it.
Mac: How to disable CCXProcess.exe (2023)
You can disable CCXProcess.exe either by disabling core sync or using the Terminal, and this is how you can do it:
1. Disable Core Sync
Core Sync is the application that syncs all your documents with Adobe documents automatically. When you disable sync, CCXProcess.exe will automatically stop running in your background, and you can do it by following these steps:
- First, close all the Adobe Creative Cloud apps.
- Then click the System Preferences and go to the ‘Extensions’ tab.
- Now click All on the left panel and uncheck the checkbox next to the Core Sync to disable it.
- Finally, close the window, and the CCXProcess.exe will stop running on your MacBook’s background.
2. Disable Creative Clouds
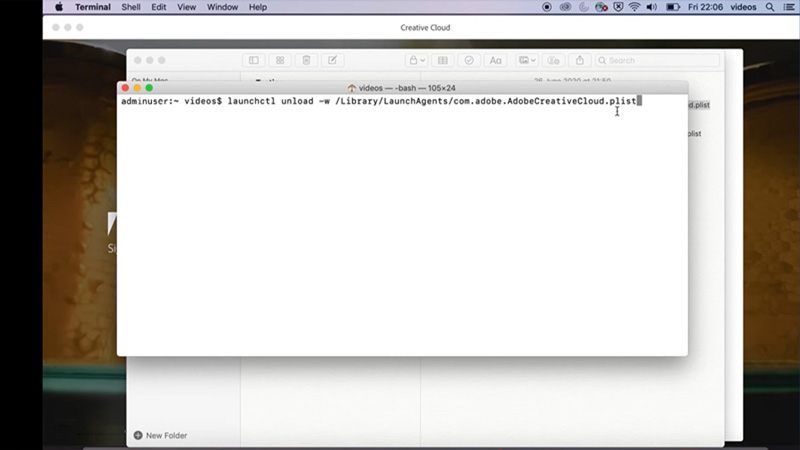
You can use Terminal commands to disable the Creative Clouds app to stop CCXProcess process from running in the background, and here are the steps for the same:
- First, open the Terminal by searching it on Finder and type in the following commands:
launchctl unload -w /Library/LaunchAgents/com.adobe.AdobeCreativeCloud.plist
launchctl unload -w /Library/LaunchAgents/com.adobe.ccxprocess.plist
- Remember to press the ‘Enter’ key after each command, and your Creative Clouds will be disabled.
- To re-enable them, type in the following commands and press the ‘Enter’ key on your keyboard after each command:
launchctl load -w /Library/LaunchAgents/com.adobe.AdobeCreativeCloud.plist
launchctl load -w /Library/LaunchAgents/com.adobe.ccxprocess.plist
- This will start the Creative Cloud services immediately.
That’s everything covered on how to disable CCXProcess.exe on Mac. Also, check out our other guides, such as How to fix Adobe Creative Cloud installation error 127 on Mac or How to fix the “Unable to check for Update” error on Mac.