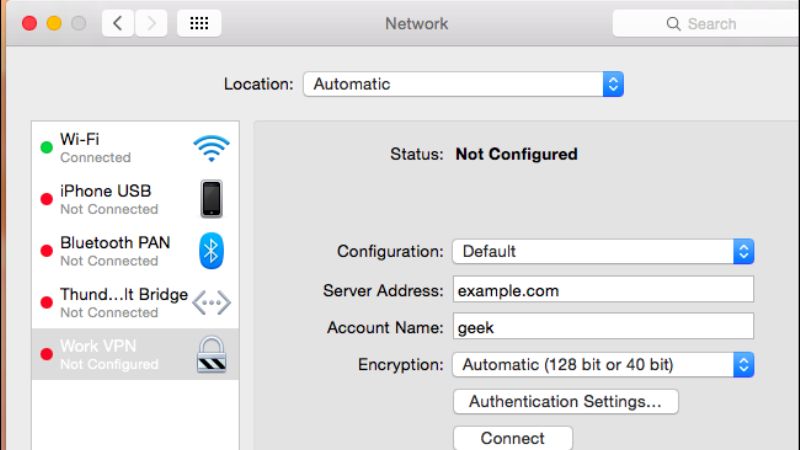
If you are looking to set up, create or connect to a VPN (Virtual Private Network) on Windows operating system, then it can be very simple for those who know about it, however, it is an issue that will cause more headaches for new Mac users. Also, if you have never used a VPN, you need to know that it serves in a way that creates a kind of tunnel on the web between a client and a server, hiding our computer’s IP address, which will provide our browsing experience with greater security. In this tutorial, I will show you how to connect to a VPN on your Mac computer.
How to Connect to a VPN on your Mac in 2022

A VPN usually allows the user to hide their identity or IP, preventing others from obtaining information about their browsing. By encrypting all the information you send and receive, you will then have the possibility to browse on a tablet, smartphone or PC without anyone knowing what you are doing, so it is a very interesting solution for many users.
So, if you want to create a virtual private network on your Mac computer, then follow the steps given below:
- Register a personal account with a website such as SecurityKISS.
- After registering, you will receive an email with a username, password, and secret password to connect.
- Once done, go to System Preferences on your Mac.
- Then on Network and tap on “+” to add a new connection.
- Select a VPN connection.
- You will need to add all the data related to that connection.
- Click Authentication Settings.
- Finally, add the password.
- Accept to validate the previous steps, then click on Apply.
Verify your VPN Connection
- Go to WhatIsMyIp.com and copy and paste your VPN IP address.
- You will see that your public IP address and location have changed.
That is everything you need to know about how to connect to a VPN on your Mac computer. If you are interested in getting more Tips and Tricks around Mac operating system, check out our other guides on how to convert PDF to Word on Mac, and how to activate dark mode on Mac.
