
DNS cache is a temporary database that stores information like the website IP addresses, the number of times a user visited a website most recently, and more. This information fastens up the website loading. However, if there’s any corruption in the cache, it can lead to an error loading the website. Flushing the DNS cache can fix this issue. If you are finding answers to clearing the DNS cache on your Android device, look no further because this guide has all the details you need.
Android: How to Clear DNS Cache (2023)
To clear the DNS cache on your Android phone, here are some methods that you can follow:
1. Clear DNS Cache using Chrome
You can flush the DNS cache from the Chrome web browser by following these steps:
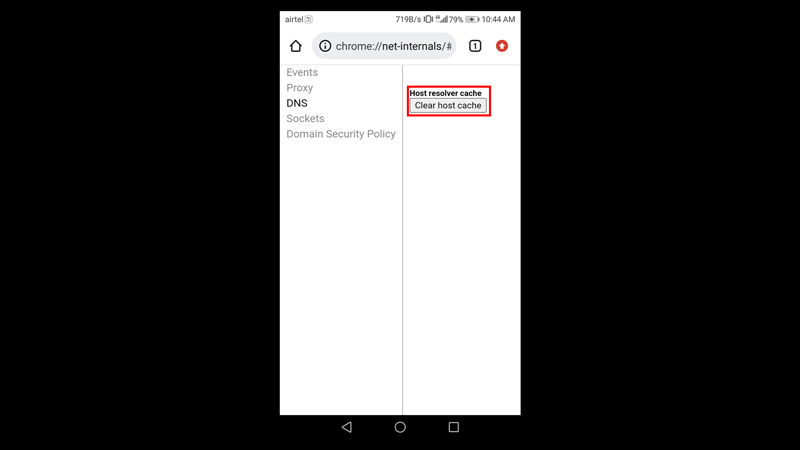
- Open your Chrome web browser on your mobile and type the following text on the address bar:
chrome://net-internals/#DNS
- From the right-hand panel, select the ‘Clear host Cache’ option.
- If prompted, select the ‘Clear Cache’ option and then select the ‘Flush Sockects‘ option.
- The cache memory will be cleared in minutes.
2. Modify the Wi-Fi network to Static
When you opt for Static IP, you will use the DNS server to browse, and the DHCP server will use Wi-Fi network servers. Hence, when you change the server, it automatically clears out the DNS cache memory, and to modify your Wi-Fi network, follow these steps:
- On the Wi-Fi settings of your Android device, select the Wi-Fi network you are connected to.
- Now select ‘Modify networks’ from the pop-up menu.
- Tap on the ‘Advanced options’ tab and select the ‘IP settings’ option.
- Select the ‘Static’ option from the dropdown menu and manually enter the DNS address. This address is different for different server networks, but if you want to use Google’s public DNS IP address, enter the following address on your DNS text box:
On DNS1 address box type: 8.8.8.8
On DNS2 address box type: 8.8.4.4
3. Clear Cache from the device Application Management Settings
- On your Android phone, go to the ‘Settings’ app, open the ‘Applications’ tab or select the ‘Application Management’ tab.
- Tap on the web browser you want to clear the cache.
- Now tap on the ‘Storage’ option on the app settings window.
- Select the ‘Clear Cache’ option.
- This straightforward method will clear all the cache related to your browser, including the DNS cache memory.
Apart from this, you can use VPN servers to change the server network and clear the cache or use third-party applications to change the DNS servers that will clear the DNS cache.
That’s everything covered on how to flush the DNS cache on Android devices. Also, check out our other guides, such as How to clear the cache on Windows 11 or How to change DNS on Windows 11.