
A DNS change mainly allows you to access all the blocked and obscured websites all over the world without any problems. In addition, changing DNS settings also has some other advantages, such as the one related to the ability to browse the internet much faster and get rid of buffering issues during streaming. Without further ado, let us check out how to change DNS in Windows 11 PC.
How to change DNS settings on Windows 11?
If you are facing a slow internet connection on your system, it is best to change the DNS server on Windows 11 PC to avoid any browsing or buffering issues. If the DNS server is slow on your computer, you will find it very difficult to access any website or the worst-case scenario is that it may leave you disconnected from the internet.
So to solve this issue, the best solution is to use a reliable and fast DNS server on your Windows 11 computer in order to stay connected to the internet. Here is the easiest and fastest way to change DNS settings on Windows 11, follow the steps given below.
- On your Windows 11 system, click on the Start menu at the bottom of the taskbar and then click on Settings (or press the Windows+I keys on the keyboard).
- From the Settings menu, click on Network & Internet option located on the left side.
- From here, click on the Ethernet or Wifi option depending on the type of connection you are using on your PC. If you are using a wired connection, click on Ethernet. If you are connected via Wifi, then click on Wifi.
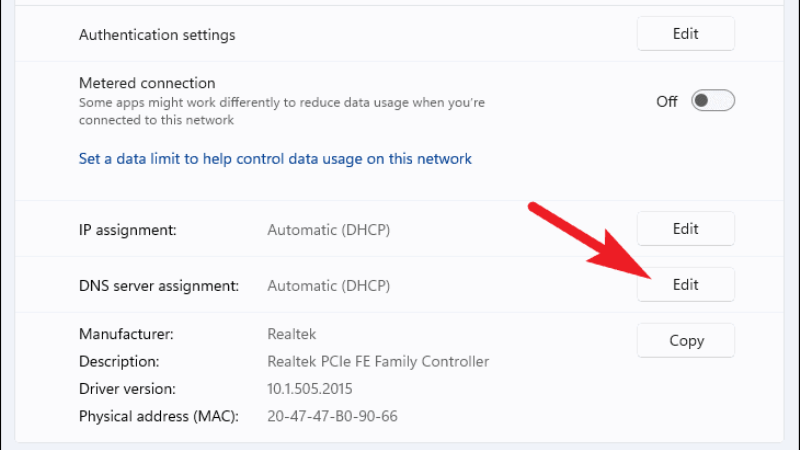
- In the next window that opens, search for “DNS Server Assignment” and then click on Edit next to it.
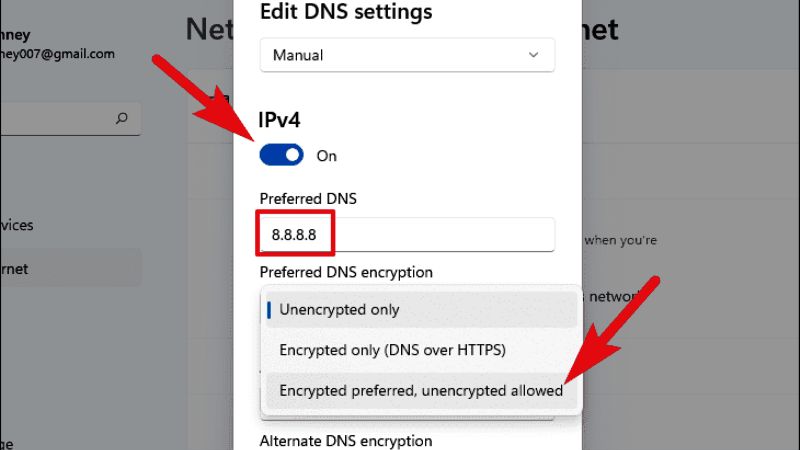
- In the DNS Settings, switch between Automatic (DHCP) and Manual mode.
- At this point, activate the switch located under IPv4 and then enter the DNS that you want to use.
- Under the “Preferred DNS Encryption” option, select the option of Encrypted preferred, unencrypted allowed.
![edit dns settings in windows 11]()
- At the bottom, you just have to click on the Save button.
- That’s it, did you see how easy it was changing the DNS on Windows 11?
That is everything you need to know about changing DNS settings on Windows 11. If you are having any kind of issues with your Windows 11 computer, check out our other Windows 11 Troubleshooting Guides right now.