As we all know, the cache is a temporary file that is created by the system and also from the various pre-installed software on your PC. In theory, these cache files on your system will be reused to speed up the existing process because you do not have to download the same file again and again. However, when the hard drive space on your Windows 11 starts to fill up, or if your system is having some problems with slow performance issues, then it will be best to clear the cache as soon as possible on your PC. Let us find out the different workarounds on how to clear cache in Windows 11 right now.
How to Clear System Cache in Windows 11
You can easily try to clear the cache in Windows 11 by deleting Temporary files. You have to delete these temporary files on your Windows 11 PC manually that is created by many software installed on the system. Follow the steps given below.
How to delete Temporary Files in Windows 11
- First of all, you need to press the Windows+R key together on your keyboard.
- After that in the Run command, type cleanmgr /low disk and press Enter on your keyboard.
- Now you need to select the system partition drive where Windows 11 is installed.
- You will be given a list of options, just tick mark on all the available options and then click on OK.
- Lastly, a confirmation will appear where you just need to click on Delete Files.
- Once the deletion process is completed, all the temporary files will be deleted on your Windows 11 system.
Additionally, there is also another method to delete temporary files manually in Windows 11, follow the steps given below to do that.
- You need to press the Windows+R key together on your keyboard.
- After that, just type “temp” or “%temp%” without the quotes in the Run command.
- Next, a temp folder will open, simply select all the files by pressing CTRL+A and then press the SHIFT+Delete key on your keyboard to permanently delete the files.
- Once the process is completed, all the temporary files in your Windows 11 system will be deleted permanently.
How to clear Microsoft Store cache in Windows 11
When you access the Microsoft Store and download apps, it creates cache files. You can easily delete these files through a simple command. Let’s see how you do that.
You can also try to clear Microsoft Store cache files, which gets created whenever you download any apps from the store. All you have to do is just use a simple command to delete those files easily. Follow the steps given below.
- You need to press the Windows+R key on your keyboard.
- In the Run command, type wsreset.exe and press Enter key.
- At that point, a window with a command prompt will open, you just have to leave it alone and wait for some time for the cache to get deleted.
- Once the deletion process is completed, the Microsoft Store will then open automatically.
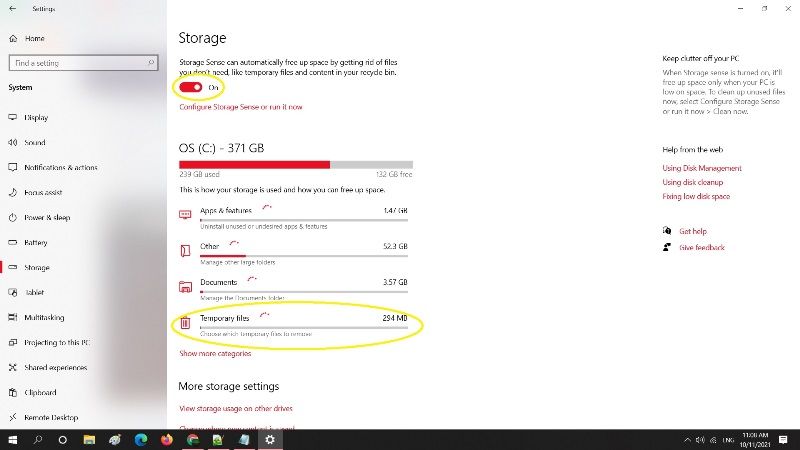
How to use Storage Sense to delete Cache in Windows 11
There is an inbuilt feature in Windows 11 that you can use to automatically delete the temporary files. You just need to enable Storage Sense to delete cache in Windows 11, so follow the steps given below.
- First of all open Settings on your Windows 11 system.
- After that click on System, and then click Storage on the right-side pane.
- Toggle the Storage Sense option to turn it On.
- Click on the “Click Storage Sense or run it now”, and then ensure to select the “During low free disk space” option.
- At the bottom, just choose to set how long the file should be in the Recycle Bin before it gets deleted automatically.
- That’s it, now your Windows 11 system will automatically delete the temporary files.
That is all you need to know about deleting cache in Windows 11. For the latest Windows 11 tips and tricks, check out our other Windows 11 Guides, only on TechNClub.com.