Many Windows 11 users have reported that their brightness control keys are not working properly after updating their operating system to the latest KB5027303 update. This can be frustrating, especially if you need to adjust your brightness for different lighting conditions or save battery life. Fortunately, there are some possible solutions that you can try to fix brightness control keys not working after Windows 11 update issue as mentioned in this guide.
How to Fix Brightness Control Keys Not Working After Windows 11 Update?
If the brightness control keys on your Windows 11 laptops ain’t working after the Windows 11 KB5027303 Update, you can fix it by following these workarounds:
1. Update your Display Driver
The first thing you should do is, check if your display driver is up-to-date. Windows 11 may have installed a generic driver that is not compatible with your hardware or software. Hence, to update your display driver on your Windows 11 desktop, follow these steps:
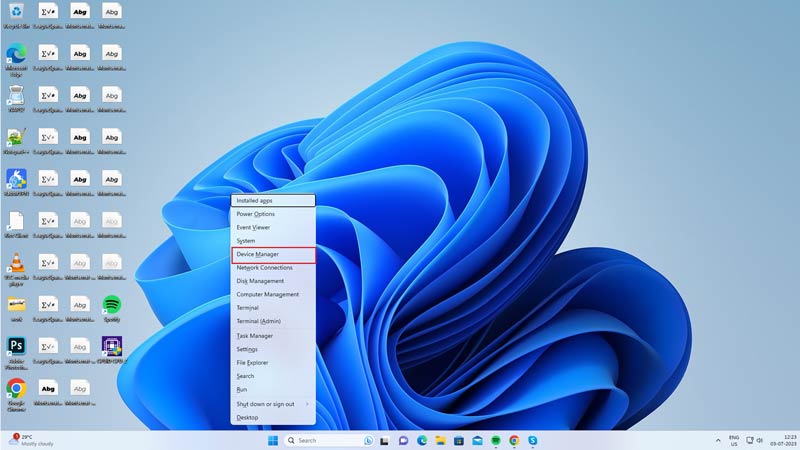
Firstly, press the ‘Windows’ + ‘X’ keys on your keyboard and select the ‘Device Manager’ option from the menu.
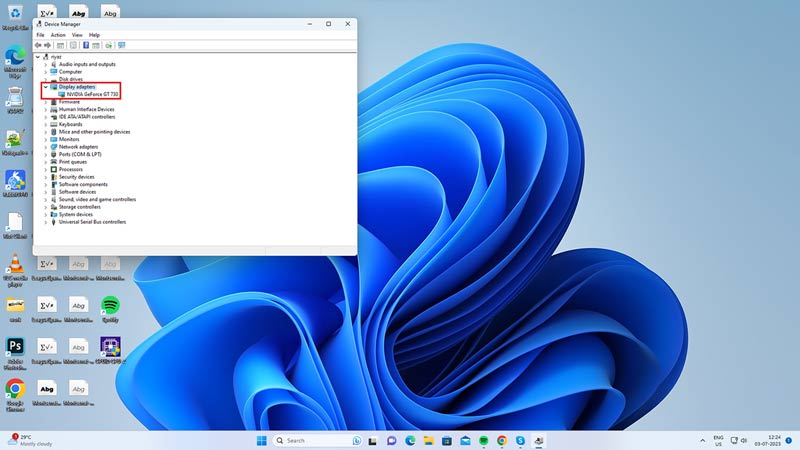
Expand the ‘Display Adapters’ category from the list on the Device Manager screen and right-click on your display device.
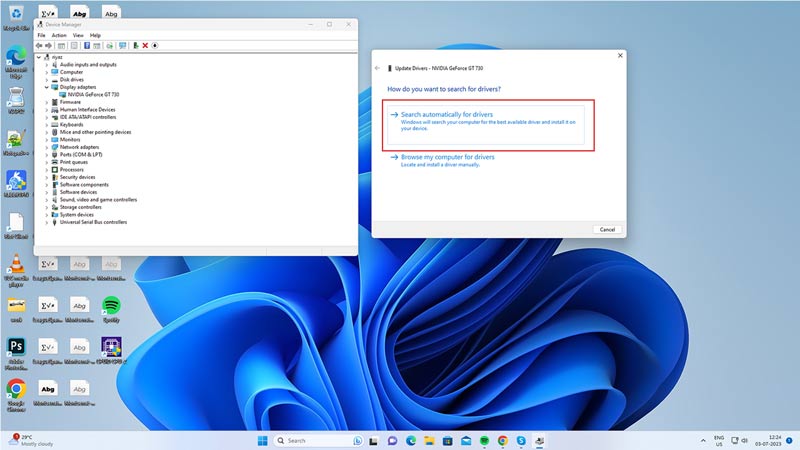
Then select the ‘Update driver’ option from the context menu and choose ‘Search automatically for drivers’ from the pop-up menu. Wait for Windows to find and install the latest driver for your device, then restart your computer and see if the brightness control keys work.
2. Reinstall Display drivers
If updating the driver does not solve the problem, you can try to reinstall it. Sometimes, the driver may get corrupted or damaged during the upgrade process causing brightness control keys not working issue on your Windows 11 desktop. In such cases you might need to reinstall the driver and here’s how you can do it:
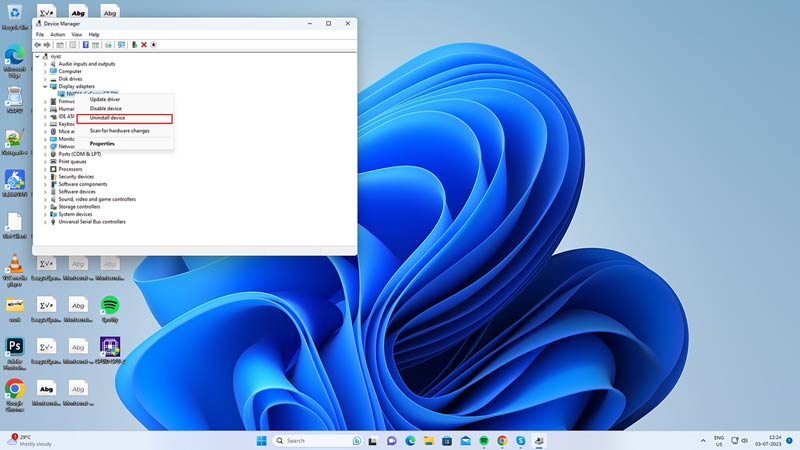
Open the Device Manager window and expand Display Adapters by following the above-mentioned steps. Then right-click on your display device and select the ‘Uninstall device’ option from the context menu.
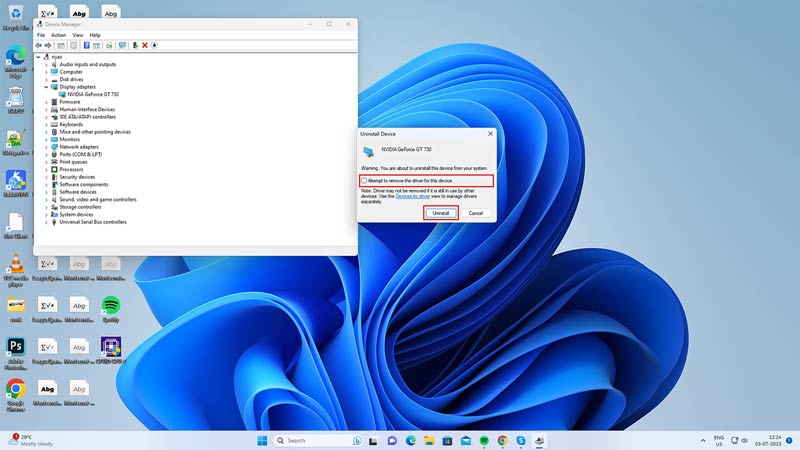
On the prompt screen, select the ‘Attempt to remove the driver for this device’ checkbox. Then click the ‘Uninstall’ button and wait for Windows to remove the driver. Restart your computer and Windows will automatically reinstall the driver.
3. Troubleshoot Hardware and Devices
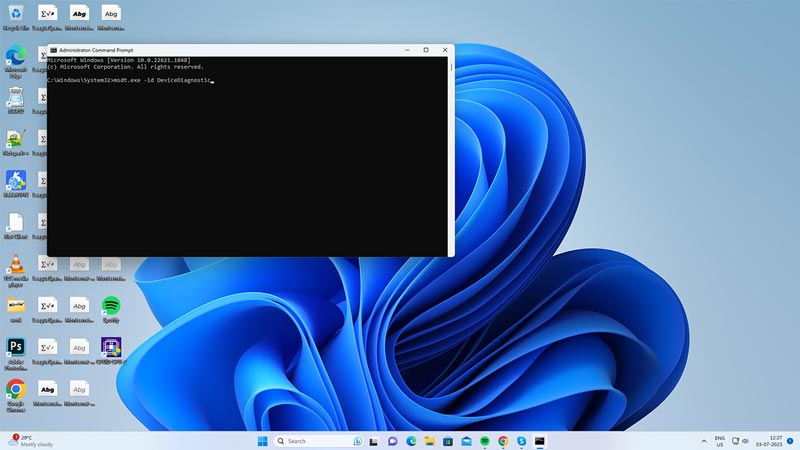
If none of the above methods work, you may need to troubleshoot your hardware and devices to find and fix any potential issues. To do this, open Command Prompt as administrator from the Start menu and type the following command:
msdt.exe -id DeviceDiagnostic
Then press the ‘Enter’ key on your keyboard to run the command and your system will start diagnosing the issue on your device. Once the troubleshooting completes the run, follow the on-screen instructions to fix the issue.
4. Run Keyboard Troubleshooters
Also, running keyboard troubleshooters can fix the brightness control keys not working issue on your Windows 11 PC, and here’s how you can do it:
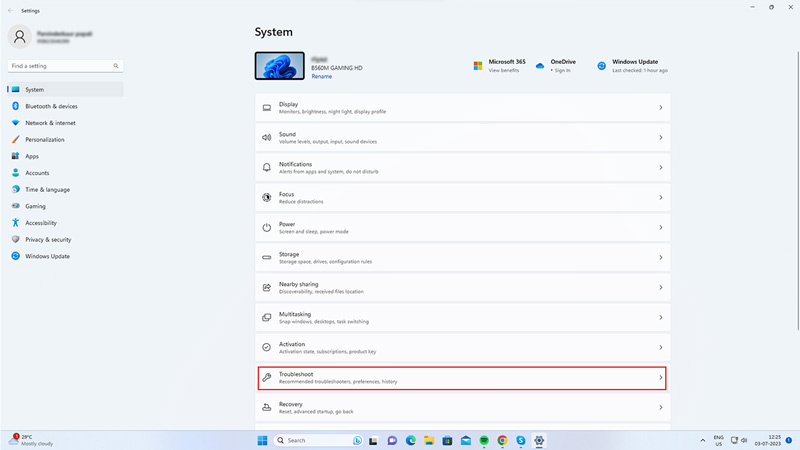
Press the ‘Windows’ + ‘I’ keys on your keyboard to open Settings, and select the ‘System’ tab from the left sidebar. Scroll down and select the ‘Troubleshoot’ tab.
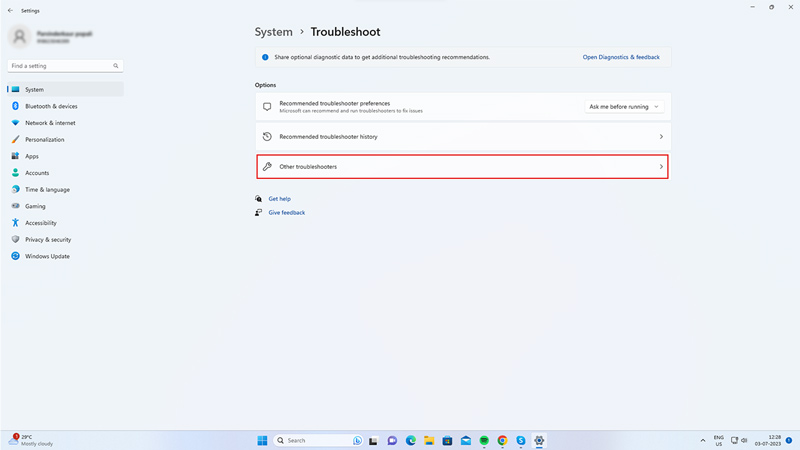
Then, click the ‘Other troubleshooters’ or ‘Additional Troubleshooters’ option.
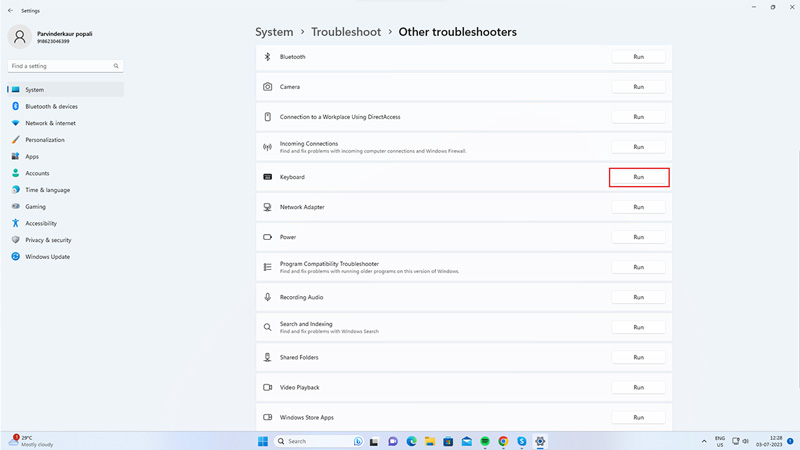
Finally, scroll down and click the ‘Run’ button next to the keyboard tab, wait for the scan to complete, and follow the on-screen instructions to fix the issue.
Those were the few ways you can fix your brightness controls not working issue after installing the Windows 11 KB5027303 update. Also, check out our other guides, such as How to turn off auto brightness on Windows 11 or How to fix Windows Defender not detecting any virus error on Windows 11.
