
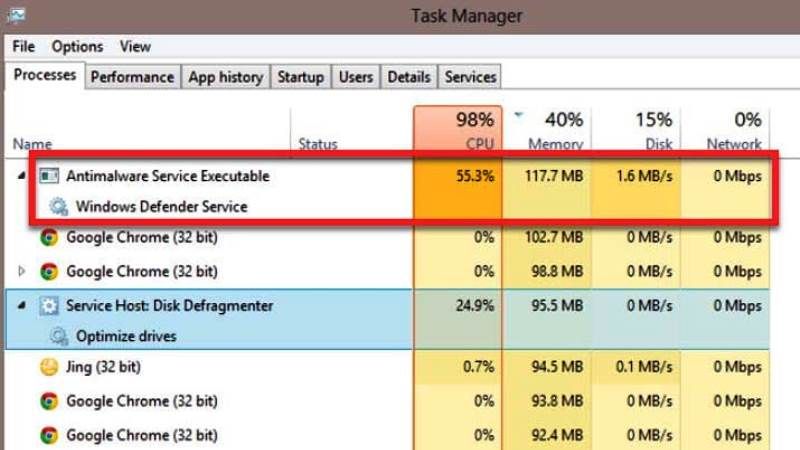
For the unversed, there is a process called Antimalware Service Executable that runs in the background on Windows 10, which is one of the processes of Windows Defender that is inbuilt into the operating system. Sometimes, this process, also called MsMpEng.exe, in Windows Task Manager occupies a lot of RAM memory and CPU, usually from 80% to 100%. So, if you are one of those who is having similar problems, in this guide we will tell you how to fix Antimalware Service Executable high CPU usage in detail below.
Antimalware Service Executable (MsMpEng.exe) High CPU Usage Fix (2023)
There are various solutions you can try to fix the high CPU usage of Antimalware Service Executable, such as, you can add MsMpEng.exe to the exclusion list, or else change the Windows Defender schedule time, etc. Below you will find all the solutions to remedy this issue once and for all.
Add Antimalware Service Executable (MsMpEng.exe) to the Exclusion List
- First, of all, launch Windows Defender on your Windows 10 PC.
- After that, click on Virus & Threat Protection.
- Next, click on Virus & Threat Protection settings.
- Find “Exclusion”.
- Then click on Add or remove exclusions.
- Press the Add an exclusion.
- You will get a drop-down menu, here select Process.
- Finally, in Add an exclusion, type MsMpEng.exe and click Add. This way the Antimalware Service Executable will be added to the exclusion list.
Change the Windows Defender Schedule
You can also try to change or disable the automatic scanning of Windows Defender and manually decide when to do each scanning when necessary, here’s how it is done:
- First, click on the Start menu,
- Then type “scheduler” without quotes and press Enter key to launch the program.
- On the left side, double-click Task Scheduler Library. Keep expanding to Microsoft/Windows/Windows Defender.
- After opening the Windows Defender folder, click on Windows Defender Scheduled Scan, located in the center pane.
- Click on the Conditions tab and deselect all the options then confirm with OK.
- That’s it, in this way it will cancel all your scheduled scans of Windows Defender.
That’s all there is to know about how to fix Antimalware Service Executable high CPU usage on Windows 10. If you are looking for similar types of guides, check out our other articles on How to Disable Windows Defender in Windows 10, and How to Repair Corrupted System Files on Windows 10.