Cache files can be accumulated over time in your PC but how do you really clear it out in Windows 11? Your PC’s cache is a temporary storage area for files that are frequently accessed. This can include things like web pages, images, and files that you’ve opened recently. While the cache can improve performance by making it faster to access these files, it can also take up a lot of space. If you’re running low on storage, or if you’re experiencing performance issues, you may want to clear your cache.
How to Clear Temporary Cache Files in Windows 11?
There are a few different ways to get rid of the cache on your Windows 11 PC. However, it doesn’t require much to clear them, Here are two of the best methods you can use to easily and quickly clear your cache:
Through Settings app

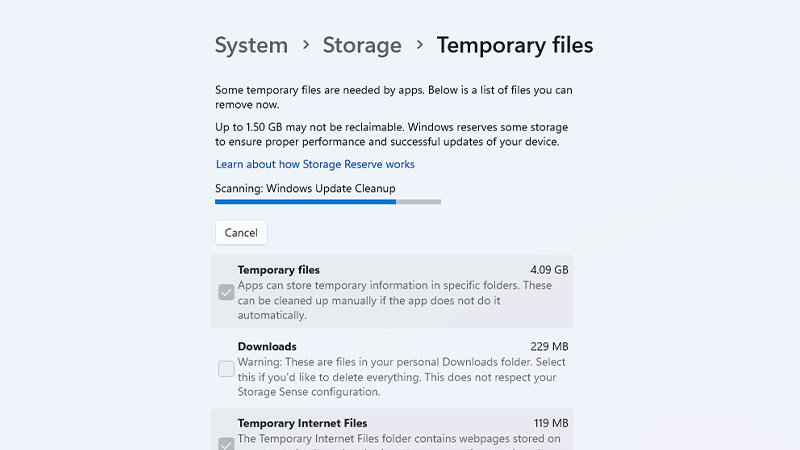
Here are the steps to clear the cache using the Settings app:
- Open the Settings app.
- Click on the “System” Tab.
- Here, Click on “Storage“.
- Click on the “Temporary files” category.
- Check the boxes next to the types of files you want to delete.
- Click on “Remove files“.
Through the Run dialog box

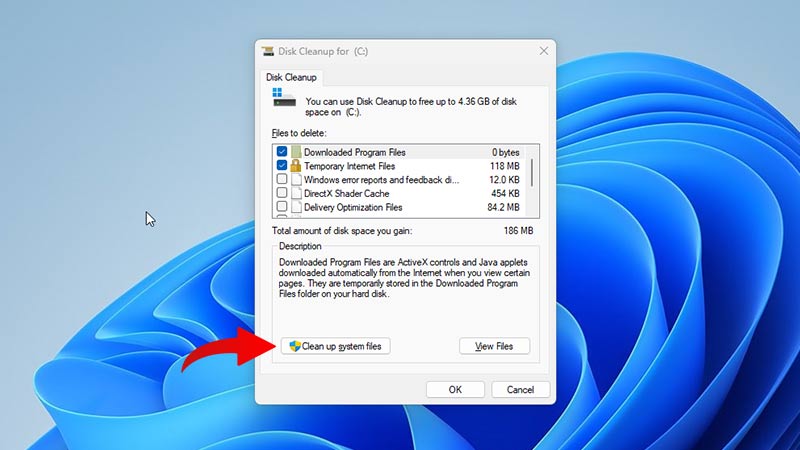
Here are the steps to clear the cache in Windows 11 using the Run dialog box:
- Open the Run dialog box by pressing the Windows key + “R” key.
- Type “cleanmgr” and press Enter.
- Click on “Clean up system files” in the Disk Cleanup window.
- Click on “OK“.
Clearing your cache is a quick and easy way to improve performance and free up space on your Windows 11 PC. If you’re experiencing performance issues or running low on storage, be sure to clear your cache regularly.
That is all you need to know on how to clear the cache on Windows 11. For more guides like this, check out our other articles such as how to free up RAM in Windows 11 and how to add apps to your desktop in Windows 11.
