Apple released iOS 16 on September 12, 2022. With it came a slew of features. One of which is the Stage Manager. It is the newest way of Multitasking & making your workspace more flexible. In this guide, I will show you how to use the Stage Manager on your iPad.
How to Use the Stage Manager on your iPad?
The Stage Manager is one of the newest features of iOS 16. It is supported by all iPads that have the M1 chip. Here are the steps on how to use the Stage Manager on your iPad.
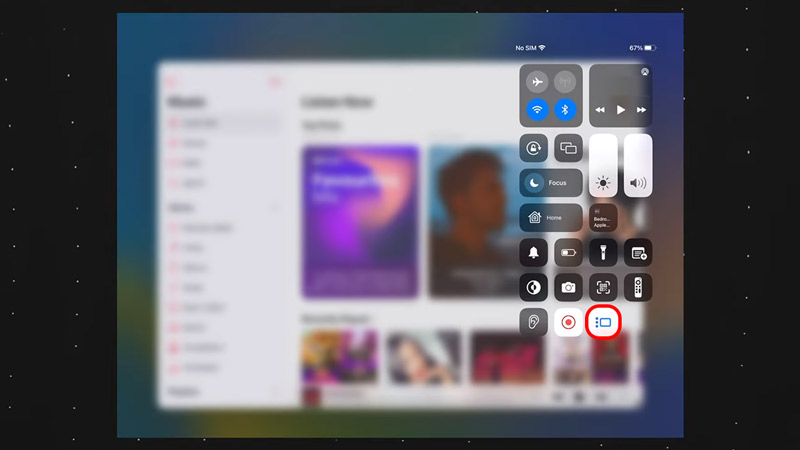
- To open up the Stage Manager, access your Control Center & activate it.
- If it is not on your Control Center, then you will have to add it.
- Go to your Settings & then Control Center.
- From there, find Stage Manager & add it.
- There is another way of activating it, go to your Settings & then click on Home Screen & Multitasking.
- From there click on Use Stage Manager on iPad.
- After that, the Stage Manager will be active.
- Now you can swap between your Recent Apps & your Dock with ease.
- Long press the Stage Manager to gain the option of enabling or disabling the display of your recent Apps & the Dock.
- If you want more room on your Screen go to Settings -> Display & Brightness -> Display Zoom & select the More Space option.
- You can create App Groups that can help sort your Workspace.
- Just tap the three dots on the top of the app & make a group.
- You can also resize the Apps.
- This is done dynamically so your workspace can look clean & neat.
- You can do this by grabbing the corners of the App and resizing it from there.
- Stage Manager is also available on Macs that support macOS Ventura.
This was all about how to Use the Stage Manager on your iPad. Hopefully, this guide has helped you. You can also check out our other guides like How to Change the Auto-Lock on your iPad.