As you all know by now, if you want to install Windows 11, then it is mandatory to have a computer equipped with a TPM 2.0. For that, it is activated in the BIOS/UEFI settings of the motherboard. Although it is present on some PCs, the TPM 2.0 is not always enabled by default. There are chances that your laptop or your desktop computer already has it. So, in this guide, let us find out how to enable TPM 2.0 on your computer in order to install Windows 11.
How To Enable TPM 2.0 on your computer for Windows 11

Before you start activating TPM 2.0 on your computer, you need to check if your computer has a TPM 2.0 chip, follow the steps below.
How to check if your PC has TPM 2.0
- First of all, click on Start and type Run, and open it. Or else you can also press the shortcut key Windows + R together to open the Run utility.
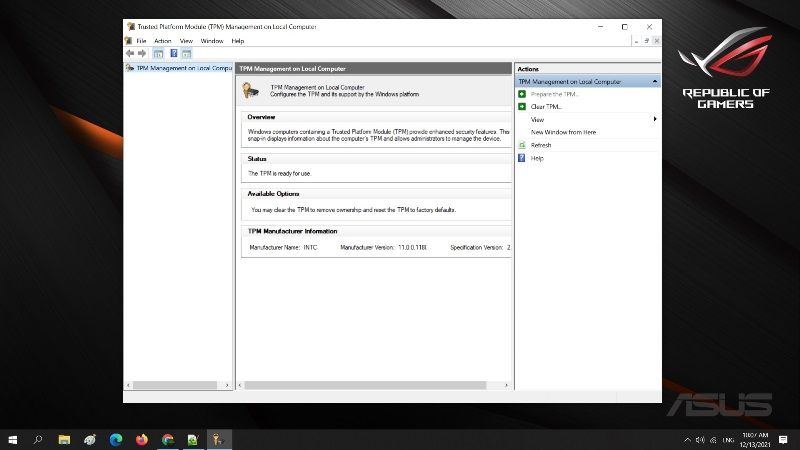
- After that just type tpm.msc in the text box and press Enter key.
- At this point, all you have to do is simply check the TPM status and its specification version.
- In case if the status doesn’t show “The TPM is ready for use,” it simply means that the TPM is disabled by default in the BIOS.
So to enable TPM on your Windows 11 computer, follow the steps below:
- You will need to enter your BIOS settings. To do that click on Start and then go to Settings > Update & Security > Recovery > Restart Now.
- After rebooting, you will get a list with a menu of options. Here, simply click on Troubleshoot > Advanced Options > UEFI Firmware Settings > Restart.
- Or else, to enter the BIOS settings you simply have to hold down the Shift key while restarting your PC and it will bring you to the BIOS menu.
- Now you have to browse the BIOS/UEFI menus looking for the TPM setting under these settings: Security Chip, Security Device Support, TPM Device, TPM Support, or TPM State.
- Simply, change the value of the TPM parameter to Enabled.
- Some examples by manufacturer:
On an HP PC:
-> Go to Security
-> Set TPM Available to Available and check TPM State
On an Asus PC:
-> Go to Advanced > Trusted Computing
-> Set TPM Support to Enabled and TPM State to Enabled - Before leaving, save the changes by selecting Save Changes and Exit or Save and Exit.
And that is everything you need to know about how to enable TPM on Windows 11. Also, do not forget to check how to make Taskbar Smaller on Windows 11, and how to enable DirectStorage on Windows 11.
