
Vanguard of Riot games is an in-house support system that prevents users from cheating. Whenever you try to open games like Valorant on your PC, due to the Anti-cheat mechanism, and some system requirements, you cannot even start the game. Valorant ‘Error Code Van9003’ on Windows 11 is the most common error on the worldwide level. There’s a complicated workaround to fix this issue by changing some BIOS settings that are risky to interfere with, but this guide will make it easy for you.
Fix: Valorant ‘Error Code Van9003’ on Windows 11 (2023)
Valorant ‘Error Code Van9003’ on Windows 11 is caused when Trusted Platform Module (TPM) or Secured Boot is disabled on your system. You can fix this by following these steps:
1. Enable TPM
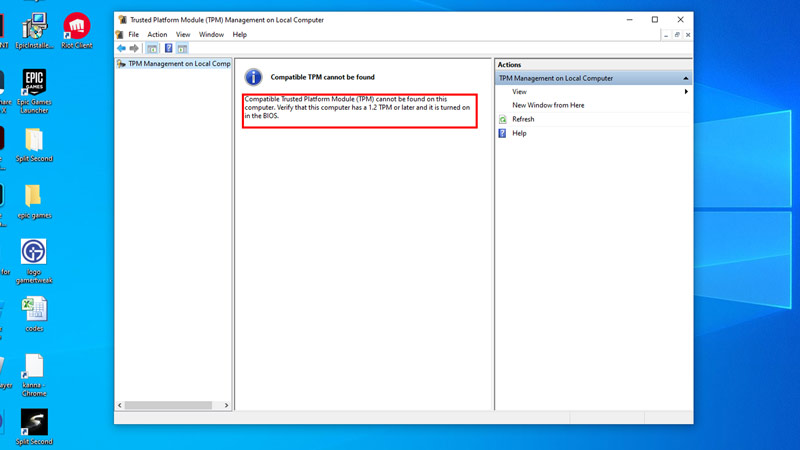
To check if TPM is on, type ‘tpm.msc’ without quotes on the Start Menu and open the console document with the same name. You will see the version of TPM. If the TPM version is lower than 2.0, upgrade it from your TPM firmware manufacturer. If your TPM is disabled, you will see a message mentioned in the above image. To enable it, follow these steps:
- Restart your Windows 11 desktop and press the BIOS key to enter, which is different for different motherboard manufacturers. Mostly its F10, DEL, F12 or F11.
- You will enter the BIOS mode. Make sure the BIOS mode is on Advanced mode.
- Use arrow keys to navigate to the ‘TPM status’ or ‘PTT’ or ‘fTPM’ option as per different BIOS menus.
- Select the ‘Enable’ option, using the arrow keys, and press the ‘Enter’ key from the keyboard.
- Now save changes and exit BIOS mode to restart Windows 11 desktop.
2. Check and Enable Secure Boot
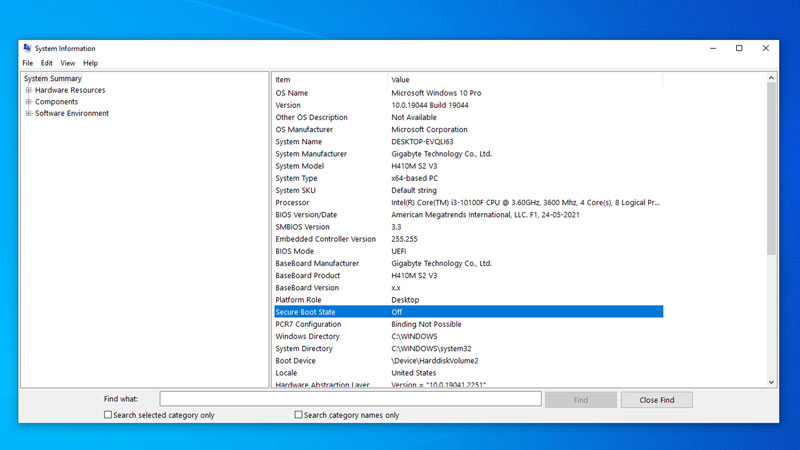
To check if Secure Boot is on, type ‘System information’ without quotes on the text box of the Search bar in the Start menu and see if BIOS mode is on UEFI mode along with System Boot status from the list. Also, you can check if TPM is enabled from here. If the Secure Boot is disabled, follow these steps:
- Restart your Windows 11 desktop in BIOS mode.
- Select the ‘Boot/Security/Advanced’ section as per the motherboard.
- On the ‘BIOS mode’ tab, select the ‘UEFI’ option and press the ‘Enter’ key from your keyboard.
- Now on the same ‘Boot’ section, scroll down using your keyboard arrow keys and select ‘Enable’ on ‘Secure Boot status’ or ‘Standard’ on the ‘System boot mode’ tab.
- Save and exit BIOS mode and restart your Windows 11 PC to fix the ‘Error code Van9003’ of Valorant.
Note that making changes to BIOS settings can lead to system malfunction. We recommend making any changes to BIOS mode under professional supervision to avoid risks.
That’s everything covered on how to fix Valorant ‘Error Code Van9003’ on Windows 11. Since changing BIOS can lead to BSOD errors like the ‘Trusted Platform Module has malfunctioned’ error on your Windows 11 desktop or a Dump file creation error on your Windows 11 desktop, our guide for the same will help you out.