If you are using Windows 11 or Windows 10 operating system, you may have noticed that it downloads the Windows Updates every now and then without your information and slows down the Internet speed. This feature of automatically installing the update whenever you try to shut down your PC irritates most users. And hence, if you want to disable this function, you have come to the right place. In this guide, we will tell you how to turn off or disable automatic updates in Windows 11 or Windows 10 in detail below.
Windows 10/11: How to Turn Off or Disable Automatic Updates (2023)
There are various solutions to turn off or disable Automatic Updates in Windows 10 or Windows 11, the procedure for both OS is the same. You can either try to Pause the Windows Update for 7 days or else Disable it permanently by going into the Services option. Below, you will find both methods to eliminate the problem you are facing with Windows Update.
Pause Windows Update for 7 Days
- First, click on the Start menu.
- Then click on Settings.
- In the new window, click on Update & Security.
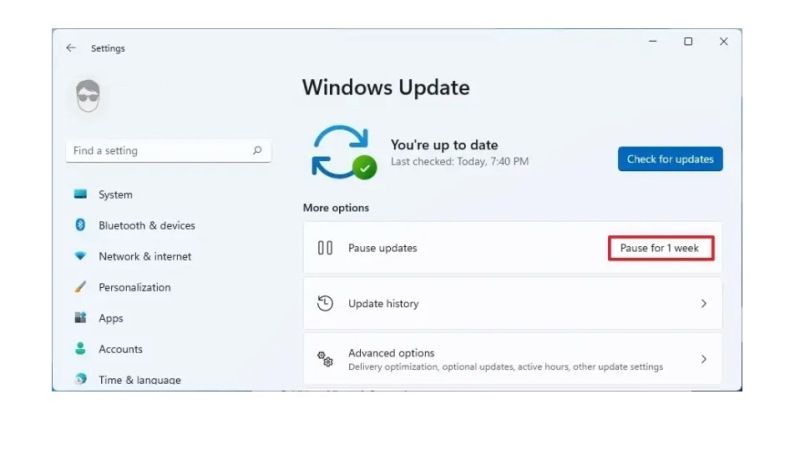
- On the top left pane, select Windows Update.
- On the right side, click on the “Pause updates for 7 days” option to turn off automatic updates for one week.
- If you want to turn them on again, you have to do that manually by clicking on the Resume updates option.
- That’s it, in this way you can pause automatic updates for a few days as per your liking.
Disable Automatic Updates Permanently
- In the Search bar, type Run.
- From the top list, click on Run to open it.
- Under the Run dialog box, type “services.msc” without quotes and press Enter key.
- A new Services window will open.
- Go to the bottom and select Windows Update.
- Right-click on Windows Update and select Properties.
- Choose the option of Disabled from the Startup type drop-down menu.
- After that click Stop in the Service status.
- That’s it, you have now disabled Automatic Windows Updates permanently.
That is all you need to know about how to turn off or disable Automatic Updates in Windows 10 or Windows 11. If you are looking for more Windows 11/10 Tips and Tricks, check out our other guides only on TechNClub.com: How to fix “Total Identified Windows Installations: 0” Error, and How to fix Microsoft Windows Search Filter Host High CPU Usage.