There are two major reasons why users would like to send their photos from an iPhone to their Mac. First, the limited amount of storage they get on their iPhones, and second, to edit their photos on their Mac. Your Mac can help you save a lot of space on your iPhone if you import your photos to your computer. Once you get all your iPhone photos to your Mac, you can delete them from your smartphone. Also, editing photos on a Mac is much better than iPhone. So, in this guide, we will explain how to transfer photos from iPhone to macOS Monterey.
Transfer Photos from iPhone to macOS Monterey
There are many ways in which you can move photos from your iPhone to your Mac and we have mentioned them below:
Method 1: Send Photos from iPhone to Mac with Photos App
- Connect your iPhone and Mac with a USB cable (Apple’s Lightning jack cable is most suited for the purpose).
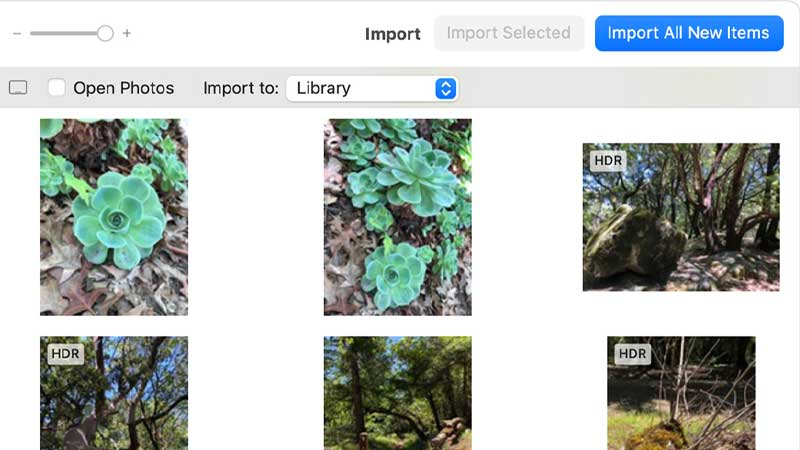
- Open the Photos app on your Mac.
- If you see a prompt on your iPhone that asks if you trust the connected computer, tap ‘Trust’.
- Select Import > Import All New Photos/Items. You can also select photos individually and click ‘Import Selected’.
Note: You can also transfer videos from your iPhone to your Mac with the same steps as above.
Method 2: Import iPhone Images in macOS Monterey with Image Capture
- Connect your iPhone and Mac with a USB cable.
- Tap ‘Trust’ on your iPhone if and when prompted.
- Press ‘Command + Spacebar’ shortcut keys.
- Type ‘Image Capture’ in the search bar.
- Open the first search result.
- Click on your iPhone’s name from the left pane.
- Click and drag the ends of the Image Capture window to enlarge it. This will enable you to see your iPhone’s photos on your Mac.
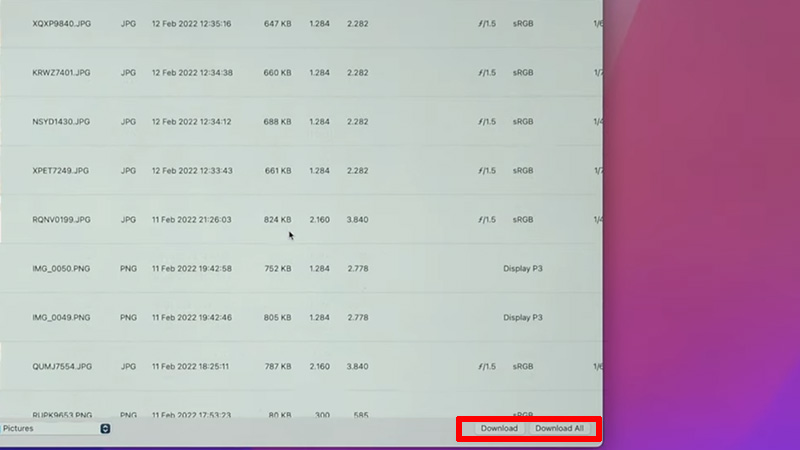
- Select the photos/videos that you need to download on your Mac.
- Click ‘Download’ to get the selected photos or click ‘Download All’ to get all the photos on your Mac.
This will transfer all the selected photos/videos from your iPhone to your Mac.
Method 3: Download iPhone Photos from iCloud to macOS Monterey
- Open the Settings app on your iPhone.
- Tap (Your Name) > iCloud > Photos.
- Here, turn on the toggle bar for ‘iCloud Photos’.
- Open the Apple Menu on your Mac.
- Go to System Preferences > iCloud.
- Login using your Apple ID.
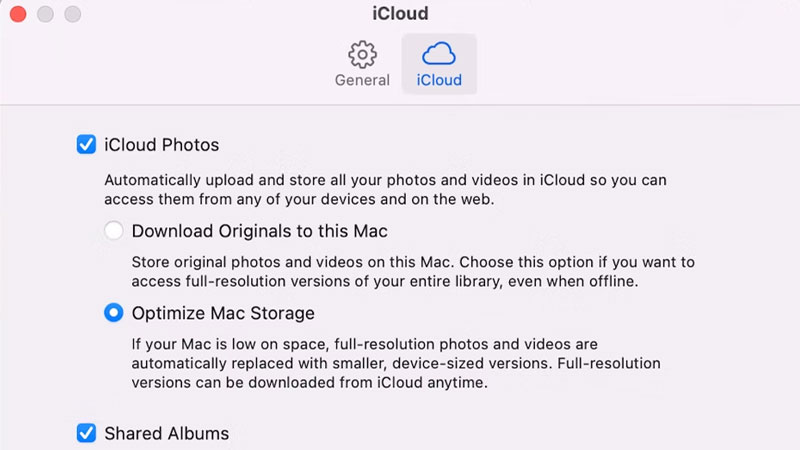
- Select ‘Options’ near ‘Photos’.
- Now, turn on ‘iCloud Photos’.
This will sync the photos from your iPhone to your Mac via the iCloud app. Open the Photos app on your Mac to see the photos that your Mac received from your iPhone.
Use Cloud Storage App to Transfer Files from iPhone to Mac
Just like iCloud, there are plenty of useful cloud storage apps that you can use to transfer your photos from iPhone to Mac. Check out the Best Cloud Storage app for macOS Monterey.
So, these are all the methods that you may use to get the photos from your iPhone to your Mac. Try the method that suits you the best and you can share photos easily from an iPhone to macOS Monterey. Now, why don’t you try Syncing Your Contacts from iPhone to Mac? You can also Stream iPhone Images/Videos on Your Mac.