Among the various qualities of the iPhone, there is certainly the high quality of the photos and videos that can be shot from an iOS device. If you have filled your iPhone with GBs of memory with photos, it can possibly compromise the proper functioning of the device. So, to clean the iPhone memory without losing anything, the best practice is to transfer and save files somewhere else, for example on our PC or on a cloud. In that sense, I will explain how you can get your photos from iPhone to the computer in a few simple steps.
How to Transfer Photos from iPhone to Computer in 2023
In this article, we will see how to transfer photos from your iPhone to PC by examining various methods given below. It is useful for those who do not want or could download iTunes, perhaps because they bought the iPhone abroad or because the PC is equipped with a system that does not support it, or because the features of iTunes do not meet your specific needs.
Method 1: Transfer photos via Cable from iPhone to PC
The first method to copy the photos from your iPhone to the PC is via a physical connection, that is via USB cable. It will be necessary to have installed iTunes for PC. Follow the steps given below to get photos from iPhone to computer:
- On your Windows 10 PC, connect the iPhone to your computer with the USB cable.
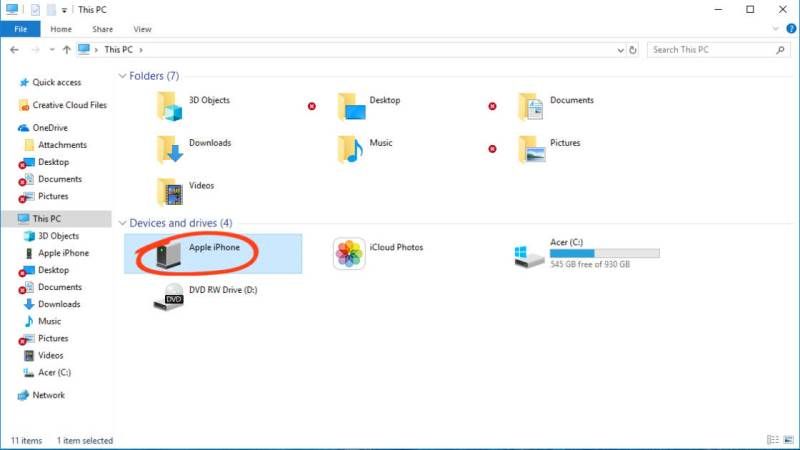
- Go to File Explorer and then click on This PC to access the internal memory of your iPhone device.
- You will then have access to the contents of your smartphone directly from your computer.
- By selecting the iPhone from the list of Devices and drives, you can access the internal memory by clicking on Internal Storage.
- The photos will be located in a subfolder named DCIM.
- From this folder, you can individually select the photos to copy or transfer to your PC. Alternatively, by right-clicking on the Apple icon and selecting Import images and videos, by doing so, you can move all the contents in the folder in just one click.
- That’s it, in this way you have now transferred your iPhone photos to your computer.
Method 2: Transfer photos from iPhone to PC via iCloud
In the above method, you have seen how to get photos from iPhone to PC via USB cable. Here we will now use virtual storage, which allows us to save photos by not occupying the memory of the iPhone or even the PC. Apple devices are equipped with a rather useful feature: when connected to a WiFi network, they automatically connect to virtual storage space, called iCloud. Here are the steps:
- You need to first activate the iCloud on the iPhone: from the Settings, select the Apple ID and identify yourself by entering the credentials of the Apple account connected to the device.
- Once logged in, you can select iCloud from the general menu.
- For the synchronization of smartphones and PCs, it is necessary that the two devices are connected to the same WiFi network.
- Once you have activated sharing on the phone side, proceed by activating it also on the target device.
- First, you download the iCloud client, available for different operating systems and different versions of the same.
- After installing the client, open the program and log in with the same credentials used for the iPhone.
- Since you have connected the two devices, you will now be able to access the Photos folder on the phone, and transfer, copy, save and move all the contents you want on your computer.
That is everything you need to know about how to get photos from iPhone to the computer. For more Tips and Tricks around iPhone, check out our other guides on How to Draw on a Photo on iPhone 13, and How to Hide Unwanted Photos in Memories on iPhone 13.