It gets very annoying when our PC slows down when we need it the most. Do you know why our computer lacks performance at any moment? Well, this happens because of the constant updates that Windows 10 performs, without asking for the user’s approval. If you are not aware of how to stop these countless processes carried out on your PC and if you are looking for a method to block Windows 10 updates, do not worry, as we have got you covered. In this guide, we will discuss how to stop automatic updates on Windows 10.
Steps to Stop Automatic Updates on Windows 10 (2022)

Windows 10 operating system has a very specific purpose in presenting automatic updates, the reason is to be well attributed to security problems. The updates, in fact, guarantee greater security of your PC and stability that would be lost without an updated computer. Having said that, on a few occasions it may happen that you want to disable some functions due to a performance issue or an update problem disclosed.
In this regard, here’s a tutorial that will allow you to block Windows 10 updates, but only those relating to stability and security, in fact, you will not block Windows version updates.
Method 1:
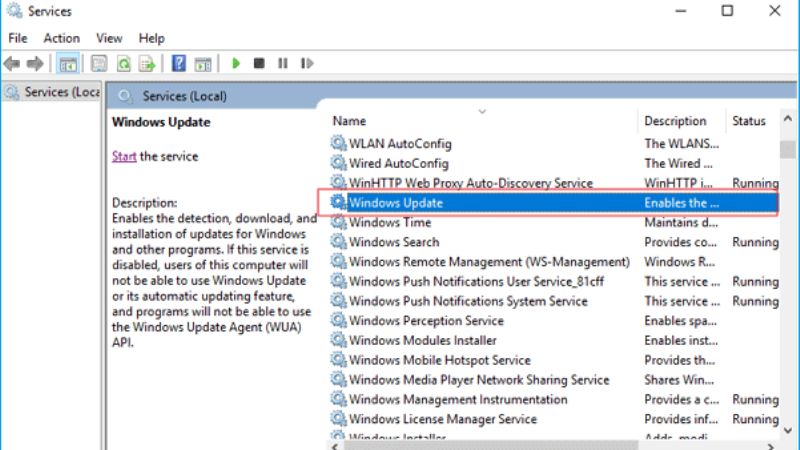
The first method involves the Windows 1 Home version, which through the System Services will stop the Windows Update activity. After the service is disabled, you have to make sure that it is not automatically restored.
- First, press Windows + R keys together on your keyboard.
- Type services.msc in the Run command then press OK.
- In the list of services, search alphabetically for Windows Update.
- Right-click and select Properties.
- Go to Startup Type and select Disabled.
- Stop the Service status, in case it is running.
- Go to the Recovery tab.
- Make sure that No action is selected under First failure, Second failure, and Subsequent failure.
- Enter 9999 in “Reset fail count after”.
- Click Apply and then OK.
Method 2:
For the second method, if you have not solved the problem with previous steps, you can take advantage of the Local Group Editor. In this way, your PC will notify you of the presence of any updates, but will not download and install any updates. Here are the steps.
- Press Windows + R keys together on your keyboard.
- Type gpedit.msc in the Run window upon exiting.
- Click OK.
- Look for the entry Computer configuration.
- Double click on Administrative Templates.
- Select Windows Components.
- Search and click on Windows Update.
- Click on Configure Automatic Updates.
- On the left, select Enabled.
- Navigate below Configure automatic update.
- Select Notification for Download and Automatic Installation/Notification for Download and Installation.
- Finally, click OK to turn on the notification for Windows Update on your PC.
That is everything you need to know about how to stop automatic updates on Windows 10. In the meantime, do not forget to check out our other guides on How to Use DISM Command Tool to Repair Windows 10 Image, and How to Get Admin Privileges on Windows 10 with Razer Mouse or Keyboard.
