When you connect a printer to your Windows 11 desktop a new printer driver is installed on your PC automatically. You may have used the printer just once on your device, but the Printer Driver remains on your device. Also, there might be instances where the driver may get corrupted, and you might need to install the driver freshly again. In such cases, you can remove the printer driver on your Windows 11 desktop with the help of this guide.
Windows 11: How to Remove Printer Driver (2023)
You can remove the Printer Driver on your Windows 11 desktop by following these workarounds:
1. Remove the Printer Driver from the Settings
The quickest way to remove a printer driver is through the Settings app, and you can do it by following these steps:
- Open the Settings window by pressing the ‘Windows’ + ‘I’ keys on your keyboard and select the ‘Bluetooth & Devices’ tab.
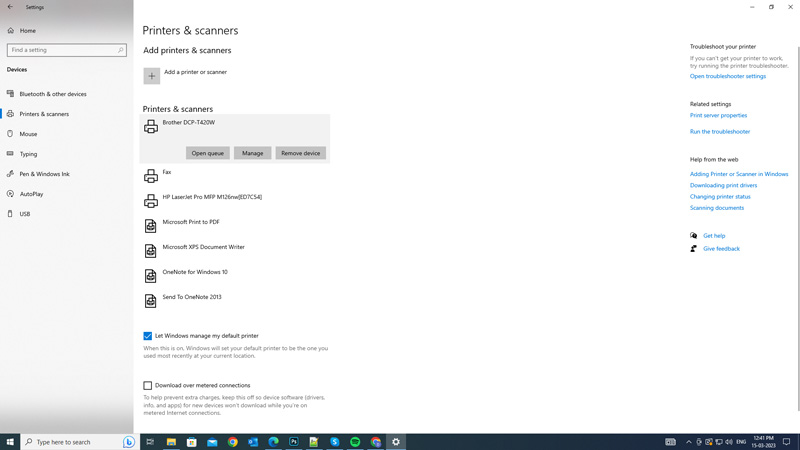
- Now click the ‘Printers & Scanners’ tab from the left panel of the Devices settings window.
- Click the printer driver you want to remove, then click the ‘Remove’ button.
- If the confirmation prompt appears, click the ‘Yes’ button to remove the printer driver from your device.
2. Remove the Printer Driver using Control Panel
Another way you can delete the printer driver on your PC is from the Control Panel, and you can do this by following these steps:
- First, open the Control Panel by searching it on the Start menu Search box. You can also open it from the Run dialog box by first pressing the ‘Windows’ + ‘R’ keys on your keyboard and typing Control Panel on the type field, then clicking the ‘OK’ button.
- Then, click the ‘View device and printer’ hyperlink under the ‘Device and Hardware’ section.
- Here, click on the printer you want to remove and select the ‘Print server properties’ option.
- On the properties window, click the ‘Drivers’ tab and select the printer driver you want to remove.
- Then click the ‘Remove’ button and select the ‘Remove driver and driver package’ option on the new window.
- Finally, click the ‘OK’ button and restart your Windows 11 OS to delete the printer driver.
3. Use Windows PowerShell to remove the Printer Driver
You can uninstall a printer driver using Windows PowerShell by following these steps:
- Open the Windows PowerShell from the Start menu Search box as administrator and type the following command:
Get-PrinterDriver | Format-List Name
- Press the ‘Enter’ key on your keyboard, and the list of all the Printer Drivers installed on your PC will appear on your screen.
- Then type in the following command on your Windows PowerShell to uninstall the driver:
Remove-PrinterDriver -Name “Your-Printer-Name”
- Note that, in the above command, you will need to type the printer name you want to uninstall in place of the “Your-Printer-Name” command. Also, the quotes are necessary if your printer name has space in it. For example;
- If your printer name is HP Inkjet 419, you will need to type:
Remove-PrinterDriver -Name “HP Inkjet 419”
-
- And press the ‘Enter’ key on your keyboard to uninstall the printer.
That’s everything covered on how to remove the Printer Driver on Windows 11. Also, check out our other guides, such as How to fix Printer Spooler not working error on Windows 11 or How to update Printer Drivers on Windows 10.