After years of saving photos, videos and different files on your Mac, its SSD getting damaged is the last thing you would want, right? No matter who the user is, a damaged SSD is a nightmare for everyone since recovering the data can be a bit tricky for many users. But to help you in this case, we have prepared a guide on how to recover data from a damaged Mac SSD below.
NOTE: Recovering data from an old Mac is much easier than a new Mac due to the upgrades Apple made in recent years. But the methods to recover data from damaged Mac SSD that we mentioned are universal and can be used with any Mac version to get the best possible results.
Ways to Recover Files or Data from Damaged Mac SSD
Restoring data files from a corrupted or broken Mac SSD is an easy task if you follow the methods described below:
Method 1: Use Disk Utility to Repair Corrupt SSD on Mac
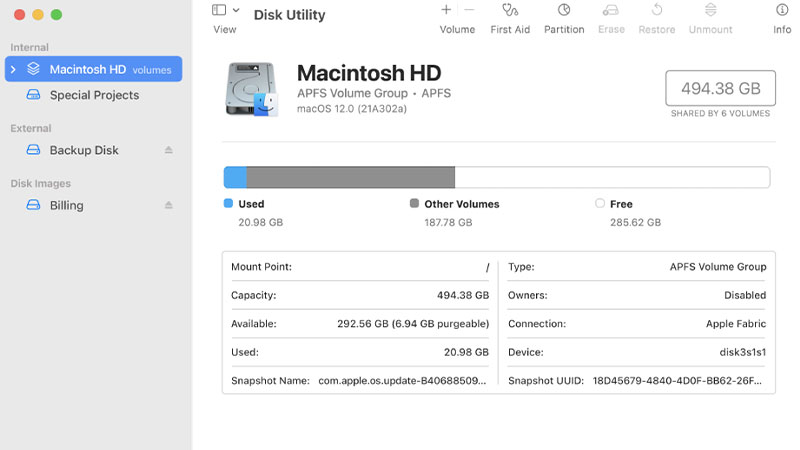
Most of the Mac laptops and computers use either APFS or HFS+ format file systems. So if the SSD on your device has not been completely damaged, repairing them using Disk Utility can be helpful. Follow these steps:
- Go to Finder > Application > Utilities.
- Double-click Disk Utility.
- Select the SSD that you need to repair from the sidebar.
- Select First Aid > Run.
The above-mentioned steps are to be used for external SSDs. For internal SSD, follow the below steps:
- Reboot your Mac computer or laptop.
- When your MacBook is booting, press and hold the ‘Command + R’
- Stop when you see the Apple logo. This is the MacOS recovery mode.
- Select Disk Utility > Continue.
- Next, follow the same process given as in steps 3 and 4 for the external SSD above.
If your SSD is beyond repair, your Mac system will inform you about it, otherwise, it will be repaired and then you do not have to worry about your data anymore. Try the next method if these steps did not work for you.
Method 2: Repair Corrupt SSD on Mac with the Terminal App
The terminal app may fix those SSDs that even Disk Utility cannot. It is a powerful tool provided by Apple. Here are the steps to use the Terminal:
- (External SSD) Go to Finder > Applications > Utilities.
- Double-click on ‘Terminal’.
OR
- (Internal SSD) Launch the MacOS recovery mode.
- Go to Utilities > Terminal.
- Type ‘diskutil list’ and press the ‘Return’ or ‘Enter’ Make a note of the identifier of the SSD.
- Next, type ‘diskutil verifyVolume SSD_ID’ and press the ‘Return’
- Use ‘/’ as the identifier if your SSD is the startup disk. Otherwise, use the same identifier that you copied earlier.
- If an error appears, type ‘diskutil repairVolume SSD_ID’, press the ‘Return’ key, and use the proper SSD identifier.
This method will most likely help you with the repairing process. If your Mac PC does not show any error, then your SSD is unrepairable. Try the next fix if this one did not complete the job.
Method 3: Use A Data Recovery Tool for Mac
If repairing the SSD on your Mac is not possible, the best thing you can do is use a recovery software that is developed by professionals. These tools are more likely to fetch the data for you from your damaged SSD on Mac. One such trusted tool is Disk Drill Pro Data Recovery Software for Mac. You can use this tool to recover data from a corrupted, broken, or damaged SD card.
Hopefully, one of these methods will help you to recover your files from a damaged SSD on Mac. Since recovering data from SDD on Mac can be a real trouble, we recommend you to always make a backup of your data. Go through our other posts on related topics – How To Back Up Photos To iCloud on iPad, and How to Transfer Files from Android to MacBook.