In our daily lives, we click a lot of Photos. We do this so that we can save the moment that we like cherishing. Those moments could be like a Birthday, an Achievement, a special day with your Loved ones, etc. But what happens if you lost your iPad? You will lose all of your precious photos along with other information. This can be avoided by simply backing up your Photos to a Cloud Storage System, i.e. iCloud for Apple products. But How do you go about Backing Up your Photos to iCloud? Don’t worry as the process to do this is pretty easy. In this guide, I will show you how to Back Up your Photos to iCloud on iPad.
How To Back Up Photos To iCloud on iPad
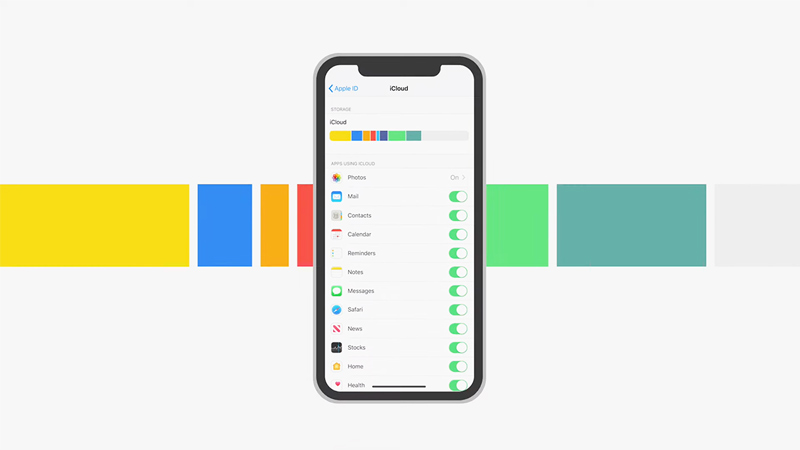
Like I have said before, backing up your Photos on iCloud is pretty easy. Here is what you will have to do. Take your iPad and go to the Settings Menu. Once your Settings Menu has opened up, click on your Name (Apple ID). This will open some additional options. If you scroll down enough, you will see iCloud, click on it. This will open up all Settings options for iCloud. Now at the very top, there should be a Photos option. Click it and it should open up all iCloud-related Settings for Photos on the iPad. Enable the iCloud Photos option and your Photos will get Backed Up periodically.
Below that option are some QOL settings you can enable. I would suggest you get a hands-on on them and understand what they do. For now, I recommend you enable Optimize iPad Storage. Now You will have 5 GB of free iCloud Storage. It is not enough to store all of your Photos. There is a way of expanding it but it comes at a premium.
This was all about Backing Up your Photos to iCloud on the iPad. Hopefully, this guide has helped you. You can also check our other guides like How To Backup IPhone 13 Pro.