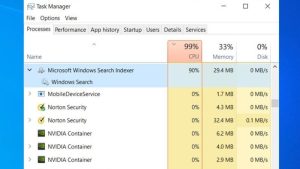
Once in a while, you may have noticed that your computer is taking a lot of time when you are performing anything on your desktop like moving your mouse and getting lagging issues, opening any applications taking a long time, etc. Then you suddenly check what is causing this issue in Task Manager and notice that the Windows Search Indexer process or SearchIndexer.exe is taking a lot of system resources. In this situation, do you start wondering whether killing this process will affect your PC? Worry not, because, in this guide, we will tell you how to fix Microsoft Windows Search Indexer high CPU usage issue in detail below.
Fix: Microsoft Windows Search Indexer High CPU Usage (2023)

There are various solutions to fix the Microsoft Windows Search Indexer high CPU usage. You can either try to restart the Windows Search Service or else run Search and Indexing Troubleshooter to get rid of this problem. Below you will find both methods to resolve the issue you are facing on your Windows PC.
How to Restart Windows Search Service
- First, in the Search box, type Run and open it from the top list.
- In the Run dialog box, type “services.msc” without quotes and press Enter key.
- A new Services window will pop up, here go to the bottom and click on Windows Search.
- Now you have to double-click on Windows Search.
- Under the Startup type drop-down menu, select the “Disabled” option.
- Under the Service status, press the Stop button.
- After that click Apply and then press the OK button.
- Next, restart your PC and then open the Windows Search service again.
- Again in the Startup type, select the drop-down menu.
- Finally, click the Start button and press the OK button. Now you can check that the SearchIndexer.exe is not utilizing high CPU.
How to Run Search and Indexing Troubleshooter
- First, click on the Start menu.
- Then click on Settings to open it.
- After that click on Update & Security option.
- On the left pane, select Troubleshoot.
- On the right side, click on the Additional troubleshooters link.
- In the new window that opens, click on Search and Indexing by scrolling down.
- Finally, click on the Run the troubleshooter button and follow the steps given on your screen to fix the high CPU usage issue caused by Microsoft Windows Search Indexer.
That is all you need to know about how to fix Microsoft Windows Search Indexer’s high CPU usage on your Windows PC. In the meantime, do not forget to check out our other guides only on TechNClub.com: How to fix Microsoft Windows Search Filter Host High CPU Usage, and What is SearchApp.exe and How to Disable It.
