
Microsoft Excel is a very powerful and reliable program that is used by companies and educational institutions alike. Learning advanced MS Excel is a little tough job, so many of its users are unaware of some hidden cool features that it provides and that can help them daily, one such feature is Freeze. In this guide, we’ll learn how you can Freeze Rows and Columns in Microsoft Excel on Windows 10.
Microsoft Excel: How to Freeze Rows and Columns
Freeze is pretty much what it sounds like. Freezing a Row or a Column in Microsoft Excel will allow you to see those Rows and Columns even when you have scrolled down or sideways. It helps you when you are comparing data and you don’t want to scroll up and down with every point. Below you’ll see how you can freeze Rows, Columns, and both at once in Microsoft Excel:
How to Freeze Rows and Columns
- Search and open your Microsoft Excel and type the information you are planning to freeze.
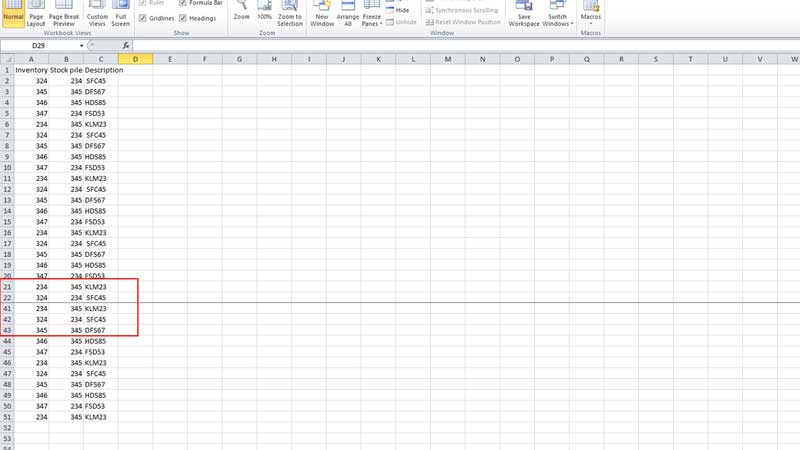
- Choose the blank row beside your information or the row above which data for freezing is entered.
- To be precise, if you are aiming to Freeze Rows of 1 to 20 numbers you’ll need to choose the 21st row by clicking on the left side number of the row.
- If you are aiming to Freeze 1 to 5 Columns, you’ll need to choose the 6th Column.
- Now on the upper part of your window you’ll see several panel options, choose “View” and then select “Freeze Panes”, and again choose “Freeze Panes”.
- All the Rows and Columns above 21 have been frozen and they will follow you down and sideways while you are scrolling, like a sticky note.
How to Freeze Row
- Open your Excel sheet by searching from the Windows Search bar and then type your data.
- From the present panels, on the upper side of your screen choose “View”, then select “Freeze Panes” and choose “Freeze Top Row”.
- You can only freeze the top row which is your first row by using this option.
How to Freeze Column
- Go to your Excel sheet and enter the data, now choose the View option from the present panel and then choose “Freeze panes” and then “Freeze First Column”.
- This option only freezes your first column.
In this article, you have now learned how to freeze Rows and Columns in your Microsoft Excel on Windows 10, what it does and why it is a necessary function to know. Looking for more Excel Tips and Tricks, then check out our other guides on How to Resize All Rows and Columns in Microsoft Excel and Can You Transfer JSON To Excel?