The snipping tool lets you take a screenshot from your Windows screen and then save and use it later. Also, it has been improved with the new Windows 11 letting you record the screen and take a snap out of it. But, sometimes the snipping tool on Windows stops working, or crashes down, and you would want to figure out how to fix it. So, here are six simple ways that you can try to fix the Snipping Tool crashing on Windows 11.
Six Ways To Fix Snipping Tool Crashing On Windows 11
With the Windows 11 update, the Sniping tool can be used using shortcut keys from the keyboard. The shortcut to take the snap is Windows Key + Shift + S. This allows you to take a screenshot of a particular part of the screen or the entire screen. But, with the update some users have faced the crashing issue. Now, there could be many reasons for the crashing of the Snipping tool. It could be due to outdated graphics, some system boot errors, or more. Thus, below are the six fixes that you can try to use the Snipping Tool back on your Windows 11.
Enable Background App Permissions
Sometimes, due to no permissions for the app to run in the background, the Snipping Tool might crash. To check and enable this feature on your Windows 11, follow the below-given steps:
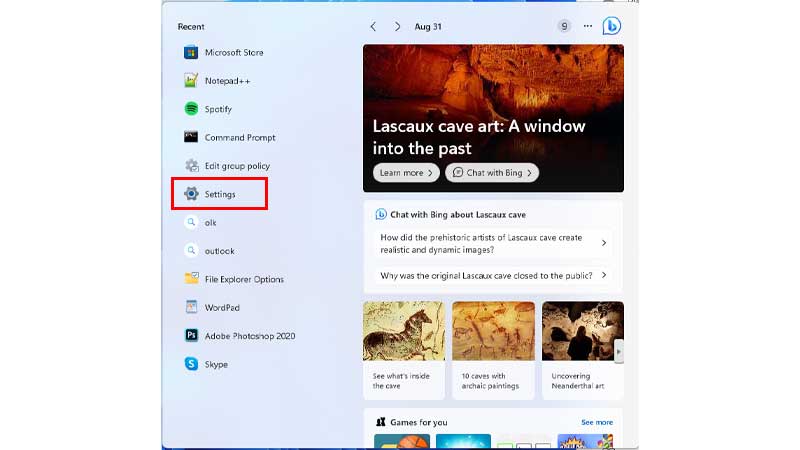
- On your Windows, go to Settings.
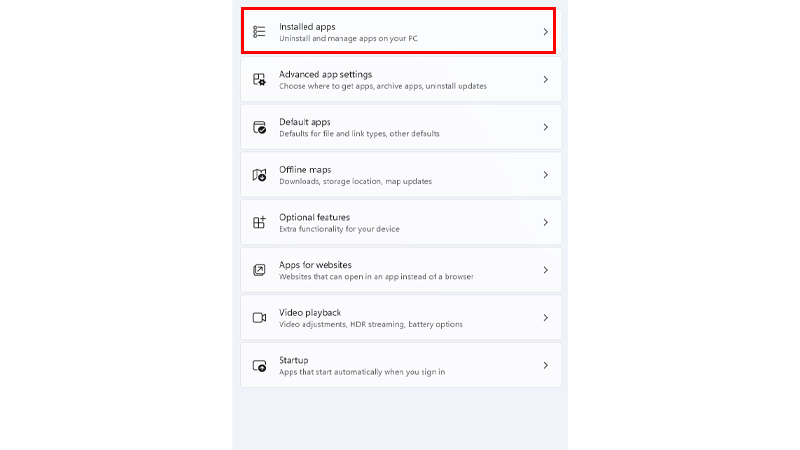
- Now, click on Apps, and then go to Installed Apps.
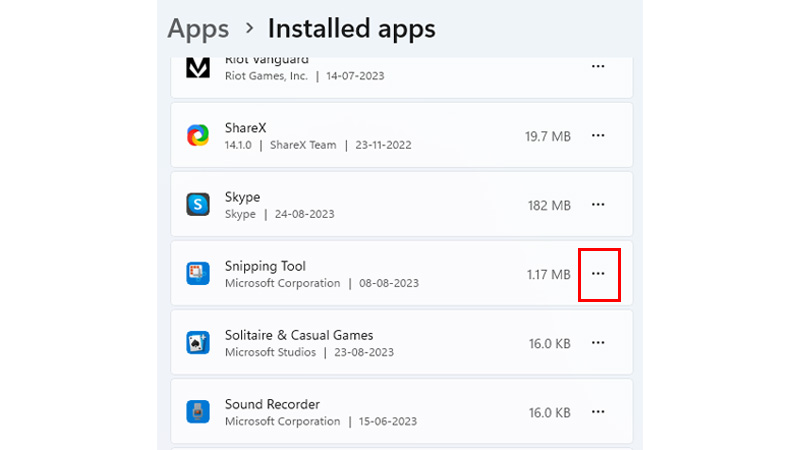
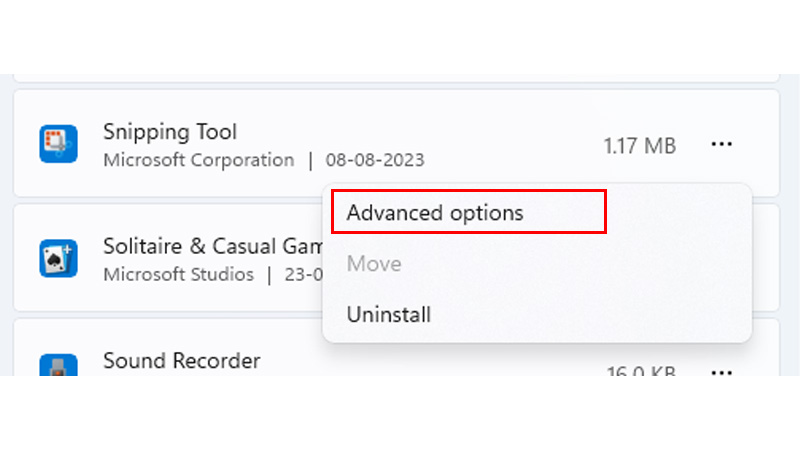
- Then, find Snipping Tool from the list, and click on the three dots beside the app.
- Now, click on Advanced Options.
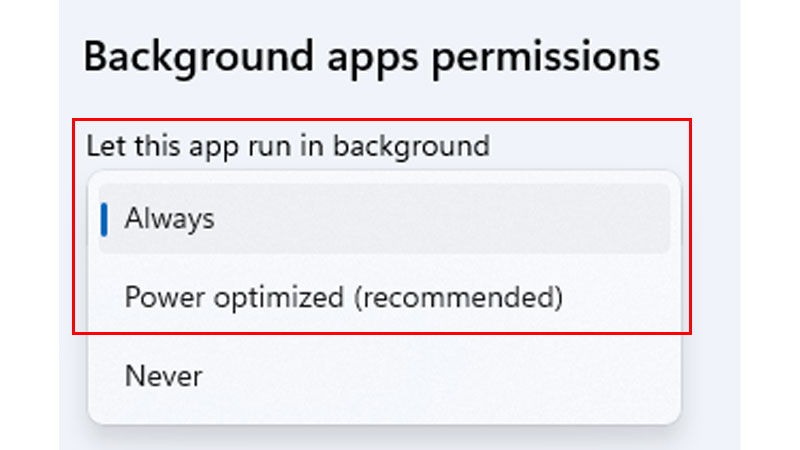
- Then, go to Background Apps Permissions.
- From the options, either click on Always or Power Optimized (recommended) option.
- Finally, save the settings and exit.
Thus, now you can check if your Snipping tool is running properly on your system. If not, try the other solutions as explained below.
Perform Clean Boot On The System
To perform the clean boot on your system, follow the below-given steps:
- On your Windows, press Windows Key and R together.
- Then, enter “msconfig” in the run command. Click Enter.

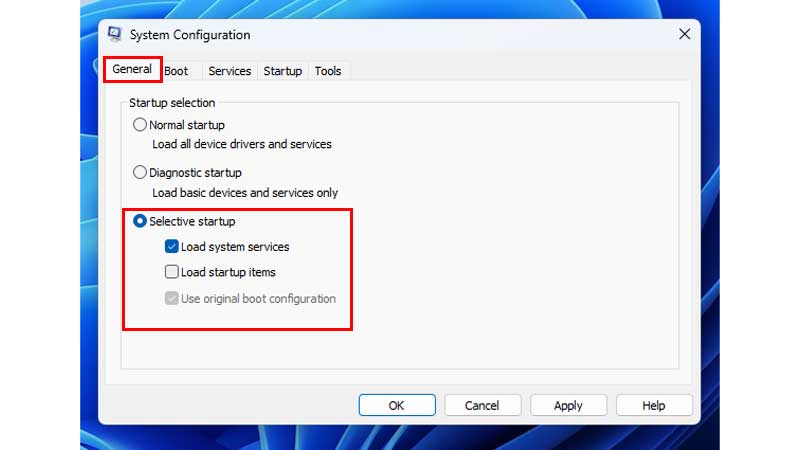
- Now, from the General option click on the Selective Startup. From the options, only check mark the Load System Services option.
- Now, click on the Services option at the top.
- Then, on your screen, click on the Hide All Microsoft Services option in the bottom-left corner.
- Now, click on the Disable All option.
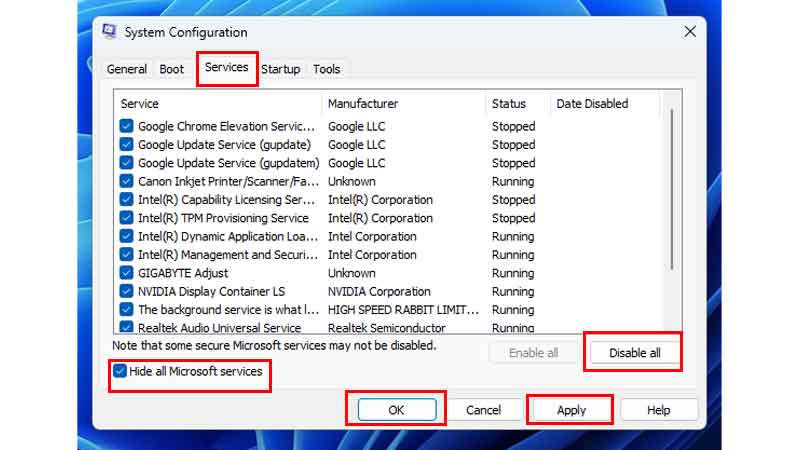
- Finally, click on Apply and then OK. Restart your Windows after this.
Thus, your system has now been clean boot and all the third-party services have been disabled from Windows to run the snipping tool smoothly on your PC. The clean boot option does not delete the data on your Windows, it just temporarily disables the services other than Microsoft to check which one of them was stopping your PC from working. Now, you can check if your Snipping tool is working or not, and if not you can check the other solutions given further.
Run SFC And DISM Commands
Another reason for the Windows App not working could be the corrupted files on the system. If this is the case, follow the steps as explained below to run the SFC and DISM commands to check and repair those corrupted files:
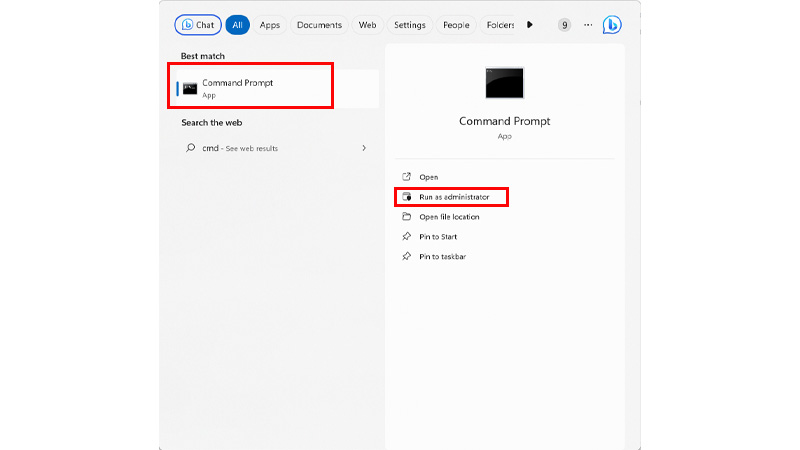
- On your Windows Search Bar, search for cmd or Command Prompt.
- Now, right-click and click on the Run As Administrator option.
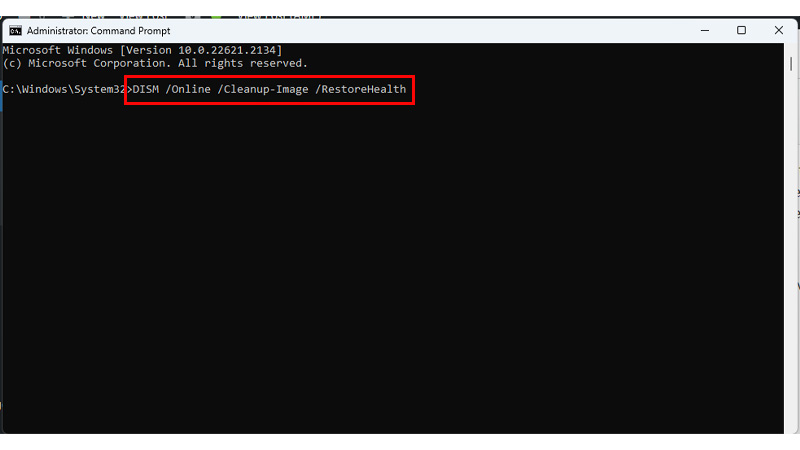
- Then, type in the command – DISM /Online /Cleanup-Image /RestoreHealth on the screen.
- Now, click Enter and Run the command.
- After this is done, type in another command – sfc/ scannow, and hit Enter.
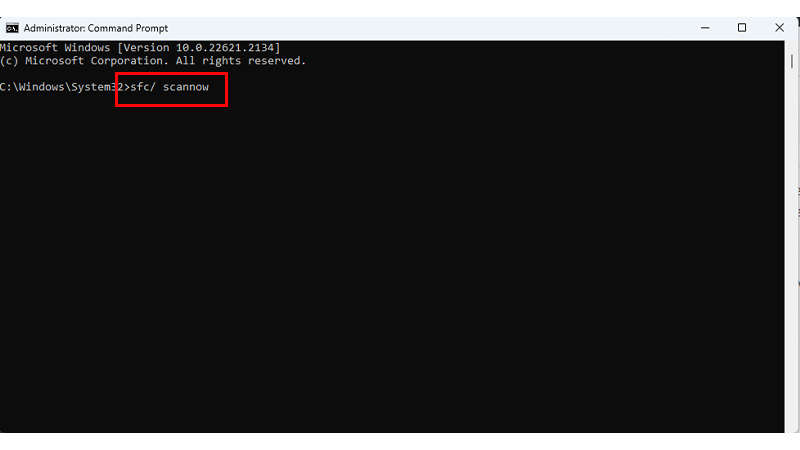
- Now, after the scan for corrupted files is completed, Restart your system.
- Finally, check if your Snipping Tool is working or not.
Thus, you can now use your Snipping tool. If you still cannot use the tool, try the other ways to fix the error.
Reset/Repair Snipping Tool
Another way to fix your Snipping tool is by resetting or repairing the tool. Now, to repair/reset the app, follow these steps:
- On your Windows, go to Settings and click on Apps section from it.
- Now, go to the Installed Apps section and click on it.

- Then, from the apps, find the Snipping Tool app.
- Now, from the right side of the app, click on three dots, and then click on the Advanced Settings option.

- Then, scroll down and find the Repair and Reset option for the app.
- Then, click on the Repair option first, and let the repair complete.
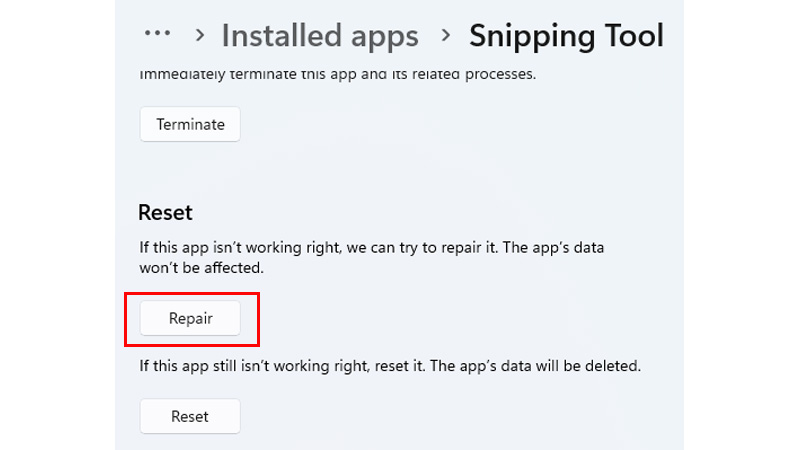
- After the repair has been done, a right tick mark will appear beside the Repair option.
- Now, Restart your PC and try to run your Snipping Tool app.
- If the app still does not work, go back to Settings.
- Then, click on the Reset option, which will reset the app and delete all your previous data.
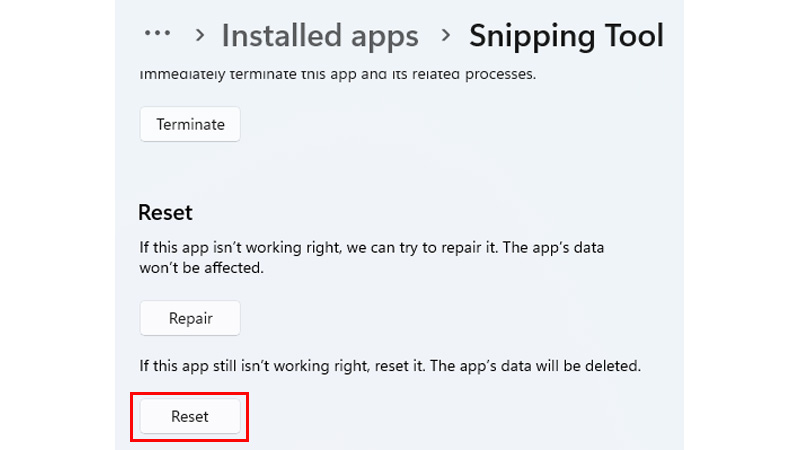
- Finally, after the Reset has been completed, relaunch the app and check if it works now.
Thus, this will now fix the issue of the Snipping tool crashing error on your Windows 11. If not, try the last two ways that you can try and fix the error.
Reinstall Snipping Tool
After trying the above repair and reset method, if still the app cannot run, you can try reinstalling the app on your Desktop. To do so, follow the steps given below:
- First, on your Windows, go to Settings, and click on Apps.
- Now, click on the Installed Apps option.
- From the list of the Apps, search for Snipping Tool and click on the three dots on the right side of the app.
- Now, click on the Uninstall option.
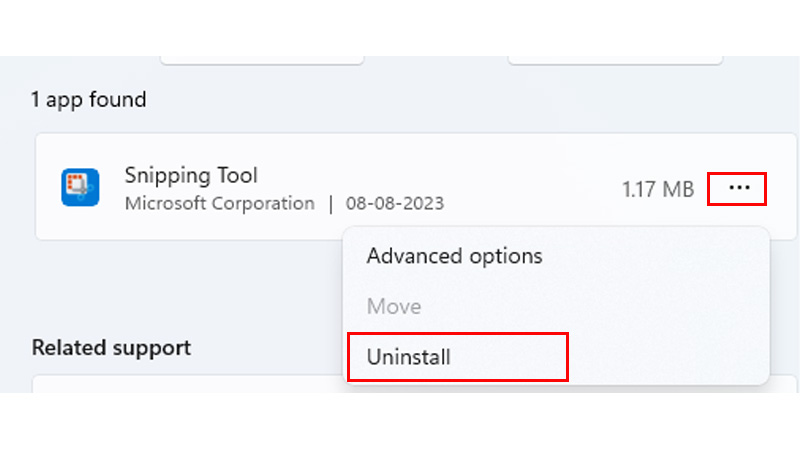
- This will uninstall the app from your PC. Now, Restart your Windows, and all the remains of the app will be removed from the system.
- Now, to reinstall the app, open the Microsoft Store from the Windows Search Bar, or the Taskbar.
- Then, search for Snipping Tool or Snip and Sketch on the search option.
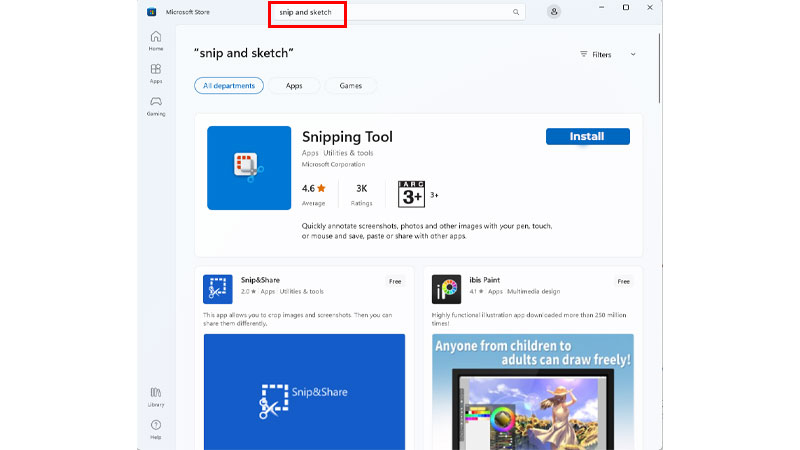
- From the apps, click on the Snipping Tool app. Then, click on the Get or Install option from there.
- Finally, install the app on your system.
Thus, after the app has been reinstalled, run the app and see if it is working well on your Windows 11. If not, there is one last fix that you can try to solve the issue of crashing down the Snipping Tool App on your system.
Update Graphics Driver
The last way to fix the issue of the snipping tool crashing on your Windows 11 can be done by updating the Graphics Driver. Now, to update the Graphics Drivers on your system, follow the below-given steps:
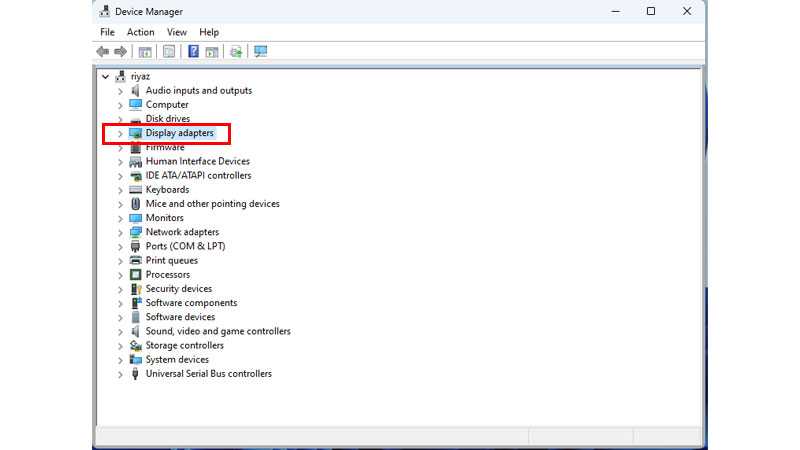
- First, on your screen, right-click on the Start Menu.
- Then from the options, click on Device Manager.
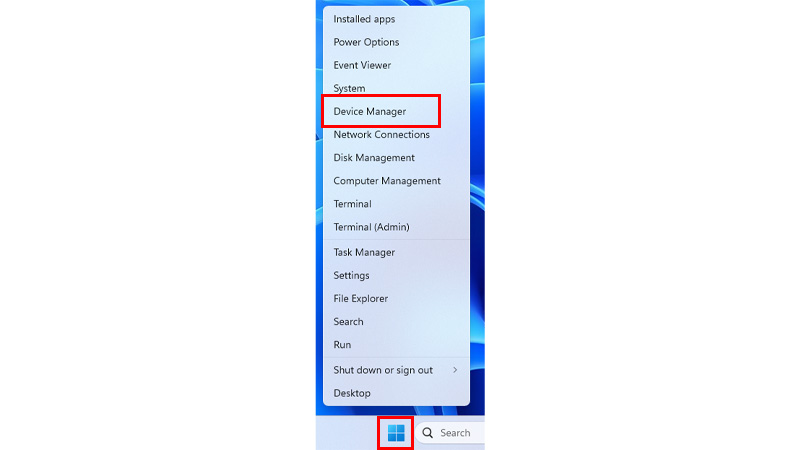
- Now, double-click on Display Adapters and select your Graphics Driver.
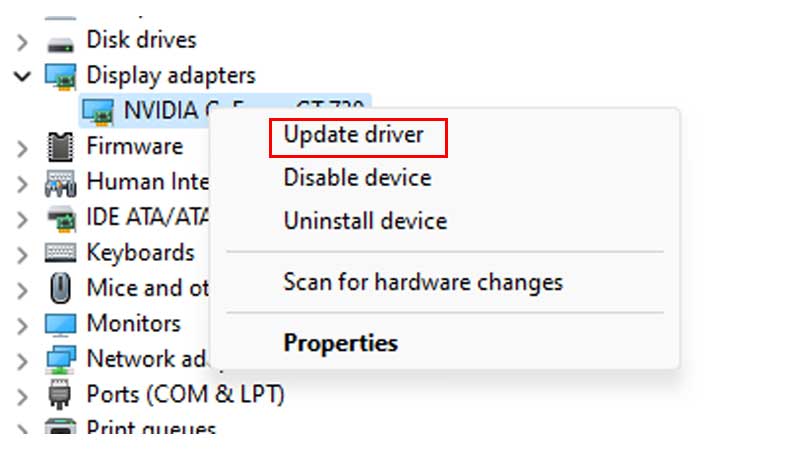
- Then, right-click on the Graphics Driver, and select the Update Driver option.
- Now, from the screen, click on Search Automatically for Drivers option.
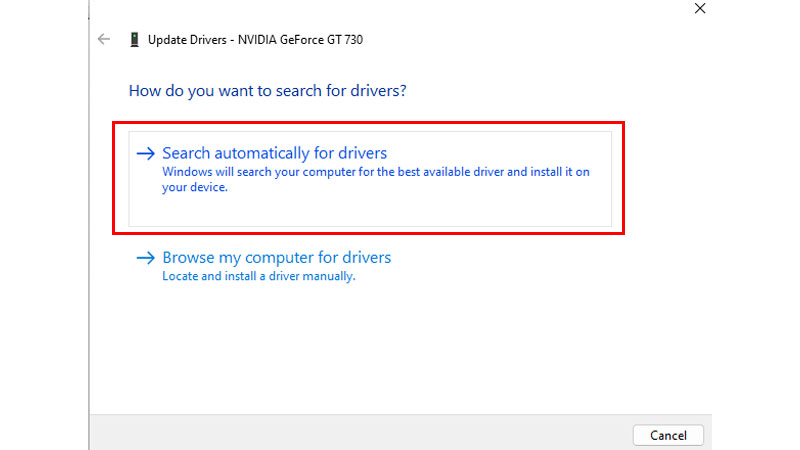
- Finally, if the update for your driver is available, you will be prompted for the update and then you can Restart your Windows to see if the Snipping tool works or not.
These were the six simple fixes that you can try to get back your snipping tool on Windows 11. Also, if these fixes do not work, you can try to update your Windows or just restart to see if the issue has been fixed. Now, to learn more about such Windows 11 fixes, refer to these guides – Remove Authenticator App For Windows 11 or Turn Off ToucScreen On Windows 11.