
AirTag helps you track your belongings using the Find My app on your iPhone. However, sometimes you may lose connection with your AirTag and need to reconnect it. There are many reasons why your AirTag won’t connect to your iPhone. Fortunately, there are a few fixes that you can try to reconnect your AirTag and this guide will help you with it.
Fix: AirTag Not Connecting with iPhone
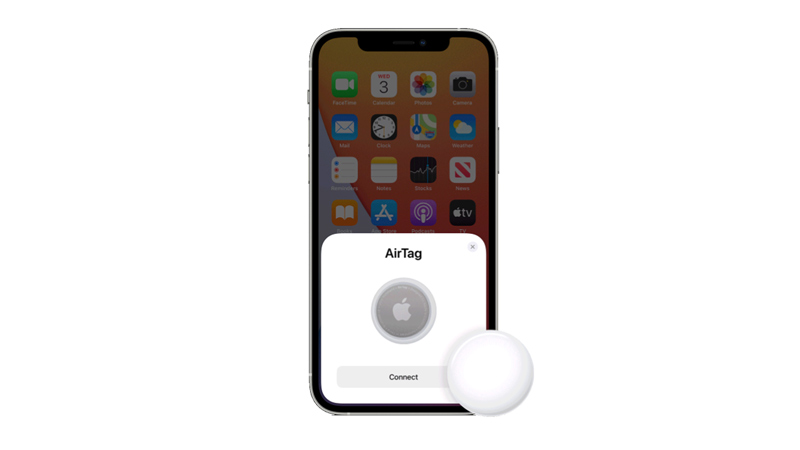
Out of Bluetooth network, low battery, or software issues might be the few reasons why your AirTag might not connect to your iPhone. However, you can reconnect your AirTag by following these steps:
1. Check Bluetooth Range
Make sure that your AirTag is within Bluetooth range of your device. The Bluetooth range varies depending on the environment, but it is usually around 10 meters or 30 feet. If your AirTag is out of range, you will see a message saying “No Signal” in the Find My app. Try bringing your AirTag closer to your iPhone and see if it reconnects.
2. Check the AirTag Battery
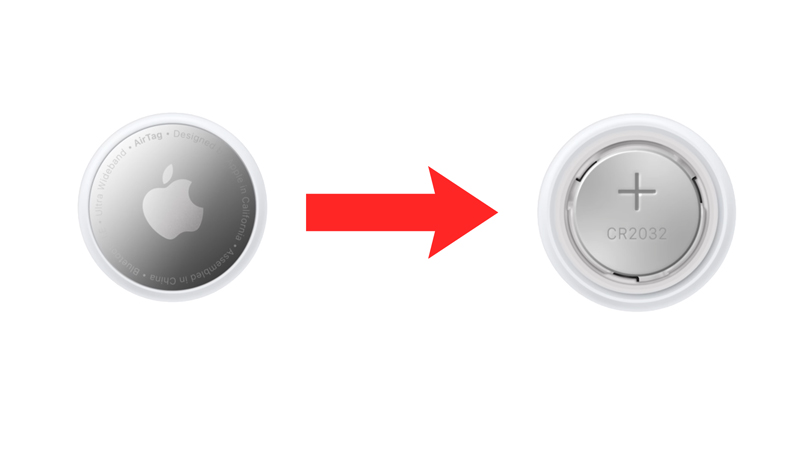
If the AirTag’s battery is low you might face the issues while connecting to it. Hence, to check the battery level, follow these steps:
- Open the Find My app and go to the ‘Items’ tab.
- Then tap on your AirTag from the list and see if a “low battery” or “replace battery” message appears on your screen. If your AirTag battery is low, you will need to replace it.
- To replace the battery, gently press and twist the back cover of the AirTag counterclockwise until it pops off.
- Then, remove the old battery and insert a new CR2032 battery with the positive side facing up.
- Finally, align the three tabs on the back cover with the slots on the AirTag and twist clockwise until it clicks.
3. Reset AirTag
If none of the above methods work, you will need to reset your AirTag and try reconnecting to your iPhone, you can do it by following these steps:
- Press and rotate the back cover of your AirTag which is the stainless steel side counterclockwise until it stops rotating.
- Now remove the cover and replace the battery of your AirTag with the new one.
- Then press down the battery until you hear a sound and repeat the steps four times.
- When you put the battery for the last time you should hear the fifth sound differently. This indicates that your AirTag is reset, and it is ready to pair.
- Now try activating your AirTag with your iPhone again to fix the issue.
That’s everything covered on how to fix AirTag not connecting to iPhone. Also, check out our other guides, such as How to fix AirTag sound alert issue or How to see AirTag on iPhone.