Macs are an Essential Tool for many people to do a plethora of things. You can perform many tasks on one entity or perform multiple tasks on a single entity. As being a crucial tool for many users, keeping it organized is key. So, sorting your Files becomes one of your tasks in organizing your Mac. One way of doing it is by finding the Largest Documents and saving them elsewhere. In this guide, I will show you how to Find the Largest Documents on your Mac.
How to Find the Largest Documents on your Mac

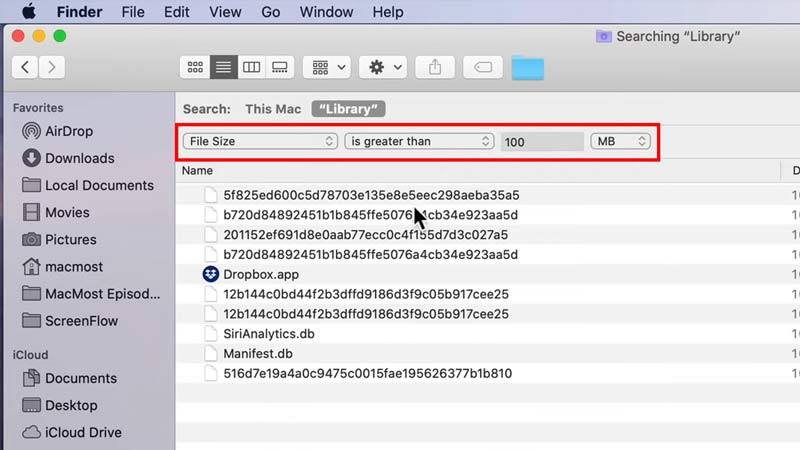
The Largest Documents on your Mac can be easily found on your Mac with the help of Finder. If you want to find any large file then open up Finder and select the Folder that you want to search in. Once you have that Folder open, perform the following steps.
- On your Finder, Press the Command + F Key.
- This will open up a Search Menu.
- Now in it, select “File Size” in the first parameter, “is greater than” in the second parameter, & “100 MB” in the third parameter.
- This will search all of the Files with a size greater than 100 MB.
- Now, Click on the Size column such that the arrow is pointing downwards.
- This sorts all of the Searched Files in descending order of their Size.
- The topmost File after the sort is your Largest Document.
- Perform this in any Folder to find the Largest Document there.
- If you want to find the Largest Documents on your Mac from all folders then click on the Apple Logo on the Top left corner of the screen.
- After that, click on About this Mac.
- Now click on Storage & then click on Manage… on the Macintosh HD.
- This will open up the Macintosh HD and display all of your Documents.
- Select the type of Document you want to search by clicking on the Tabs at the side.
- Sort the Documents in the descending order of their File Size.
This was all about how to Find the Largest Documents on your Mac. Hopefully, this guide has helped you. You can also check out our other guides like How To Get Rid Of Yahoo Search on Mac.
