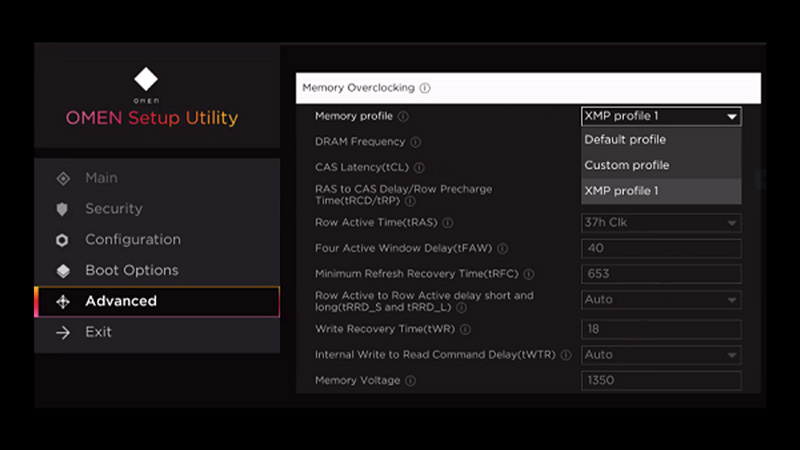
Typically, a RAM runs on the speed defined by Joint Electron Device Engineering Council (JEDEC). However, you can enhance your RAM performance and can make it run to its full potential by turning on the XMP (Extreme Memory Profile). For users who play high-end competitive games on their PC or do high-resolution image editing, having a boosted RAM is helpful. Hence, you can enable XMP from the BIOS settings on your Windows desktop with the help of this guide.
Windows: How to Enable XMP (2023)

Extreme Memory Profile or XMP boosts your RAM, but due to the standards set by JEDEC, any advertised high-speed RAM on the market will still run at the standard speed. Hence, there’s a workaround to Enable XMP on your Windows desktop, and you can do it by following these steps:
- First, boot your PC in BIOS mode by pressing the BIOS key on your keyboard, which is different for different motherboard manufacturers while restarting.
- Navigate to the Advanced or Ai Tweaker tab or any other tab with similar names, as the different motherboard manufacturers have different BIOS menus.
- Now find the ‘XMP’ settings and enable it by changing selecting the ‘On’ option or selecting XMP from the dropdown.
- If there are multiple XMP profiles, you can enable each profile manually for boosted speed.
- Press ‘F10’ to save the settings.
- Now exit the BIOS menu and restart the device.
- The XMP is enabled on your Windows desktop now.
Is Enabling XMP Safe on Windows?
Enabling XMP on Windows doesn’t harm your Windows desktop. If your RAM manufacturer added the XMP profiles, then it is tested and safe to use. However, you can enable XMP only if your Windows System as well as RAM supports this feature.
That’s everything covered on how to enable XMP on your Windows desktop. Also, check out our guides, such as How to turn off Mouse Acceleration on Windows or How to fix Microsoft Windows Search Indexer high CPU usage.
