Functioning similarly to what was known as hybrid sleep in older versions of Windows, the fast startup feature is enabled by default on a clean system install on most devices. When enabled, Windows closes open applications and disconnects logged-in users as in a normal shutdown, but at the same time creates a hibernation file to save the current state of the operating system, causing the system to start from that point on the next boot instead of starting all over again. In this article, I will explain how to turn on or turn off fast startup in Windows 11.
How to Enable or Disable Fast Startup in Windows 11

In your Windows 11 computer, you can easily enable Fast Startup if it is not already turned on. You can also disable it in case you have some issues with the same feature. Anyhow, follow the steps given below to boot your Windows 11 PC faster.
- First of all, click on the Start menu and then search for Control Panel and open it.
- Next, search for Hardware and Sound option and open it in Control Panel.
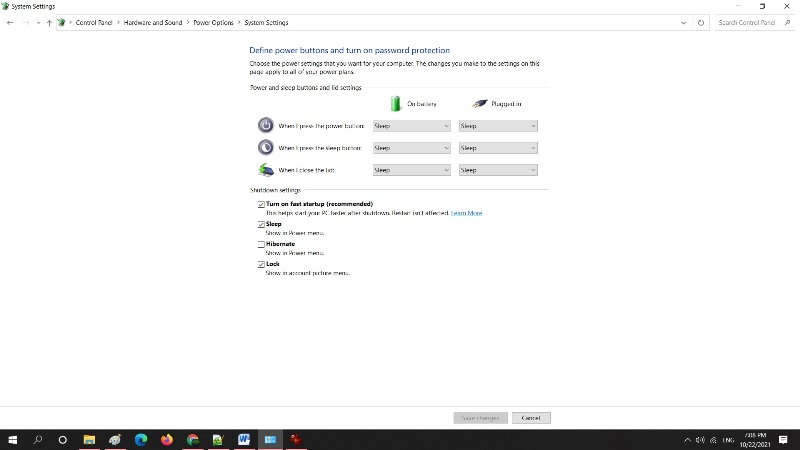
- After that, search for Power Options and under it, you need to click on the “Change what the power button do” option.
- In the next window that pops up, just click on the “Change settings that are currently unavailable” option.
- Finally, you have to check the box of “Turn on fast startup (recommended)” to enable Fast Startup in Windows 11.
- If you want to disable it in Windows 11, simply uncheck the same option.
That’s it, you have now learned how to manage your Windows 11 computer’s fast startup mode. As said, for some specific purposes, functionality can get in the way; although in most cases, it can save you a good few seconds during startup, increasing your productivity.
Also, do not forget to check how to run Android apps on Windows 11, or how to completely remove Microsoft Edge browser on Windows 11, etc.
