Have you installed Windows 10 and Windows 11 on your computer in dual boot and not seeing the same option while booting up? Well, do not worry, as we have got you covered. There are many users who have got missing dual boot option due to some problems in the boot manager. Thankfully, there are various methods to fix this issue by making some changes in the Windows settings. In this guide, I will explain how to fix the missing dual boot option on your Windows 11 and Windows 10 computers.
How to Fix Dual Boot Option Not Showing in Windows 11/10
There might be many reasons why the dual boot option is not showing in Windows 11 or Windows 10. The reasons included are: boot menu disabled, damaged system files causing the Windows Boot Manager to not function properly, or default operating system might be not properly configured in the Startup and Recovery mode. In any case, check out the different solutions to fix the missing dual boot option on your Windows 11 or Windows 10 below:
How to Restore Dual Boot Menu Via System Configuration Tool
It is very easy to configure the Windows Boot Manager using the System Configuration tool. With the help of this tool, you will be able to control and select the default OS in a dual boot option and more. Here are the steps to configure Windows Boot Manager using the System Configuration tool:
- First, in the Search bar, type MSConfig.
- From the list on the top, click on the System Configuration app to open it.
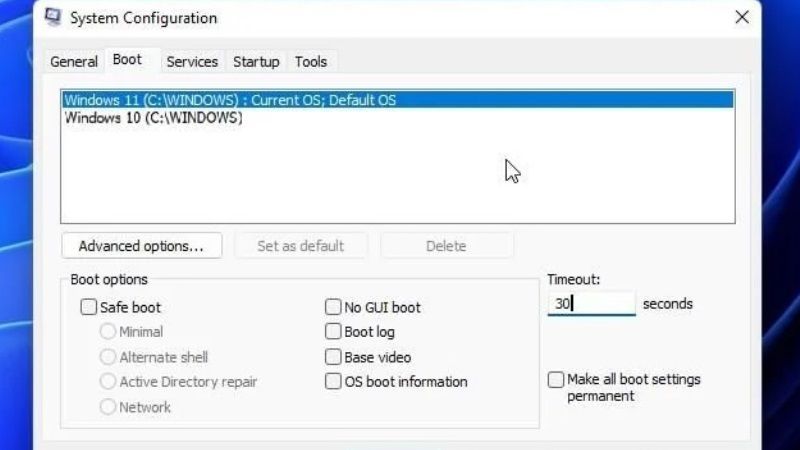
- At the top, click on the tab “Boot”.
- Under “Boot”, you will see all the operating systems installed on your computer.
- Choose one of the operating systems that you want to set as default by clicking on the Set as default button.
- On the right side in the middle, you will see the Timeout option, under that set the value like 10, 20, 30, 40, 50, or 60. These values are basically seconds, so if you have selected 10 then the boot manager will wait for 10 seconds before loading the default operating system that you have chosen.
- After that, just click on Apply and then OK to save the changes.
- Finally, your computer will restart, and then you will be able to see the dual boot options now.
How to Enable Boot Menu via Command Prompt
You can also try to enable the boot via the Command Prompt, here are the steps:
- First, click on the Search bar and type CMD.
- From the list on the top, right-click on Command Prompt and choose Run as administrator.
- A new window will CMD will open.
- Here, you just need to enter the command mentioned below and press the Enter key on your keyboard:
bcdedit /set {bootmgr} displaybootmenu yes - Finally, you will see that the command is successfully completed and now after every restart, you will see the dual boot option to select the operating system that you want to boot in.
That is all you need to know about how to fix the dual boot option not showing in Windows 11 and Windows 10. In the meantime, do not forget to check out our other guides on How to Enable Classic Boot Menu in Windows 11, and How to Enable New Boot Animation on Windows 11.