If in the days of Windows 7 when our computer is in the Boot process, there is usually an option to manually install Windows 7, plus there is also information to press F8 to enter Advanced Options. Now, in Windows 8, Windows 10, and Windows 11, this Classic Boot Menu has been abandoned, but what if you want to activate it back in the latest operating system of Microsoft. In this guide, I will tell you how to enable classic boot menu in Windows 11.
How to Enable Windows 7-like Classic Boot Menu in Windows 11

Here’s how to enable the classic Windows 7-like legacy boot menu in Windows 11. It helps avoid double restart when switching between the installed operating systems.
Users that update from Windows 7 to Windows 10 and 11 will notice that Microsoft has fully redesigned the boot menu in newer operating systems. Instead of the simple classic menu with a black background and a list of available operating systems, Windows shows a more modern interface that requires an additional restart.
If you have updated your Windows 7 to Windows 11, you will find out that the boot menu has been completely redesigned in the latest operating system. You won’t be able to see a list of available operating systems to choose from while booting your pc, instead, you will find the operating system with the latest interface.
However, if you want to enable the classic Windows 7-like boot menu in Windows 11, then check out this article on how to do that. Follow the steps given below to activate the classic boot menu in Windows 11 below:
- First of all, you need to press Windows + R keys together on the keyboard to open the Run command.
- After that type “cmd” without the quotes and then press CTRL + SHIFT + ENTER keys simultaneously to open Command Prompt in administrator mode.
- Type the following command: bcdedit /set {bootmgr} displaybootmenu yes. After that press the Enter key on your keyboard.
- After that close the Command Prompt window and restart your PC.
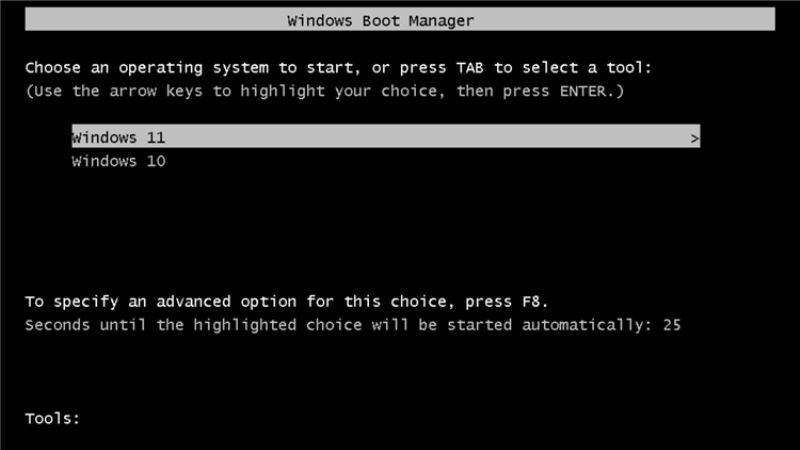
- Once the computer starts to boot, you will be able to see the classic Windows Boot Manager screen at startup, here you will also see a list of all the installed operating systems on your computer.
- As usual, to enter the Advanced Boot Menu/Advanced Options, you can press the F8 key.
- If you want to return to the Windows 11 Modern Boot Menu, you can use the following command: bcdedit /set {bootmgr} displaybootmenu no
That is everything you need to know about how to enable the classic boot menu on Windows 11. While you are here, do not forget to check out our other guides on How to Install New Media Player on Windows 11, and How to Enable or Disable Fast Startup in Windows 11.
