It is very essential to create a recovery drive in order to restore your PC if your computer stops booting or crashes constantly. It will thus allow you to restore a system image to get your PC working again. You can easily create a recovery drive containing the operating system files. However, it is always good to create a system image on a USB drive than on the recovery drive. In this guide, I will explain how you can create a USB recovery drive in Windows 11.
How to Create a USB Recovery Drive in Windows 11
As you very well know, a recovery drive is simply a bootable USB drive or DVD that contains troubleshooting tools that you can use to troubleshoot Windows 11 when it is not working properly. So, it is essential to create a recovery drive from the USB flash drive to get rid of the crashing issues of the operating system. Following are the steps to create a USB recovery drive on Win 11:
- First of all, you have to connect a blank or erasable USB drive to a free USB port on your PC.
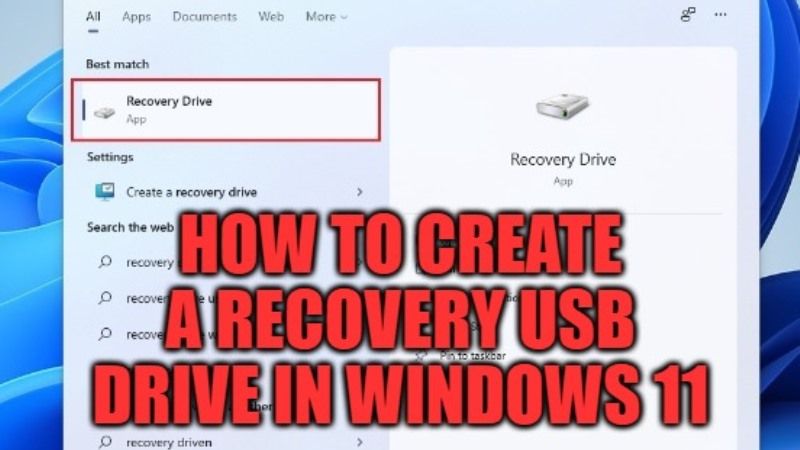
- After that open the Start menu and then search for “Recovery Drive” and open it.
- After that click on “Create a recovery drive.” You can also find the option in Control Panel. Just open Control Panel > System and Security > Security and Maintenance > Recovery > Create a recovery drive.
- In the new window of Recovery drive, you have to uncheck the “Back up system files to the recovery drive” box, and then click “Next”.
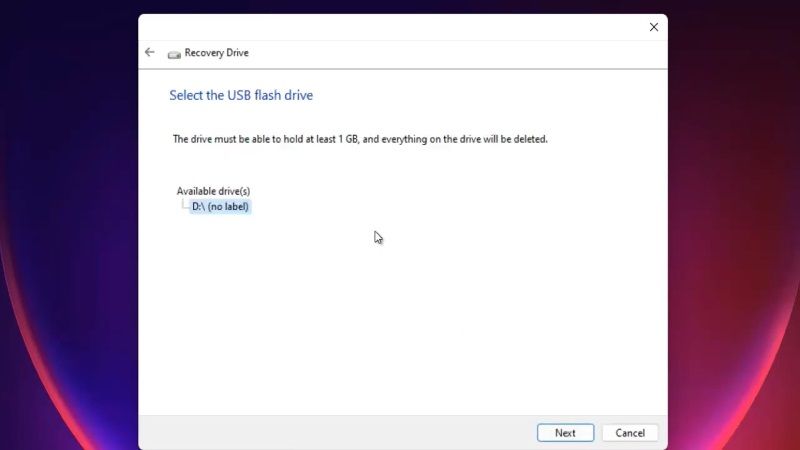
- Now you need to select your USB drive and then click “Next.”
- At this point, you will get a warning that all data stored on the USB drive will be deleted.
- Just click on the “Create” option to continue the operation.
- Wait for a couple of seconds while the troubleshooting utilities are copied to the USB drive.
- Once the recovery drive is ready, click on the Finish button.
- That’s it, now your recovery USB drive is ready and you can also restore the system image and get a working Windows 11 PC back.
And that is everything you need to know about how to create a USB recovery drive in Windows 11. While you are here, also check out our other Windows 11 Guides such as how to activate God Mode in Windows 11, or how to fix Windows 11 Black Screen of Death error.