
System image files are the backup files of your Windows 11 desktop that helps to restore the system drive files. Also, you can use this system image to move your operating system to a hard drive without any data loss. Hence, to know how to create a system image backup on your Windows 11 desktop, this guide will help you.
Windows 11: How to Create System Image Backup (2023)
You can create a system image backup by using the Control Panel and here’s the detailed workaround for the same:
- First, open the Control Panel from the Start menu Search box.
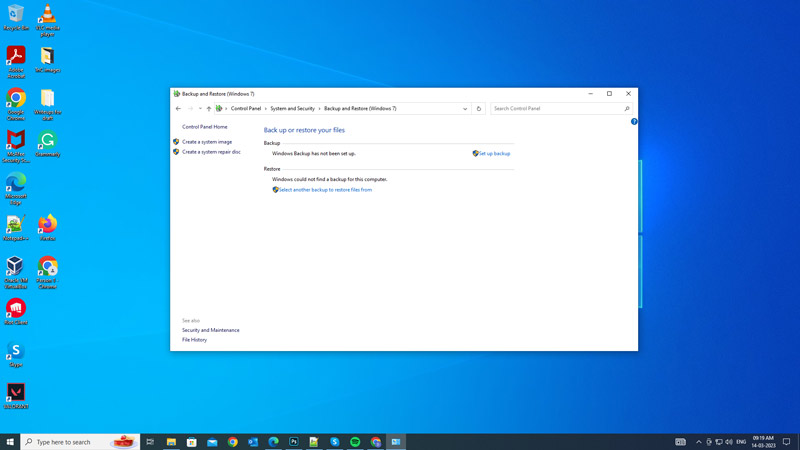
- Now, click the ‘System and Security’ tab on the Control Panel window, then click the ‘Backup and Restore (Windows 7)’ hyperlink.
- Then, click the ‘Create a system image’ option from the left pane.
- Now, select the location for your backup, such as an external drive or a network location.
- Note that you need enough storage space to store your entire Windows 11 installation. Hence, backing up on an external drive like a USB drive is recommended.
- Select the drives you want to include in the system image backup. You must include the drive where Windows 11 is installed, usually, it is the ‘C:’ drive.
- Click the ‘Next’ button to confirm your backup settings.
- Then click the ‘Start backup’ button to begin the backup process. Note that, depending on the size of the file it may take a few minutes to hours to create the backup.
- Do not force shut down to prevent errors during backing up System Image.
- Also, if prompted you might need to permit User Account Control (UAC). Especially when you’re using an external hard disk to store the backup.
How to use System Image Recovery
- Press the ‘Windows’ + ‘I’ keys on your keyboard to open the Settings window, then click the ‘System’ tab.
- Then, click the ‘Recovery’ tab from the System settings window. If you didn’t find the ‘Recovery’ option under System settings, you can find it in the ‘Update & Security’ settings window.
- Click the ‘Restart now’ button next to the ‘Advanced startup’ tab.
- Your PC will reboot in recovery mode, here select the ‘Troubleshoot’ option.
- Now select the Advanced options tab.
- Then, click the ‘System image recovery’ tab. If you didn’t see this option on the Advanced options screen, click the ‘See more recovery options’, then click the ‘System image recovery’ tab.
- Now select the system image you want to restore and click the ‘Next’ button.
- Follow the instructions in the recovery prompt, to initiate the recovery process.
- Finally, click the ‘Finish’ button to boot your Windows 11 desktop and restore files using the system image backup.
That’s everything covered on how to create Windows 11 system image backup. Also, check out our other guides, such as How to use System Restore on Windows 10 or How to enable remote desktop on Windows 10.