
System Restore is a utility available in different versions of Windows. This utility is used to fix problems that could cause slow performance or freezing issues on your computer. It does not affect documents, images, or other personal data, but recently installed programs may be uninstalled after using System Restore. It is a very useful recovery tool, however, System Restore is disabled by default in Windows operating system. So, in this guide, let us find out how to use System Restore on Windows 10 and enable it.
Steps to Use System Restore on Windows 10
The System Restore feature on Windows 10 allows you to restore the system to an earlier backup point; unlike a reset, you can keep your personal files. This utility restores Windows and applications in the event of an unstable system.
In this tutorial, I will teach you how to configure System Restore on Win 10. The only prerequisite before proceeding is that you must have created a restore point beforehand.
How to Enable System Restore on Windows 10
To activate System Restore on your Windows 10 PC, follow the steps given below:
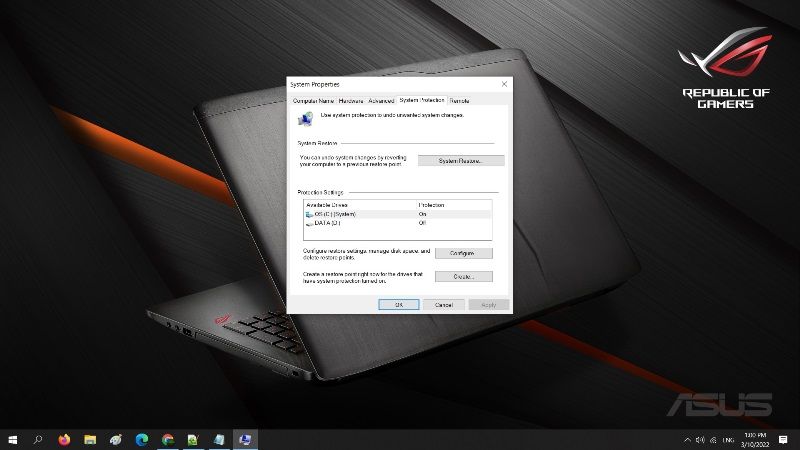
- Go to the Search box and type Create a restore point and open it (or alternatively go to Control Panel > System and security > System > on the left click Advanced system settings > go to the System Protection tab).
- After that, click the Configure button next to the heading “Configure restore settings, manage disk space and delete recovery points”.
- In the new screen, select “Turn on system protection” and set the Disk Space Usage to a value between 2% and 5%.
- Click Apply and then OK.
Creating a System Restore Point on Windows 10
To create a System Restore point in Win 10, follow the steps given below:
- First, open the Search box and then type Create a restore point and open it (or alternatively go to Control Panel > System and security > System > on the left click Advanced system settings > go to the System Protection tab).
- Click on the Create button which is located next to the wording “Create a restore point right now for the drivers that have system protection turned on”.
- Type a description to identify the restore point – for example, TechNClub Restore Point – and click Create.
- Just wait while the restore point is being created.
- If the operation is successful, the message Recovery point creation complete will appear.
- Click Close.
Using System Restore on Windows 10
Now, whenever you have a problem with your computer, you can use the System Restore tool to go back to an earlier state. To restore your PC to an earlier state using System Restore on Win 10, follow the steps given below:
- Type in the search box Create a restore point and open it (or alternatively go to Control Panel > System and security > System > on the left click Advanced system settings > go to the System Protection tab).
- Click on the System Restore button.
- In the new window click Next.
- Select a restore point and click Next.
- Click Finish.
- One last warning will be displayed before continuing. Click Yes.
- Please wait while the system restore is being prepared.
- The system will reboot to perform the recovery.
- Wait for the process to be finished.
- Upon restart, a message will notify you that the system has been restored.
That is everything you need to know about how to use System Restore in Windows 10. For more Windows 10 Tips and Tricks, check out our other guides like How to Enable Remote Desktop on Windows 10, and How to Turn Off Background Applications In Windows 10.