")
If you have a lot of TIFF files that you want to convert to RAW format, you might prefer to use Adobe DNG Converter. It’s a free tool that can convert TIFF files and other image formats to DNG (Digital Negative), a universal RAW format that can be opened by many software applications. For photographers and software developers, this file format is useful in many ways, such as simplifying workflow, preserving more image data, and ensuring future compatibility. Hence, to convert a TIFF file to a RAW file using Adobe DNG Converter, this guide will help you.
Adobe DNG Converter: How to convert TIFF file to RAW file (2023)
You can convert a TIFF file to a RAW file using the Adobe DNG Converter by following these steps:
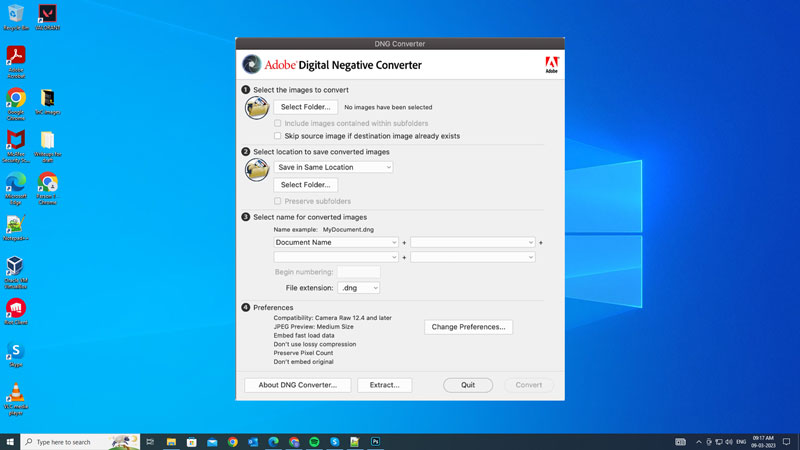
- First, open the Adobe DNG Converter app by double-clicking its icon.
- Select the folder of images you’d like to convert to DNG.
- Also, you can drag and drop individual images or a folder that you want to convert images directly onto the Adobe DNG Converter icon to directly open the images in the DNG converter dialogue box.
- Now select the location to save the converted DNG files.
- Then select a naming pattern for the new DNG files, you can choose to keep the original name with the DNG extension added or add serial numbers or letters to differentiate them.
- If necessary, change the compatibility preferences. You can choose which version of Camera Raw or Lightroom you want your DNG files to be readable by.
- Also, you can select the compression option (None or lossless) and the JPEG preview size (None, Medium size, Full size).
- Click the ‘Convert’ button to start the conversion. A dialog box showing the status of the conversion will appear on your screen.
- Wait until the conversion is complete. You can now open your DNG files with any software application or device that supports them.
Advantages of DNG Files over RAW Image Formats
DNG (Digital Negative) is a format for storing RAW files that were developed by Adobe as an open standard. Moreover, DNG files have several advantages over other RAW formats, such as:
- Compatible with many software applications and devices that support DNG or TIFF.
- Smaller and faster than other RAW formats because they use lossless compression.
- It can store additional metadata and profiles that enhance the image quality and workflow.
- Preserves the original RAW data as well as the edited version.
That’s everything covered on how to convert a TIFF file to a RAW file using Adobe DNG Converter. Also, check out our other guides, such as How to change the Default GPU for Photoshop to high performance to a high-performance GPU or How to switch an Adobe Creative Cloud plan to a student plan.