
It is always recommended to perform a clean installation of the operating system when there are slowdowns and problems on the Windows PC. By doing a clean installation, which is totally different from the factory reset, you can avoid carrying around so many junk files and several programs from the computer. In this guide, I will show you how to do a clean installation of Windows 10 on your PC.
Steps to Perform a Clean Installation of Windows 10
A clean installation of Windows 10 on your PC is the ultimate troubleshooting technique that is guaranteed to eliminate performance or compatibility issues caused by third-party applications, temporary files, viruses, and malware.
There are various ways to perform a clean installation of Windows 10 (unless you buy a new computer). Check out the steps for performing a clean install of Windows 10 on your PC.
Download Windows 10 and create a bootable USB drive or DVD
To install Windows 10 you need to download the operating system and create a bootable USB flash drive or DVD. To do this:
- Download the Media Creation Tool utility from the Microsoft official site.
- Insert a formatted USB drive (FAT32 or NTFS, it does not matter as the tool will start formatting of the same before loading the OS) in your PC, and remove any other USB devices from the computer. The USB drive must have a minimum capacity of 16GB.
- Start the utility and choose to Create installation media for another PC and select Next.
- Set English in the Language field, your Windows version in the Edition field (you can find it in the system info), and the architecture of your system (32 or 64 bit). You can choose Both if you want to use the pen drive to make installations on multiple devices. We have chosen 64-bit. Then select Next.
- In the next screen, you will have to choose the media to use: the first item will create a bootable pen drive, the second will download the ISO to be mounted later on a pen drive with utilities such as Rufus, or to be burned to DVD. Choose USB Drive, go ahead and let the program take care of the rest.
- The download of Windows 10 and the subsequent creation of the bootable USB key will take place automatically and may take a few hours, depending on the speed of the connection. In the meantime, you can still use the system.
- Click Finish, wait for the program to close, and remove the device correctly.
Install Windows 10 from a USB flash drive
- Turn off the PC.
- Insert the USB drive with Windows 10 and start the PC from the same drive.
- Once the installation has started you will find the screen with the language. Set everything in English and go ahead.
- Then choose Install.
- You will be asked for the Product Key. If you have an original copy of Windows 10, you can simply ignore this step in fact the system, once the installation is complete, will activate automatically.
- Now you will be asked what type of installation you want to continue with. Choose Custom.
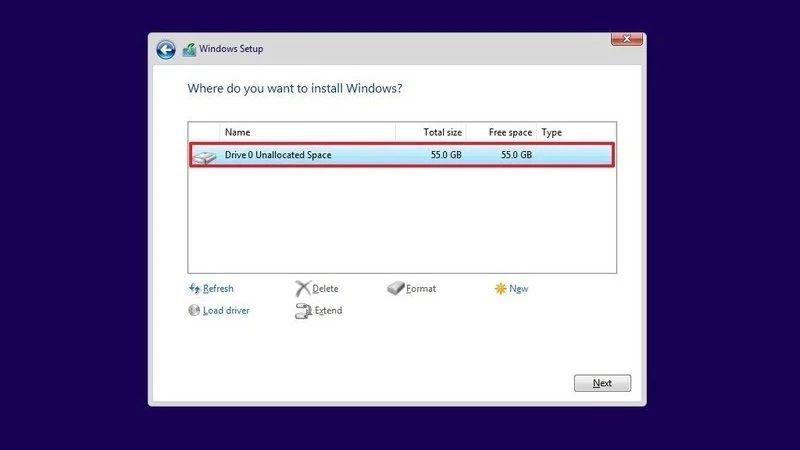
- The disk drive with all current partitions will appear. Remove them all in order to create a single unpartitioned space.
- Select the space you just created and choose New – Apply, without changing anything (if you want to partition the disk you will have to create the various partitions and set their capacity).
- Click on Next to continue.
- The actual installation will now begin.
- In the end, the system will restart automatically.
- Configure your system according to your preferences and that’s it.
- Finally, the clean installation of Windows 10 is now finished.
That is everything you need to know about how to perform a clean installation of Windows 10 on your PC. While you are here, do not forget to check out our other guides on How to Use System Restore on Windows 10, and How to Defrag Windows 10.