There are many applications or games built with .NET, so you need a specific version of the .NET framework to work properly. You also might have several versions installed on your PC. Without the correct version, the app might not run properly or not start at all. Therefore, you need to find out which version of Net Framework is installed on your computer. In this guide, we will see together how to check NET Framework versions on Windows 10 system.
Steps to Check NET Framework version on Windows 10
If you are using a Windows 10 operating system, know that it comes with .NET Framework 4.5 version pre-installed. However, there are many apps that were developed in Windows Vista and Windows 7 that require .NET Framework 3.5 version. When you try to open it in Windows 10, it will return a message inviting you to download and install the .NET Framework 3.5. Hence, here are some ways to find the .NET Framework versions you have installed on your PC.
Method 1: Checking .NET Framework version on Windows 10 using Registry
To find out the .NET Framework version through the Registry Editor, you can follow the steps given below:
- First click on the Search bar and type “Regedit” without the quotes.
- From the top result, right-click on Registry Editor and then click on Run as administrator.
- Go to the path in Registry Editor mentioned below:
HKEY_LOCAL_MACHINE\SOFTWARE\Microsoft\NET Framework Setup\NDP - Now you have to expand the key of the main version, for example – v4 or v4.0.
- Now choose the Client Key.
- On the right, check the “Version” string to determine the release of the .NET Framework.
- Finally, you can now check the “Version” string which is located on the right side to find out which version of the .NET Framework is installed on your Windows 10 computer.
Method 2: Checking .NET Framework version on Windows 10 using PowerShell
You can also check the .NET Framework version on Windows using PowerShell, here are the steps:
- First of all, click on the Search bar and then type PowerShell.
- From the top result, right-click on Windows PowerShell and then click on Run as administrator.
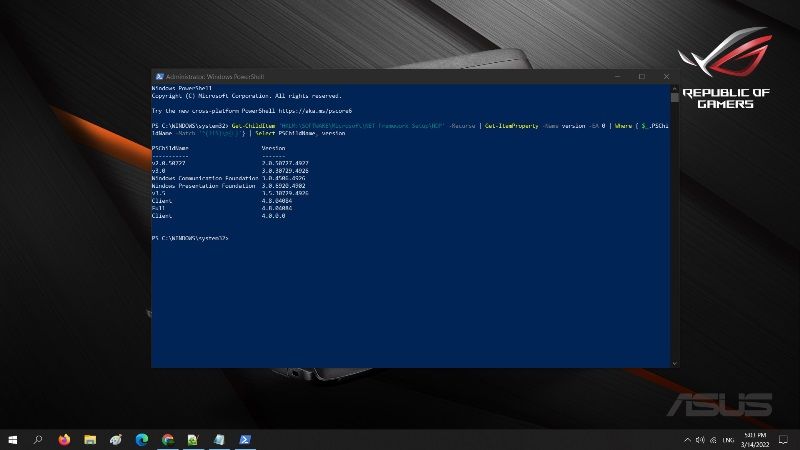
- A new window will pop up, here you have to type the command mentioned below and then press Enter key:
Get-ChildItem ‘HKLM:\SOFTWARE\Microsoft\NET Framework Setup\NDP’ -Recurse | Get-ItemProperty -Name version -EA 0 | Where { $_.PSChildName -Match ‘^(?!S)\p{L}’} | Select PSChildName, version - Finally, confirm the .NET Framework version installed on your Windows 10 system now.
And that is all you need to know about how to check .NET Framework on Windows 10. If you are interested in more Windows 10 Tips and Tricks, check out our other guides on How to Create a Windows 10 Bootable USB with Rufus, and How To Open HEIC File On Windows 10.