The hosts file is used by operating systems to address network nodes in a computer network. The file in question is a document containing lines of text, indications of which the operating system takes into account, consisting of an IP address in the first text field on the left followed (on the right) by a “host name”. In this guide, you will learn how to change hosts file on your Mac Ventura operating system in detail below.
What is Hosts File and How to Change It on Mac Ventura (2023)
In this article, I am going to explain to you what is the hosts file and how to change it on macOS Ventura. Simply put, when you type a web address into a browser, the Mac first queries the DNS server (a sort of telephone directory with the indications “common name/IP address” that transforms domain names into addresses that are easier to remember and manage for humans) to locate the TCP/IP address of the server you are trying to connect to, then create a cache file to remember these details (useful when you revisit the same site).
By modifying the hosts file it is possible to overwrite the DNS pointers of a domain on that specific computer, in other words, replace the domain to which a domain “points” and send it elsewhere. We may, for example, block a user from visiting one or more sites or change directions in the hosts file to resolve some connectivity issues.
Each field in the text of the hosts file is separated by white space. Comment lines can be included, indicated by a hash character (#) at the beginning of the lines. Completely blank lines in the file are ignored.
How to edit the hosts file on macOS Ventura
1. Open the Terminal application
2. Type: sudo nano /etc/hosts
3. Enter the administrator user password and press Enter.
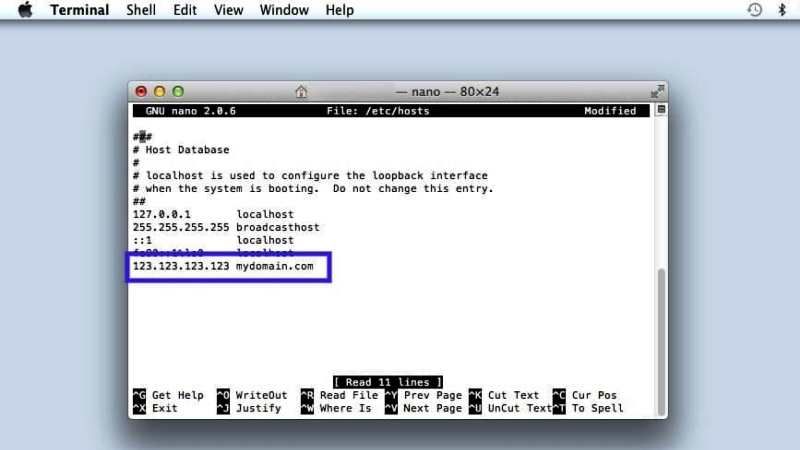
4. The Nano editor opens (the classic text editor for Unix systems). At this point you can add and remove lines by moving with the arrow keys and using the syntax seen before, indicating in each line the IP address (the destination) and on the right (by pressing TAB) the address to be “hijacked”.
5. If you want to prevent the visit to a certain site, just indicate:
127.0.0.1. sitename1
127.0.0.1. sitename2
127.0.0.1. sitename3
(127.0.01) is what in jargon is called “localhost”, therefore, in principle, your own computer (the domain indicated to the right of the IP address in the host file will not be reachable because it is as if your computer “spoke” for itself), referencing within your system.
6. Once you have finished making the desired changes, press the Control-O keys (note that it is the letter “O” and not a zero) to save the files and Control-X to exit.
The macOS DNS cache files will be purged and the operating system will take into account the hosts file.
Before doing any operation it is obviously advisable to copy somewhere the current configuration of the hosts file and obviously, if you don’t know what you are doing, don’t make any changes.
That is everything you need to know about what is hosts file and how to change it on Mac Ventura. For more macOS Ventura Tips and Tricks, check out our other guides only on our website TechNClub.com: How to use iPhone as Webcam in MacOS Ventura, and How to Turn ON / Off Firewall in macOS Ventura.