Noise cancellation is a feature that blocks out unwanted external sounds, such as crowds or background chatter, and lets you enjoy your music or podcasts without distractions. When the noise cancellation mode is turned on, the microphone which is facing outward detects external sounds and counters them with a sound wave exactly opposite to it. This is possible due to the Active noise cancellation technology used in AirPods Max. So now you might wonder how to activate AirPods Max noise cancellation mode on your iPhone, iPad, & Mac devices, and for the same, this guide will help you.
How to Activate Noise Cancellation Mode on AirPods Max?
To turn on noise cancellation on AirPods Max, You can click the noise cancellation button located on the right side of the device. But first, you will need to connect the AirPods Max to your Mac, iPhone, or iPad via Bluetooth. On iPhone or iPad to connect to AirPods Max, you will need to go to Settings > Bluetooth > AirPods Max name > Connect. While on your MacBook, go to Apple Menu > System Preferences > Bluetooth > AirPods Max > Connect. If this method doesn’t work you can turn on noise cancellation mode on your AirPods Max using your iPhone, iPad, or Mac by following these steps:
Turn on Noise Cancellation on your iPhone or iPad
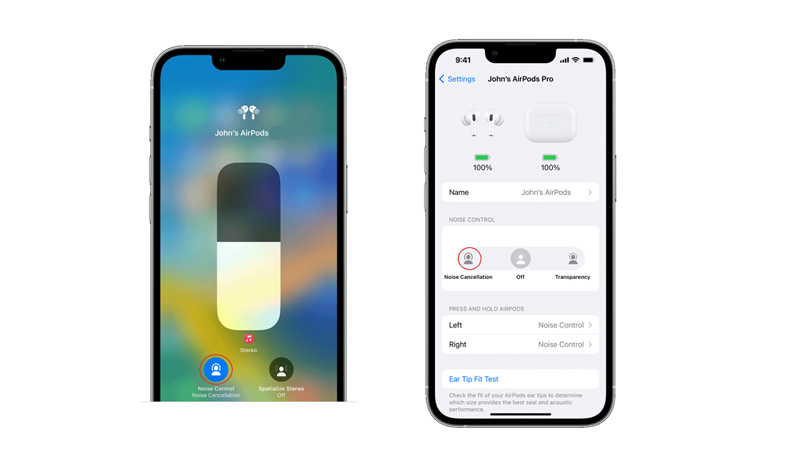
- On your iPad or iPhone without home button swipe down from the top-right corner of your screen to open the Control Center. If you have an iPhone with a Home button, swipe up from the bottom of the screen instead.
- Tap and hold on to the volume slider until you see a pop-up window with additional controls for your AirPods.
- Then tap the noise control icon in the bottom-left corner of the screen.
- Finally select, Noise Cancellation from the list of options. You should hear a chime indicating that noise cancellation is activated.
- Alternatively, you can go to Settings > AirPods Max name and select the ‘Noise Cancellation’ option from the Noise Control section.
Enable Noise Cancellation on Mac
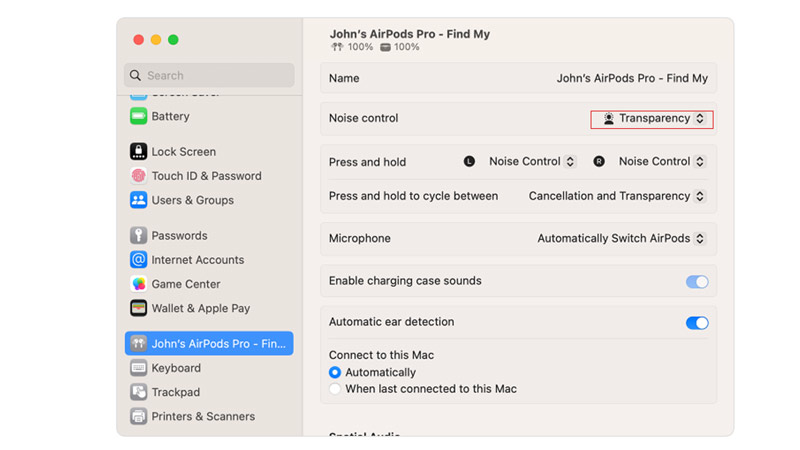
To enable noise cancellation for your AirPods Max on your Mac, you need to follow these steps:
- Click on the volume icon in the menu bar and select your AirPods Max from the drop-down menu.
- Select Noise Cancellation from the noise control list. You should hear a sound indicating that noise cancellation is active.
- Alternatively, you can go to, the Apple menu > System Settings > AirPods Max name and select Noise cancellation from the Noise control drop-down.
Noise cancellation is a great feature for anyone who wants to immerse themselves in their audio content without being disturbed by external noises. It can help you focus better, relax more, and enjoy your music or podcasts at a lower volume level, which can protect your hearing health. However, noise cancellation on AirPods Pro may not work perfectly for all scenarios. Hence, you should check out our guide on the Best noise-canceling headphones to know more.