
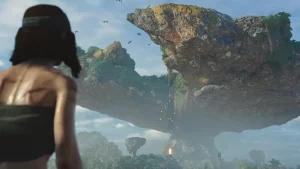
Being a pirate adventurer, you can loot the riches of hidden treasures while sailing across the oceans in Skull and Bones. For that, you need to find the treasure maps to locate these hidden riches. Once you have found the treasure maps, it will offer you two important key info. This includes a location and a clue to find the treasure easier. But as players plunder through the Red Isles, they are unable to get and find the treasure maps in Skull and Bones.
Don’t worry, here are all the locations of treasure maps and how to find them. So, here’s everything you should know about it.
How to Find and Get Treasure Maps in Skull and Bones
In total, four types of treasure maps can help us navigate the hidden loot. These include Common, Old, Legendary, and Contract types of hidden treasures. Currently, there are mainly four ways to get treasure maps in Skull and Bones. They are as follows:
- Clear out contracts that reward Treasure Maps
- Completing PvE and PvP missions
- Rewards from completing Main Missions
- Loot and Board the Enemy ships
From the above-mentioned ways, it’s clear that simply progressing the game can reward you with Treasure maps. So, all you need to do is complete contracts and missions to claim them. For looting enemy ships, you can use a spyglass to view the ships. If you board on them, there’s a chance of getting additional items that can’t be seen on the spyglass.
As soon as you find a treasure map, you can claim the hidden treasure by docking at outposts. After docking there, search for it by walking and looking for a glowing red light. Then, you simply need to dig up the treasure to complete your treasure hunt.
Skull and Bones Treasure Maps Locations
Here’s the list of all the types of Treasure maps with the clues and their locations:
Common Maps
Reef Sea
- Clue – “I have a full chest for you. My best option was to go to Reef Sea, Southwest of Sacred Tree”
- Location –
- Can be found at the Royal Burial Ground.
- As you reach there, head straight to the stairs and follow the path to the left.
- Rewards – TBD
Contract Maps
Lost Sea People Relic
- Clue – “A timeworn relic of the Sea People, lost to decades of conflict. A little battered, but surprisingly unharmed”
- Location –
- Located at Fort Louis on Tenina Coast.
- When you reach the Fort Louis on the Tenina Coast, walk a few steps and head left.
- Rewards –
- x2 Sea People Token
- Sea People Bottom Case
- Windswept
- First Aid Station
- Boneforged
Caradec’s Bounty
- Clue – “Your job is simple. Kill the bastard and his crew. Succeed, and you will be rewarded handsomely. Travel to Reef Sea, Red Isle, then head to the Royal Burial Ground outpost for your reward.”
- Location –
- Head over to the Royal Burial Ground.
- When you reach the Royal Burial Ground, check the top right of the treasure map. Search for a wooden pole with an X written on it.
- Rewards –
- x2 Brandy
- Bombard I
- Letter of Marque
- Caradec’s Bounty
- Campaign progression (Infamy)
Port l’Hermine
- Clue – “John Scurlock chose me to guard a chest, a stupid mistake. I decided for Port l’Hermine, southwest of Kokok Terapung. Good luck on your search!”
- Location –
- Can be found located at The Oubliette Outpost.
- As soon as you reach there, keep moving straight toward a torch and find a red beam of light.
- Rewards –
- 7,100 silver
- Melusine’s Pose
- x2 Lamba Cloth
- x7 Iroko Plank
Old Treasure Maps
Sultanate of Sohar
- Clue – “We were parched and starving but chanced upon an abandoned chest. Hands working for The Sultanate of Sohar helped me bury the loot on the Coast of Africa. They haven’t seized me yet. I must hold out for just a little longer”
- Location –
- Located on Elder’s Cave Outpost
- Once you reach there, head over to the middle path and turn right before taking the entrance.
- Rewards –
- 3,748 silver
- x7 Juniper
- x5 Wine
- x2 Ornate Pistols
- Melusine’s Splendor
Legendary Maps
- n/a
As the above list is incomplete, we will be adding more maps with the clues, rewards, and locations in the future. So, stay tuned.
That’s everything covered about this topic. If you have started with the game recently, check out our Skull and Bones beginner’s guide for the best tips, and explore more Skull and Bones Guides in our dedicated section right here on Technclub.