AirPods Pro are wireless earbuds that have a force sensor on the stem that lets you control various functions with a simple press. Many users might be unaware of these controls. Hence, in this guide, we will show you how to use AirPods Pro controls to get the most out of your listening experience. But before using the touch controls read how to pair them with your Apple device as mentioned below.
How to Pair AirPods Pro to Apple Devices?

To use AirPods Pro controls, you need to pair them with an Apple device, such as an iPhone, iPad, or Mac, and here’s how you can do it:
- Make sure your device has Bluetooth turned on and is updated to the latest software version.
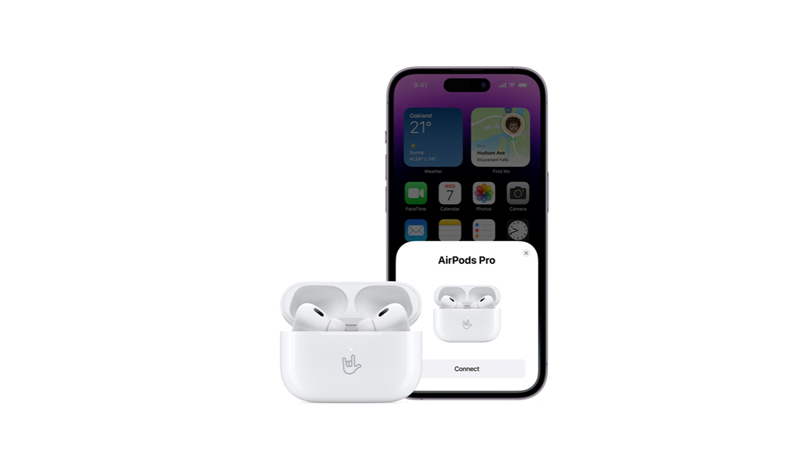
- Open the case lid and hold your AirPods Pro close to your device.
- Wait for a setup animation to appear on your device screen and tap the Connect button.
- Follow the onscreen instructions to customize your settings and preferences.
- Once you have paired your AirPods Pro with your device, you can use the force sensor on the stem to control various functions.
How to Use AirPods Pro Touch Controls?

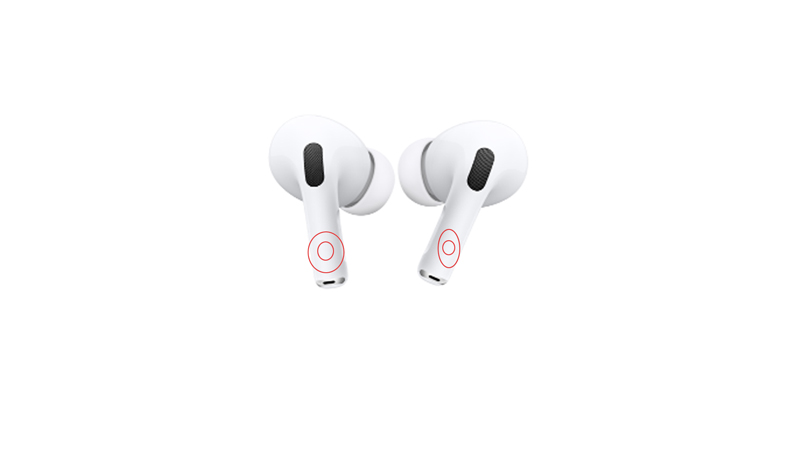
Pressing your AirPods stem in different patterns enables different functions with the help of force sensor technology. Here’s the list of controls you can use on your AirPods Pro:
- Play and pause audio – Press the stem once.
- Skip to the next track – Press the stem twice.
- Go back to the previous track – Press the stem three times.
- Answer or end a call – Press the stem once.
- Switch between noise cancellation and transparency mode – Press and hold the stem until you hear a chime.
- Activate Siri – Press and hold the stem until you hear Siri.
How to Customize Action?

You can Customize some actions like ending a call or setting a microphone location using your iPhone or Mac and here’s how you can do it:
1. On iPhone or iPad
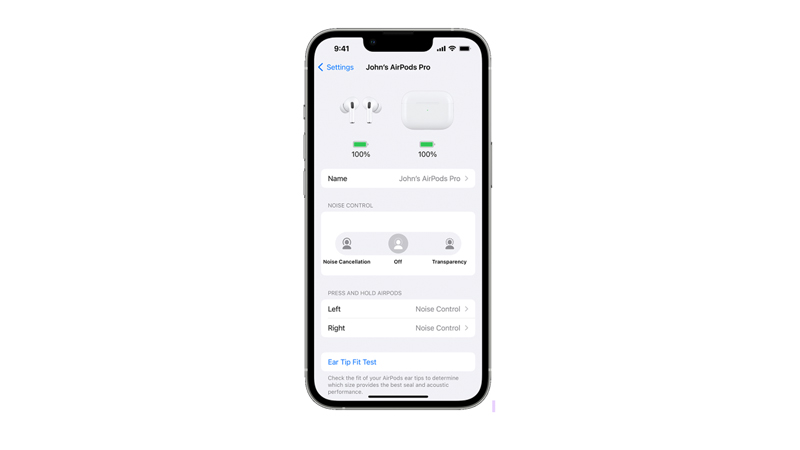
- Firstly, pair your AirPods to your iPhone and go to Settings > Bluetooth and tap on your AirPods Pro name.
- Then tap the ‘i’ button and select ‘Left’ or ‘Right’ based on your preference set as a microphone.
- To end a call using your AirPods Pro go to Settings > AirPods and tap the ‘End Call’ tab.
- Finally, select the ‘Press Once’ or ‘Press Twice’ option based on your pre.
2. On Mac
- Open the Apple menu > System Settings and tap on your AirPods Pro name.
- Then select ‘Left’ or ‘Right’ based on your preference to set it as your microphone.
- To set controls to end call click on ‘End call’ and select ‘Tap Once’ or ‘Tap Twice’ option.
That was everything you need to know about the AirPods Pro touch controls. Also, check out our other guides, such as How to fix AirPods Pro static noise in One ear or How to fix AirPods Pro not working error.
