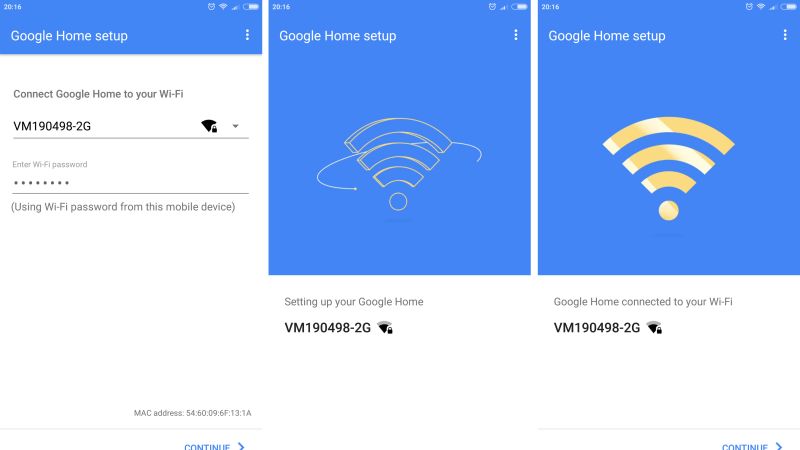
Google Home can be used as a personal assistant and it can be also very useful to connect all the smart devices in your home. After your devices are connected to Google Home, you can easily control all of them from your phone via the Google Home app or with a few simple voice commands. However, in order for Google Home to listen to these commands, you first need to connect it to a Wifi network. So, in this guide, I am going to explain all the steps on how to connect Google Home to Wifi network.
Steps to Connect Google Home to Wifi (2023)

You need to ensure that before connecting a Google Home device to your wireless network you have the wireless network name and password ready. After that make sure to download and install the Google Home app via the App Store for iPhone, iPad, or iPod touch devices and Google Play Store for Android. After that follow the steps given below for connecting your Google Home to Wifi network.
How to connect Google Home to Wi-Fi for the first time
- First, open the Google Home app if it’s not already open.
- After that select or enter the Google account, you want to associate with your Google Home device.
- Next, you might have to enable Bluetooth on your Android or iOS device if you get any prompt.
- In the next step, your Google Home device should be discovered by the app.
- Click on Next.
- Once you hear any sound from the speaker, select Yes in the app.
- Now you have to select the location of your device (example Living Room) from the list provided.
- After that, you need to enter a unique name for your smart speaker.
- You will come across a list of available Wifi networks, just select the network you want to connect Google Home to and click Next.
- Finally, you have to enter the Wifi network password and click on Connect. That’s it, you will see a connected message after a couple of seconds.
How to connect Google Home to a new Wi-Fi network
- First of all, launch the Google Home app on your Android or iOS device.
- Click on the + button in the upper-left corner and then select Set up device.
- You should now see a list of your Google Home devices. Find the device you want to connect to Wifi and tap its menu button, located in the upper right corner and represented by three horizontally-aligned dots.
- A pop-up menu will now appear, where you need to choose the Settings option.
- Go to the bottom to find the Device Settings section and then click Wifi.
- The Google Home device’s Wi-Fi settings should now be visible. If you are currently connected to a network, select Forget This Network.
- A pop-up will appear asking you to confirm this decision. Choose to Forget Wifi Network.
- After forgetting the network, go back to the main app screen. Tap the device button a second time.
- Select Add New Device.
- A series of instructions will now appear, asking you to access the Wifi settings of your Android or iOS device and connect to the custom Google Home hotspot that appears in the network list.
- This hotspot will be represented by a name followed by four digits or the custom name you previously assigned to your Google Home device during setup.
- Return to the Google Home app. The speaker should now emit a sound. If you heard this sound, select Yes in the app.
- Select the location of your device (example Living room) from the list provided.
- After that, you need to enter a unique name for your smart speaker.
- You will come across a list of available Wifi networks, just select the network you want to connect Google Home to and click Next.
- Finally, you have to enter the Wifi network password and click on Connect. That’s it, you will see a connected message after a couple of seconds.
That is everything you need to know about how to connect Google Home to Wifi network. If you are interested in getting more Tips and Tricks around Google, then check out our other guides on How to Reset Google Home Mini, and What is Google Authenticator QR Code & How to Set It Up.
