With the iOS 16 update, Apple added a rare feature in its iPhone models. In this feature, you can scan documents from your iPhone without downloading any third-party apps. It is a very useful function if you want to scan a document immediately and you don’t have a scanner near you. Now, if you are someone who wants to scan documents on an iPhone but is unaware of the steps. Then check out our guide below.
Steps to Scan Documents on iPhone
Users must note that the feature is only available on iPhone devices that have iOS 16 or later versions. Also, make sure the document is placed in a well-lit environment to get a good scan. Scanning a document using an iPhone is quite easy. Check out the steps below.
- Open the “Notes” app on your iPhone.
- Create a new Note or select an existing one.
- Tap on the “Camera icon”.
- A set of options will pop up on your screen.
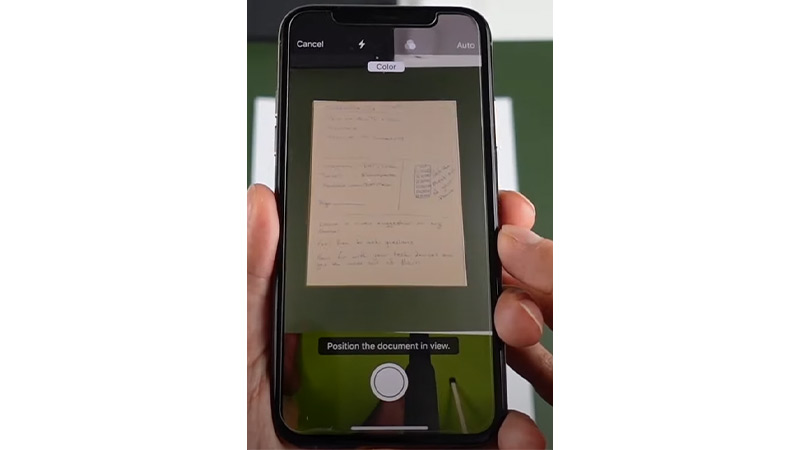
- Tap on “Scan Documents”.
- Hold the phone over the document.
- Wait till the document gets scanned.
- You can also manually scan the document by pressing the shutter button.
After scanning users can also make changes to the document. To crop the document you just have to press on the circles and adjust it accordingly. The scanning feature on the iPhone also provides filters like Color, Grayscale, Black & White, and Photo to change the document according to your preference. Save the document once you have made the desired changes. Now, you can either share your files via Messages, Email, etc., or Print the document.
That’s everything you need to know on how to scan on iPhone. If you found his guide of some help then check out our other guides like How to Sync Messages from iPhone to Mac and How to Take Photos of Stars on iPhone 14 on TechnClub.