In addition to making Windows 11 Build 22449 available for download to Windows Insider Program users, Microsoft also announced the availability of Windows 11 22000.176 for Beta and Release Preview channel users. However, there seems to be a bug causing Start Menu and Task Manager to disappear in Windows 11 after restarting the computer. Let us find out how to fix this issue in the instructions given below.
How to fix Start Menu and Taskbar disappearing issue in Windows 11 Build 22000.176 (2023)
Microsoft today released the Windows 11 22000.176, which is available for download to Beta channel users. However, a serious bug in this latest Windows 11 build is causing the Start Menu and Taskbar to disappear for many users.
This bug is happening to thousands of people and makes the user no longer able to use the Start Menu bar and also various Windows functions after reboot. In order to fix this problem, follow the below steps carefully.
- On your Keyboard, press CTRL-ALT-DEL and select to open Task Manager.
- After that select “More details” at the bottom of Task Manager to expand Task Manager.
- Next, you need to go to “File” and select “Run new task.”
- After that just type “cmd” in the “Open” field.
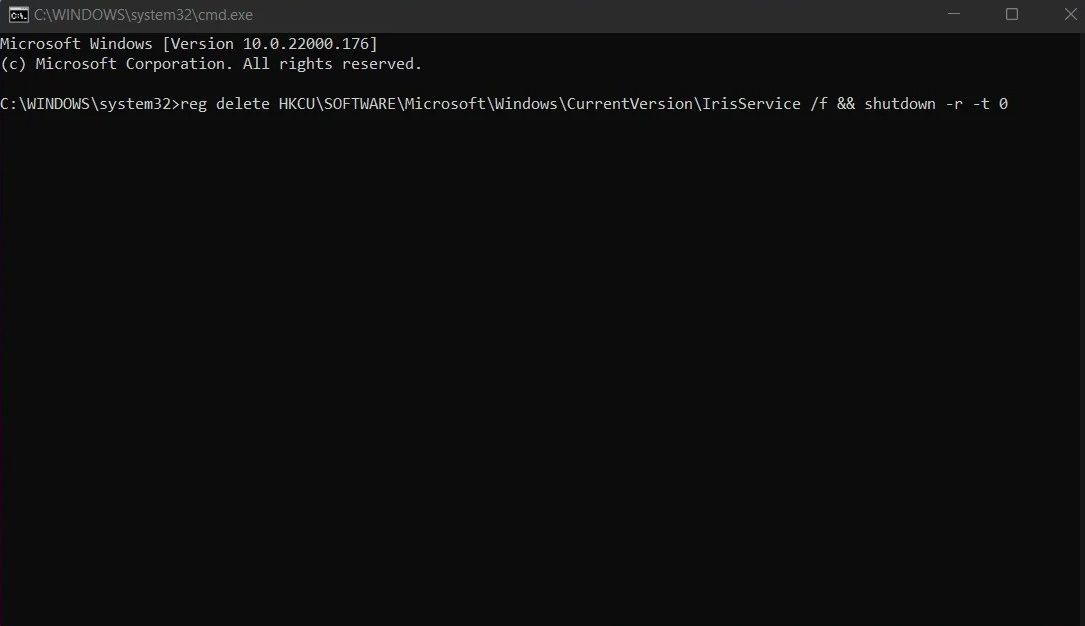
- You will then need to paste the following command:
reg delete HKCU\SOFTWARE\Microsoft\Windows\CurrentVersion\IrisService /f && shutdown -r -t 0
![Windows 11 Build 22000.176 Fix for Start Menu and TaskBar Disappearing]()
- Lastly, you need to press the “Enter” key on your keyboard, and then your PC will restart. After that, everything should be back to normal.
Another temporary solution is to not sync the Time and Date.
Here’s how to do that:
- Press Ctrl-Alt-Del key combination on your Keyboard.
- After that choose Task Manager and select More Details.
- Now you need to choose File > Run new task, here you have to type control.exe
- After that open Control Panel, and then go to Clock and Region, here you need to set the time and date.
- Now select Internet Time and then go to Change settings. Here you have to uncheck Synchronize with an Internet time server.
- After that, you go back to the Date and Time tab and choose Change date and timezone.
- You will need to set the calendar to a few days ahead of the current date and hit OK.
- Finally, reboot your PC and after that, if everything is working fine, you can set the time and date back manually, there will be no problems until another reboot.