
With the availability of iPadOS 15.4 and macOS 12.3, Apple has finally released the Universal Control function, which was revealed at WWDC 2021. Universal Control was previously delayed by Apple to this spring, but finally, it is here now. You can use the Universal Control function you move back and forth between side-by-side iPads and Macs using keyboards, mouse, etc. Let’s see together how to use Universal Control on iPad and Mac in more detail below.
Steps to use Universal Control on iPad and Mac
With Universal Control, however, you will be able to use a keyboard and trackpad or mouse connected to a Mac, with multiple iPads or Macs nearby. For example, you can move the mouse from the 24-inch iMac to the MacBook Pro or iPad.
Compatible devices
If you are looking to use the Universal Control feature, you also need to have at least two supported devices, which are as follows:
- MacBook Pro (2016 and later)
- MacBook (2016 and later)
- MacBook Air (2018 and later)
- iMac (2017 and later)
- iMac (27-inch 5K Retina, Late 2015)
- iMac Pro
- Mac mini (2018 and later)
- Mac Pro (2019)
- iPad Air (3rd generation and later)
- Any iPad Pro
- iPad (6th generation and later)
- iPad mini (5th generation and later)
How to Set Up Universal Control on iPad
- First, you need to install iPadOS 15 on your iPad to set up Universal Control on your tablet.
- After that launch the Settings app on your iPad.
- Now go to the General option which is located on the left menu.
- Next, you need to tap on the toggle button to ON for Cursor and Keyboard (Beta) option.
- Finally, you will now be able to use Universal control on your iPad.
How to Set Up Universal Control on Mac
- First, you need to install macOS Monterey 12.3 version on your Mac computer.
- After the installation of the update is complete, click on the Apple icon at the top left corner.
- Go to System Preferences.
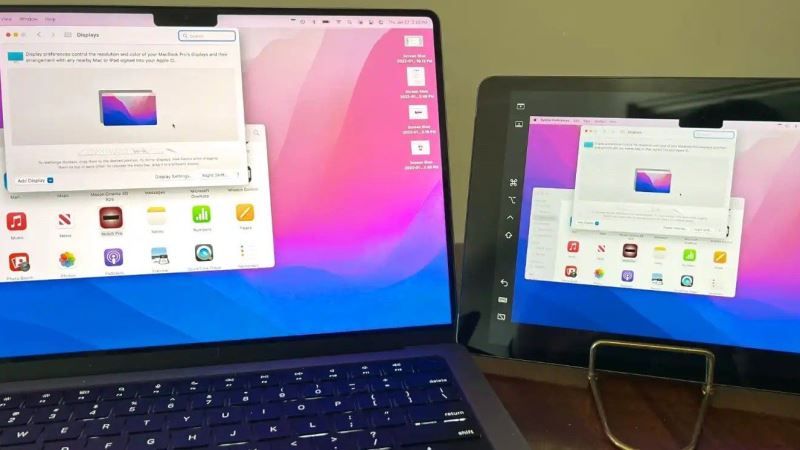
- Next, click on Displays.
- Now you need to go to the Advanced option.
- Here, you need to tick mark three boxes, namely: “Allow your cursor and keyboard to move between any nearby Mac or iPad,” “Push through the edge of a display to connect a nearby Mac or iPad,” and “Automatically reconnect to any nearby Mac or iPad.”
- Finally, choose Done, and then your Mac will be ready for Universal Control now.
Using Universal Control
- As mentioned before, you must install iPadOS 15.4 and macOS 12.3 or later on your device.
- Both devices need to be signed in with the same Apple ID with two-factor authentication enabled.
- Enable Bluetooth, Wifi, and Handoff on both devices.
- Make sure the devices must be within a maximum distance of 9 meters.
- If you wish, you can also connect the devices via USB.
- Now, simply bring the two devices together and move the mouse on the side of the screen towards your secondary device.
- You will notice a gray bar appearing on your Mac relating to the screen size of your second device, and a second bar will appear on the screen of the second device.
- After moving the cursor across that bar, the Universal Control function is enabled and the mouse will appear on the secondary display device.
That is everything you need to know about how to use Universal Control on iPad and Mac. While you are here, you might be also interested to know the differences between iPad Air 5 (2022) Vs iPad Air 4 (2020), and Best Drawing Apps for iPad.