Updating your camera’s firmware helps you enjoy the latest features and improvements. Also, it fixes any glitches that cause issues while shooting. However, updating the firmware isn’t always easy, especially if you have an Insta360 X3 camera. So, in this guide, we have explained a few easy workarounds to update the Insta360 X3 firmware.
How to Update Insta360 X3 Firmware?
You can update the Insta360 X3 Firmware either using the Insta360 app or using the Micro SD card as follows:
Using Insta360 app

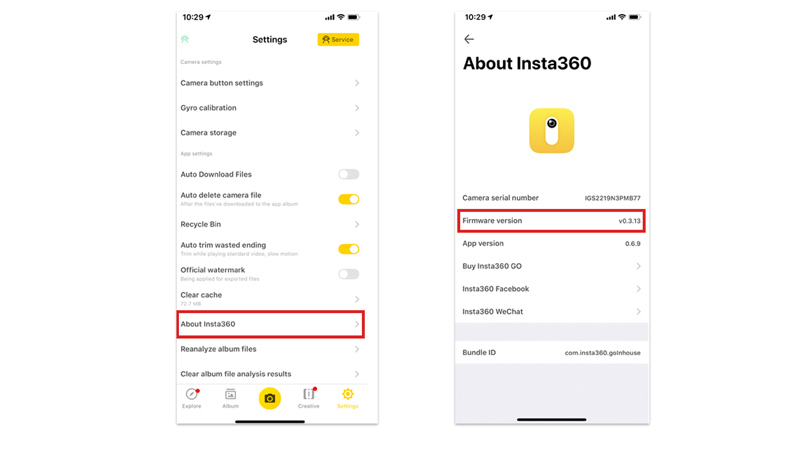
If you have installed the Insta360 app from Google Play Store or Apple App Store on your respective Android or iPhone devices, and connected your Insta360 camera with it, you can update the firmware by following these steps:
- Firstly, connect your Insta360 camera and your smartphone via Bluetooth.
- Now open the Insta360 app on your iPhone or Android smartphone.
- Then tap Settings > About Insta360 > Firmware.
- Finally, tap the ‘Update’ tab and your firmware will update.
- Please do not close the window or minimize it while updating the firmware to avoid any unnecessary errors.
Using Micro SD Card

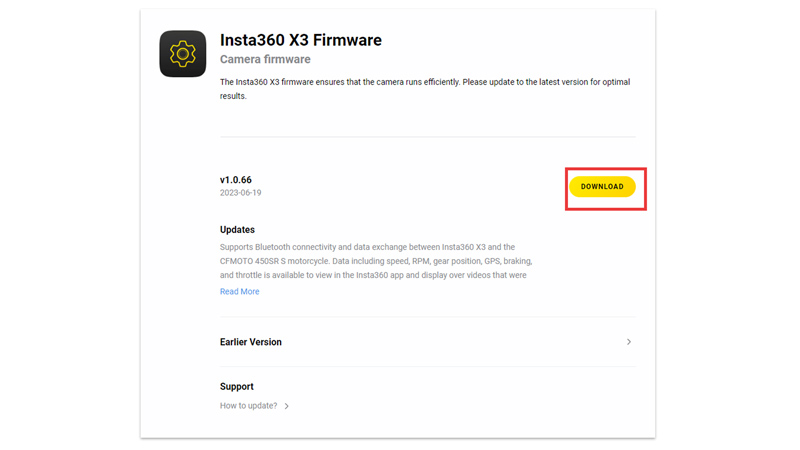
You can also, use a Micro SD Card to update your Insta360 X3 Firmware via PC, and here’s how you can do it:
- First, download your PC’s latest firmware update from this Insta360 website link.
- Now insert the Micro SD card in your Insta360 camera and connect it to your PC via a compatible USB cable.
- Then turn on your Insta360 X3 and your camera screen will show you the “U Disk Mode” message.
- Finally, directly, copy and paste the ‘InstaONEXFW.bin’ file directly to the SD card.
- Note that if you have an older firmware update installed on the SD card, you will need to uninstall it first, then paste the latest firmware update to avoid any errors.
That’s everything covered on how to update Insta360 X3 firmware. Also, check out our other guides, such as Insta360 Go 3 vs GoPro Hero 11 Black, or How long does GoPro Hero 11 battery life last?
